
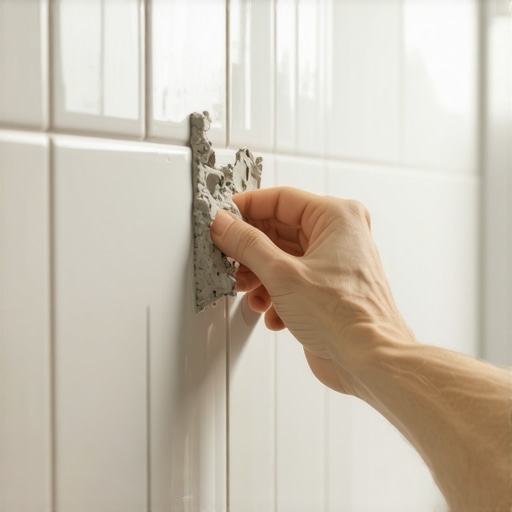
I once walked into a project where a homeowner thought they could fix a rattling bathroom tile with a bit of superglue and a prayer. It was a disaster. Most guys skip the proper prep work, thinking the underlayment or the grout will hide a poor bond. It won’t. I spent three days grinding down a substrate on a job last month just so the finish wouldn’t click like a castanet every time someone walked near it. With bathroom walls, the stakes are even higher. I have seen entire walls of porcelain peel away like wet wallpaper because the installer ignored the hydrostatic pressure building up in the wall cavity. A loose tile is never just a loose tile. It is a structural warning sign that your moisture barrier or your adhesive chemistry has reached a breaking point. When you hear that hollow thud when you tap your wall, you are listening to the sound of mechanical failure. Repairing it requires more than a quick dab of mastic. It requires an understanding of the molecular bond between the ceramic and the cementitious bed.
The myth of the five minute repair
A loose bathroom wall tile requires immediate attention to prevent water infiltration into the wall cavity. To fix it properly, you must remove the loose tile, scrape away the old thinset, clean the substrate with isopropyl alcohol, apply a polymer-modified mortar, and reset the tile with consistent pressure. The idea that you can simply squirt some caulk behind a tile and call it a day is a lie told by big-box retailers. In reality, a professional fix involves managing the moisture vapor transmission rate of the wall. If you trap moisture behind the tile with a non-breathable adhesive, you are inviting mold to eat your studs. We use thixotropic mortars for a reason. These materials stay buttery while you work them but lock into place once the tile is set. This prevents the tile from sagging while the hydration process occurs. You need to understand that Portland cement does not dry, it cures. It is a chemical reaction that creates a crystalline matrix that interlocks with the pores on the back of your tile. If that matrix is interrupted by old dust or soap scum, the bond will fail every single time.
The microscopic war behind your bathroom walls
Bathroom environments are high-stress zones where tiles face constant thermal expansion and contraction cycles. The bond between the tile and the substrate must be flexible enough to handle these shifts while remaining rigid enough to support the weight of the ceramic or stone. When we talk about a loose tile, we are talking about a failure of the mechanical key. Most modern tiles have a very low absorption rate, often less than 0.5 percent for porcelain. This means the mortar cannot just soak into the tile. It must rely on chemical additives, like liquid latex or dry polymers, to stick. If the installer used a cheap, unmodified thinset on a porcelain tile, it was doomed from the day it was set. I have seen tiles that look perfectly fine until you touch them, at which point they fall off the wall, clean as a whistle. This happens because the chemical bond never formed. The mortar just sat there like dried mud. To fix this, you have to ensure the back of the tile is cleaned of all factory release agents. Those white powders you see on the back of new tiles are the enemy of adhesion. Wipe them down. Use a stiff brush. Ensure you are bonding to the actual ceramic, not the dust left over from the kiln.
Why moisture is the silent assassin of ceramic bonds
Water vapor can penetrate grout lines and migrate behind tiles, leading to the degradation of the adhesive bond over time. This process is accelerated in showers where the vapor pressure is high and the drying time between uses is insufficient for the substrate to reach equilibrium. I have spent years studying how water moves through a wall. It is relentless. If your grout is cracked, you aren’t just looking at an aesthetic issue. You are looking at a straw that is sucking water into your wall. This water hits the thinset and begins a process of hydrolysis, slowly breaking down the polymer chains that hold the tile in place. This is why using grout restoration secrets for long-lasting results is vital for the health of your home. A solid, sealed grout joint is the first line of defense. Without it, your tiles are just floating on a bed of wet sand. When you go to fix that one loose tile, look at the grout around it. If it is soft or sandy, the rot has already started. You might find that the drywall behind it is mush. In that case, a five-minute fix becomes a five-day renovation. But if the substrate is still sound, you can proceed by cleaning the area meticulously. Any trace of old grout will prevent the new grout from bonding, creating a cold joint that will crack within weeks.
“Tile units must be fully supported by a sound, clean, and dimensionally stable substrate; any movement is a precursor to bond failure.” – Master Flooring Axiom
Identifying the specific failure points in modern showers
Failure usually occurs at the interface between the thinset and the waterproofing membrane or the thinset and the tile backer board. Common causes include inadequate mortar coverage, improper troweling techniques, or the use of premixed adhesives in wet areas where they cannot properly dry. I see it all the time with the DIY crowd. They buy a tub of premixed mastic because it is easy. Mastic is basically organic glue. It stays soft in the presence of water. In a shower, that is a death sentence. It will eventually turn back into a liquid, and your tiles will start sliding down the wall. If you are doing a repair, throw the mastic in the trash. You need a bag of high-quality, polymer-modified thinset. You also need to look at how the original mortar was applied. If you see circular swirls in the old mortar, that is why it failed. Professional installers use directional troweling. This allows the air to escape when the tile is pressed into place, ensuring 95 percent coverage. Air pockets are where water sits. Air pockets are where mold grows. Air pockets are where tiles fail. When you reset that tile, use a notched trowel and collapse the ridges. It is the only way to ensure the physics of the bond work in your favor.
The chemistry of a permanent tile repair
The hydration of Portland cement requires a specific water-to-powder ratio to achieve maximum compressive strength and bond durability. Using too much water during the mixing process leads to a weak, porous matrix that is prone to cracking and delamination under stress. If you are fixing a single tile, you might be tempted to just eyeball the mix. Don’t. Use a measuring cup. You want the consistency of peanut butter, not soup. If it is too wet, it will shrink as it cures, pulling away from the tile. If it is too dry, it will skin over before you can set the tile, resulting in zero transfer. This is why many pros prefer a rapid-setting mortar for small repairs. These products use calcium aluminate cement to speed up the cure time, allowing you to grout in hours rather than days. But you have to be fast. Once you mix it, you have about fifteen minutes before it turns into a rock in your bucket. This chemical speed is great for a bathroom that needs to be back in service quickly, but it leaves no room for error. You have to have your tile cleaned, your substrate prepped, and your spacers ready before you even open the bag. Proper planning is the difference between a repair that lasts thirty years and one that lasts thirty minutes.
[IMAGE_PLACEHOLDER_1]
Preparing the substrate for maximum mechanical keying
Substrate preparation is the most critical phase of any tile repair, involving the removal of all contaminants and the restoration of a flat, stable surface. A properly prepared substrate allows the mortar to penetrate the surface and create a mechanical interlock that resists shear forces. Use a small chisel or a multi-tool with a carbide blade to remove the old mortar. You don’t need to go all the way back to the studs, but you need a flat surface. If you leave bumps, the tile will sit proud of the rest of the wall, and your grout lines will look like a mountain range. Once the old mud is gone, vacuum the dust. Then, wipe it with a damp sponge. This is a trick many skip. A bone-dry substrate will suck the moisture out of your new thinset too fast, killing the chemical reaction. By dampening the surface, you ensure the mortar cures at the correct rate. If you are dealing with a transition area, consider how baseboards makeover ideas to elevate your space can help hide the edges of your tile work. Often, the bottom row of tiles is where the most movement occurs because of the transition from the wall to the floor. Ensuring this joint is filled with a color-matched 100 percent silicone sealant rather than grout will allow for the natural expansion of your home without popping the tiles off the wall.
Technical performance of bonding agents
| Adhesive Type | Tensile Bond Strength (PSI) | Water Resistance | Flexibility Rating |
|---|---|---|---|
| Unmodified Thinset | 150-200 | High | Low |
| Polymer-Modified Thinset | 250-450 | Excellent | Medium |
| Epoxy Mortar | >1000 | Impermeable | High |
| Type 1 Mastic | 100-150 | Low | None |
The secret to applying thinset for a lifetime of service
Directional troweling and back-buttering are the two most effective techniques for ensuring full mortar coverage and a permanent bond. These methods eliminate air voids and ensure that the adhesive is in full contact with both the substrate and the tile. When you are ready to set the tile, apply a thin layer of mortar to the wall with the flat side of the trowel. This is called “burning in.” It forces the mortar into the pores of the substrate. Then, use the notched side to create straight ridges. Now, do the same to the back of the tile. This is back-buttering. It is a non-negotiable step for me. When the ridges on the wall meet the flat coat on the tile, they collapse into a solid, void-free mass. This is how you get 100 percent coverage. If you just put a few globs on the back of the tile, a method called “spot bonding,” you are creating a failure point. Water will collect in those gaps, and eventually, the tile will crack or fall. It might take longer to do it right, but I have never had a back-bordered tile fail. Not once. It is the gold standard for showers with a style trendy ideas for small bathrooms where every square inch is exposed to high moisture levels.
“The shear strength of a polymer-modified thin-set mortar often exceeds 250 psi after a 28-day cure, provided the substrate is prepared to ANSI A108 standards.” – Master Flooring Axiom
Why grout is the structural glue of the system
Grout serves as a sacrificial joint that absorbs the stress of structural movement while providing a water-resistant barrier between tiles. Properly mixed and applied grout prevents tile edges from chipping and keeps the entire installation monolithic. Once your tile is set and the mortar has cured for 24 hours, you need to grout. Do not use old grout that has been sitting in your garage for three years. Grout has a shelf life. The polymers in it degrade over time. Fresh grout will have a smooth, creamy consistency and will hold its color. When you push the grout into the joints, use a rubber float at a 45-degree angle. This ensures the joint is filled from the bottom up. If you just smear it on the surface, it will crack and fall out. After about twenty minutes, wipe the surface with a barely damp sponge. If you use too much water, you will wash the pigment out and weaken the grout. This is why many homeowners struggle with how to refresh grout without replacing it later on. They ruined it during the installation. Take your time. Be precise. A perfect grout joint is the mark of a master.
The Checklist for a Professional Tile Repair
- Inspect the substrate for rot or structural instability before applying new adhesive.
- Remove 100 percent of the old mortar and grout residues from the repair area.
- Clean the back of the tile with a stiff brush and water to remove kiln dust.
- Select an ANSI A118.4 compliant polymer-modified thinset for the repair.
- Use directional troweling and back-butter the tile to achieve maximum coverage.
- Maintain a consistent grout joint width using plastic spacers during the cure.
- Seal the repaired grout joints after a 72-hour curing period to prevent moisture intrusion.
Final thoughts on structural integrity
A loose tile is a symptom of a larger mechanical story. Whether it is the expansion of the framing or the degradation of the adhesive, you have to treat the cause, not just the symptom. My contrarian advice is this. While most people reach for the thickest underlayment or the heaviest layer of glue, too much material actually causes more failures. Excessive mortar shrinkage can pull a tile right off a weak substrate. You want the thinnest effective bond possible. This is why we use high-performance thinsets. They allow for incredible strength with minimal thickness. By following these steps and respecting the chemistry of the materials, you can turn a five-minute fix into a permanent solution. Your bathroom is a high-performance environment. It deserves a high-performance repair. Don’t settle for anything less than a full mechanical bond. Your walls depend on it.