
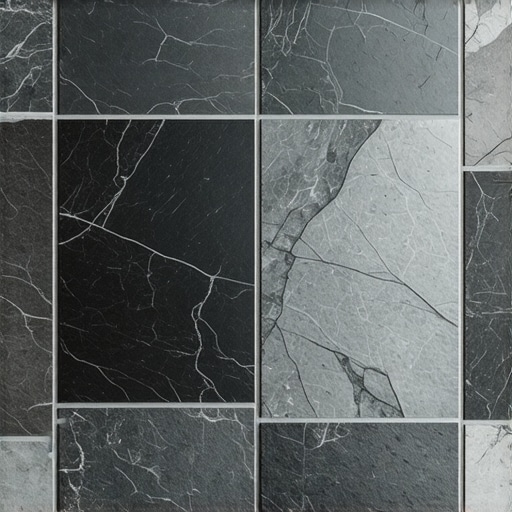
The subfloor secret that ruins slate installations
Slate flooring installations fail most often because of subfloor deflection and poor leveling compound application. I spent three days grinding concrete on a job last month just so the floor wouldn’t click like a castanet. Most guys skip the leveling compound. They think the underlayment will hide the dip. It won’t. If your subfloor is not flat within 1/8 inch over 10 feet, those dark slate tiles will eventually crack at the grout lines. I have seen it a thousand times. A client spends five figures on premium stone and then expects a bag of cheap thin-set to bridge a valley in the plywood. It does not work that way. You have to treat the substrate like the foundation of a skyscraper. Without a rigid, flat surface, the grout color you pick will not matter because the joints will crumble into dust within two years.
The shadow game of charcoal joints
Dark grout colors like charcoal or anthracite are the best choices for dark slate bathroom floors because they create a monolithic look. Using a matching dark pigment hides the natural shade variations in the stone and masks the inevitable dirt that accumulates in wet environments like showers. When you use a dark grout, you are essentially telling the eye to ignore the grid and focus on the texture of the stone. Slate is a metamorphic rock, split along its foliation planes. This creates a rugged, uneven surface. If you use a high-contrast white or light gray grout, you highlight every minor height difference between tiles, a phenomenon we call lippage. In a bathroom, you want the floor to feel like a solid slab of earth, not a checkerboard. To maintain this appearance, you should look into grout restoration secrets for long lasting results once the installation ages. Matching the grout to the darkest vein in the slate is a pro move. It makes the floor look expensive and intentional.
“A floor is only as good as the subfloor beneath it; deflection is the enemy of every joint.” – Master Flooring Axiom
Why your subfloor is lying to you
Subfloor integrity is determined by joist spacing and plywood thickness, not just how it feels when you jump on it. People think that because a floor feels solid, it is ready for slate. Slate is heavy. A 12×12 inch slate tile can be twice as thick as a standard ceramic tile. This weight adds dead load to your floor system. If you have 24 inch on-center joists, your subfloor is likely sagging between the spans. When I walk onto a job site, the first thing I do is pull up the old floor and look at the fasteners. If the nails are backing out, the subfloor is moving. You cannot put dark slate over a moving target. I always recommend adding a second layer of 3/8 inch exterior grade plywood or a dedicated cement backer board. This stiffness ensures that when you apply your grout, it stays in the channel. For those looking to upgrade their entire bathroom aesthetic, integrating showers that wow modern designs for 2025 requires this same level of structural obsession.
The physics of slate density and porosity
Slate porosity varies significantly depending on where the stone was quarried, affecting how grout pigments interact with the tile surface. Some slate is as dense as granite, while other slabs are as flaky as a croissant. Before you even think about grout, you have to seal the slate. If you don’t, the dark pigment in the grout will leach into the edges of the stone, creating a permanent smudge that looks like a grease stain. This is called grout halo. I always use a high quality penetrating sealer before grouting. This fills the microscopic voids in the stone surface. When the grout is spread, the pigment sits on top of the sealer rather than soaking into the stone. This makes the cleanup a breeze. I have seen guys ruin $20,000 worth of Vermont Black slate because they were too lazy to wipe on a coat of sealer. They ended up with a gray haze they had to acid wash, which then ate into the calcium carbonate of the stone. It was a disaster.
Grout types compared for bathroom durability
| Grout Type | Moisture Resistance | Color Consistency | Difficulty Level |
|---|---|---|---|
| Sanded Cement | Moderate | Low | Easy |
| Epoxy Grout | High | Very High | Advanced |
| High Performance Cement | High | Moderate | Medium |
| Pre-mixed Urethane | High | High | Medium |
The 1/8 inch that ruins everything
Joint width dictates the structural stability of the grout bond and the overall visual impact of the slate floor. For slate, I never go smaller than a 3/16 inch joint. The tiles are too irregular for a 1/16 inch micro-joint. If you try to go too tight, the grout won’t have enough body to hold together. It will flake out. On the other hand, if you go too wide, like a 1/2 inch, the grout becomes the star of the show, and that is not what you want. A 3/16 inch or 1/4 inch joint allows for the natural variation of the stone edges while providing enough volume for the grout to form a solid, durable plug. This is especially true near the walls where you transition to the trim. If you are planning a full room update, consider how chic baseboard designs that transform rooms in 2025 will sit against the thickness of the slate. A thicker tile needs a beefier baseboard to look proportional.
The molecular bond of modified thinset
Polymer modified thinset creates a chemical bond that is necessary for low absorption stones like certain high density slates. Traditional dry-set mortar relies on mechanical suction. It pulls the moisture out of the tile to create a grip. But many slates are so dense they don’t suck up water. You need the polymers in the thin-set to act as a glue. I always mix my thin-set to a peanut butter consistency. If it is too runny, the heavy slate will sink, creating lippage. If it is too stiff, you won’t get 95 percent coverage, which is the TCNA standard for wet areas. I back-butter every single piece of slate. This means I spread a thin layer of mortar on the back of the tile before setting it into the combed bed on the floor. It is more work. My back hurts just thinking about it. But it is the only way to ensure there are no air pockets where water can collect. If you want to keep that installation looking new, follow these tile cleaning tips for a sparkling bathroom in 2025 to avoid chemical erosion of the bond.
“Ensure 95% mortar contact in wet areas to prevent moisture pools beneath the tile surface.” – TCNA Handbook Standards
The ghost in the expansion gap
Expansion gaps around the perimeter of the bathroom are essential for thermal movement and preventing the slate from tenting. Every room expands and contracts with the seasons. If you butt the slate tight against the wall studs or the bathtub, the floor has nowhere to go when the humidity rises. It will exert thousands of pounds of pressure against the tiles until the weakest link, the grout, snaps. I leave a 1/4 inch gap around the entire perimeter. I don’t fill this with grout. I fill it with a 100 percent silicone caulk that matches the grout color. This allows the floor to breathe. Most DIYers and bad contractors fill this gap with grout and then wonder why the edges of the floor are cracking six months later. If you are worried about how this gap looks, remember that your baseboards will cover it. Using baseboards makeover ideas to elevate your space can help hide these functional gaps while adding a high end finish to the bathroom.
Essential Slate Installation Checklist
- Verify subfloor stiffness and L/720 deflection rating for natural stone.
- Acclimate slate tiles to the bathroom environment for 48 hours.
- Apply a high quality penetrating sealer to prevent grout staining.
- Use a 1/2 inch square notched trowel for proper mortar bed depth.
- Back-butter every tile to achieve 95 percent coverage.
- Mix grout with a low-RPM drill to avoid introducing air bubbles.
- Maintain a consistent 1/4 inch expansion gap at all vertical surfaces.
- Wait 72 hours before applying the final coat of stone enhancer or sealer.
The chemistry of grout pigments and water
Water ratio during the grout mixing process determines the final color consistency of dark grout on slate. This is where most people fail. They add too much water to the bucket because it makes the grout easier to spread. But extra water dilutes the pigment. As the water evaporates, it leaves behind microscopic voids that scatter light, making the grout look washed out and chalky. We call this efflorescence. To get a deep, rich black or dark gray, you must use the minimum amount of water required. It should be stiff. It should be hard to work. If you are not sweating while you are grouting, you are doing it wrong. Also, do not use a soaking wet sponge to clean the haze. A wet sponge will pull the pigment right out of the joint. Use a damp sponge, almost dry to the touch. If you have old grout that has already turned white, you might need to learn how to refresh grout without replacing it to fix the color without a full tear out.
Why slate is a structural engineering challenge
Load bearing capacity must be calculated when switching from linoleum or ceramic to heavy slate tiles. Slate is heavy. It is dense. It is unforgiving. If your floor joists are undersized, the weight of the stone will cause the floor to bow. This bow puts the grout joints in tension. Grout is great in compression but terrible in tension. It will pull apart. I have seen beautiful slate floors ruined because the installer didn’t check the basement to see the size of the lumber holding up the bathroom. If you see 2×8 joists spanning 12 feet, you are in trouble. You need to reinforce those joists before the first tile is laid. This is the difference between a floor that lasts 50 years and one that lasts 50 days. It is not just about the color. It is about the physics of the assembly. For those looking for lighter alternatives that still look modern, exploring eco-friendly tile solutions for sustainable homes in 2025 might provide some relief for older homes with structural limits.