
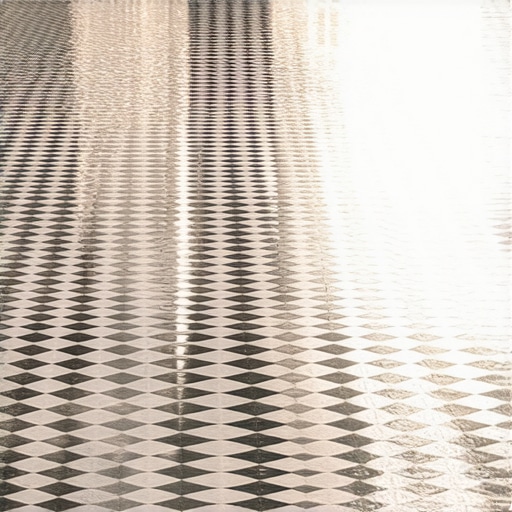
The visual trap of contrast
Choosing the best grout for black and white patterned tiles requires selecting a high performance cementitious grout or epoxy in medium gray tones to prevent staining while maintaining visual contrast. Pure white grout yellows quickly. Pure black grout is a pigment nightmare that stains the porous faces of your tile. Medium gray provides the most balance for busy patterns.
I have spent twenty five years on my knees. I have seen every mistake a weekend warrior or a lazy contractor can make. My hands are stained with thin-set and my knees have the permanent calluses of a man who respects the subfloor more than the surface. People walk into a showroom and see those beautiful encaustic patterns. They see the black and white geometry and think it is just a puzzle. It is not a puzzle. It is a hydraulic system. If you do not treat it as a structural challenge, your expensive tile will look like trash in six months. I am here to make sure that does not happen. We are going to look at the chemistry of the bond and the physics of the joint. We are going to talk about why your grout choice is the difference between a masterpiece and a demolition project.
Why your subfloor is lying to you
Most guys skip the leveling compound. They think the underlayment will hide the dip. It won’t. I spent three days grinding concrete on a job last month just so the floor wouldn’t click like a castanet. If you have a black and white patterned tile, any deviation in the subfloor plane will cause lippage. Lippage is the term for one tile edge being higher than its neighbor. On a high contrast floor, lippage creates shadows. These shadows break the geometric pattern. It looks amateur. It looks broken. You need a floor flat within 1/8 inch over ten feet. Do not trust the slab. Use a ten foot straight edge. If you see light under that bar, you have work to do. I have ground down high spots until the room was a cloud of gray dust. I have poured self leveling underlayment until the floor looked like a mirror. Only then can you think about grout. A floor is only as good as the subfloor beneath it, especially when dealing with the tight joints required for patterned tile. This is the foundation of everything. If the subfloor moves, the grout cracks. If the grout cracks, the moisture gets in. If the moisture gets in, the bond fails. It is a chain reaction of failure that starts with a lazy assessment of the concrete slab or the plywood layer.
“A floor is only as good as the subfloor beneath it; deflection is the enemy of every joint.” – Master Flooring Axiom
The chemistry of epoxy vs cementitious
Selecting the right material involves understanding that epoxy grout offers the highest level of stain resistance and color consistency for black and white tiles. Unlike standard cement grout, epoxy is non-porous. It does not require sealing. It uses a two part chemical reaction to create a plastic-like bond that is impervious to the red wine or coffee that usually ruins a white tile installation. However, you must be careful with the pigments. For black and white patterns, a medium gray epoxy is the industry standard for a reason. It bridges the gap between the two extremes without looking dirty. Standard cementitious grout is fine for low traffic areas, but it is a sponge. It absorbs everything. If you are doing showers with a style that involves high contrast, the cement grout will eventually harbor mold. The microscopic structure of cement grout is full of voids. These voids are the perfect home for bacteria. High performance grouts like those meeting ANSI A118.7 standards use polymers to fill these voids. This makes the grout denser. It makes it stronger. But it is still not as tough as epoxy. If you are a perfectionist, you go epoxy. It is harder to work with. It is sticky. It requires a specific cleaning window. But it lasts forever.
The 1/8 inch that ruins everything
The width of your grout joint determines the structural integrity and visual flow of the entire room. For patterned tiles, a 1/16 inch or 1/8 inch joint is necessary to keep the pattern aligned and minimize the visual distraction of the grout lines. If the joints are too wide, the black and white shapes will appear disconnected. If the joints are too tight, you cannot get enough grout into the gap to create a proper bond. This leads to pinholes. Pinholes are the enemy. They allow water to seep behind the tile. In a bathroom, this is a death sentence. You need to use spacers. Do not eye-ball it. Use a leveling system that clips the tiles together and pulls them to a uniform height. This prevents the lippage I mentioned earlier. When you are applying the grout, you must pack it in. Do not just smear it over the top. You need to force it down into the full depth of the tile. This is where the structural zooming matters. The grout is not just a filler. It is a lateral support. It holds the tiles in place. It absorbs the minor shifts in the building. If the joint is hollow, the tile edge is vulnerable. One heavy step and the edge chips. That chip is permanent.
| Grout Type | Stain Resistance | Installation Difficulty | Recommended Joint Width |
|---|---|---|---|
| Standard Sanded | Low | Low | 1/8″ to 1/2″ |
| High Performance Cement | Medium | Medium | 1/16″ to 3/8″ |
| Epoxy Grout | Very High | High | 1/16″ to 1/4″ |
| Pre-mixed Urethane | High | Medium | 1/16″ to 1/2″ |
Shielding your baseboards and showers
Protecting the perimeter of your installation is just as important as the center. You must leave an expansion gap at the perimeter where the tile meets the walls or baseboards to allow for structural movement. This gap is later covered by your baseboards. If you jam the tile tight against the wall, the floor has nowhere to go when the temperature changes. It will buckle. It will tent. I have seen entire kitchen floors pop up like a mountain range because the installer forgot the expansion gap. For a finished look, you should check out baseboards makeover ideas to elevate your space. When you are working in wet areas, the grout needs extra care. Use a high quality sealer if you are not using epoxy. For those dealing with older installations, you can find grout restoration secrets for long lasting results to bring back that original contrast. In a shower, the transition between the floor and the wall must be caulked, not grouted. Grout is rigid. Walls and floors move at different rates. If you grout that corner, it will crack. Use a color matched 100 percent silicone sealant. It stays flexible. It stops the water. It saves your subfloor from rot.
Mastering the cleaning cycle
Once the grout is in, the clock is ticking. You have a narrow window to clean the haze off the tile face. If you wait too long, especially with epoxy, you will be grinding it off with a diamond blade. Use a damp sponge. Not a wet one. If you use too much water on cement grout, you wash out the pigment. This leads to splotchy, uneven color. It ruins the black and white effect. Use the two bucket method. One bucket for dirty water and one for clean. Change the clean water every 50 square feet. This is the part where most people fail. They get tired. They get lazy. They leave a film. That film attracts dirt. Within a week, your white grout looks brown. If you find yourself in this situation later, refer to tile cleaning tips for a sparkling bathroom in 2025 to fix the mess. Maintenance is a discipline. It starts an hour after the last tile is set.
- Check subfloor levelness with a ten foot straight edge.
- Acclimate the tile to the room temperature for 48 hours.
- Use a moisture meter on concrete slabs to ensure less than 3 percent moisture.
- Mix grout with a low speed drill to avoid introducing air bubbles.
- Apply grout at a 45 degree angle to the joints.
- Perform the first wash with a barely damp sponge.
- Wait 24 hours before walking on the surface.
- Seal cementitious grout after it has cured for 72 hours.
The regional climate factor
If you are living in a high humidity region like Florida or the Gulf Coast, your grout will take longer to cure. The moisture in the air prevents the water in the grout from evaporating. This can lead to soft joints. You might need to run a dehumidifier. In dry climates like Arizona, the grout can dry too fast. If it dries too fast, it does not reach its full strength. It becomes brittle. You might need to mist the joints with water to slow down the process. This is the molecular reality of construction. You are managing a chemical reaction. It is not just about the color. It is about the cure. I always tell my clients that the weather outside affects the floor inside. If the HVAC is not running, do not install the floor. You need a stable environment. Professional installers know that the ambient temperature must be between 60 and 80 degrees Fahrenheit for at least 48 hours before, during, and after the installation. This is the law of the job site. Ignore it and you will be calling me to rip it all out and start over. And I am not cheap. I charge for the expertise that prevents these disasters.
“Cement based grout is a porous material; without proper sealing, it becomes a chronological record of every spill in the home.” – TCNA Technical Manual
When you look at your finished black and white floor, you should see a unified field. The grout should support the pattern, not compete with it. By choosing a medium gray, high performance grout and ensuring your subfloor is perfectly flat, you create a surface that will last for decades. It is a structural engineering feat. It is a testament to patience and precision. No one ever noticed a perfect floor, but everyone notices a bad one. Keep your lines tight. Keep your subfloor flat. Keep your grout joints packed. That is how you build a floor that earns respect. It is how you avoid the heartbreak of a failing installation. Take your time. Measure twice. Grout once.