The plastic ghost on your expensive tile
The best tool for removing hardened epoxy grout haze is a chemical softener containing benzyl alcohol paired with a white non-woven nylon abrasive pad. These professional grade materials work by penetrating the polymer chains of the cured resin, loosening the bond between the epoxy and the tile surface without damaging the finish of the ceramic or porcelain. I spent three days grinding concrete on a job last month just so the floor wouldn’t click like a castanet, and that same level of technical obsession is what you need when epoxy grout goes wrong. When you are dealing with epoxy, you are not dealing with mud or cement. You are dealing with a chemical reaction that has gone to completion on the surface of your flooring. If you wait more than twenty four hours, that haze becomes a permanent plastic coating that traditional cleaners will not touch. Most guys skip the leveling compound and they definitely skip the proper cleaning window. I have seen countless high-end showers that wow modern designs for 2025 ruined because an installer left a film of resin over the face of the tile. It creates a cloudy, greasy look that catches the light and makes the whole project look amateur. This is not a task for a standard sponge or water. You need to understand the molecular reality of what you are up against. Epoxy is a two part system consisting of a resin and a hardener. Once they are mixed, a process called cross-linking begins. This creates a dense, waterproof matrix that is resistant to acids and stains, which is why we use it, but that same resistance makes it a nightmare to remove once it hardens where it does not belong.
The chemical reality of epoxy resin bonds
Epoxy grout haze consists of residual resin and hardener that has cured into a thin, transparent film across the surface of the tile. This film is essentially a plastic sheet that has mechanically bonded to the microscopic pores of the tile glaze. To break this bond, you need a solvent that can swell the resin matrix. While most people want the thickest underlayment, too much cushion actually causes the locking mechanisms on LVP to snap under pressure, and similarly, using too much water during epoxy cleanup actually causes the resin to emulsify and spread further into the pores of the tile rather than lifting it off. You need a targeted strike. I prefer using a specialty haze remover that uses a benzyl alcohol base because it has a lower evaporation rate than acetone or lacquer thinner. This gives the chemical time to work into the resin. You have to let it sit, or dwell, for at least fifteen to thirty minutes. If you rush it, you are just moving the plastic around. During this time, the solvent is attacking the amine hardener bonds. It is a slow, microscopic war. You can see the haze start to wrinkle slightly when the chemical is winning. That is when you bring in the mechanical force. If you are working in a bathroom, you might also want to check out these tile cleaning tips for a sparkling bathroom in 2025 to keep the rest of the space looking as sharp as the floor you are about to save.
“The chemical bond of epoxy resin to a ceramic substrate is essentially permanent once full cross-linking is achieved.” – Master Flooring Axiom
Why your scrub brush is failing you
Standard nylon scrub brushes and yellow sponges are ineffective against hardened epoxy because they lack the abrasive density to shear the resin from the tile glaze. You need a white, non-woven nylon pad, often called a Doodlebug pad in the trade. These pads are designed to be abrasive enough to cut through the resin film but soft enough that they will not scratch the Mohs scale hardness of a ceramic or porcelain tile. If you use a green pad or a black pad, you run a massive risk of leaving permanent swirl marks in the glaze, especially on polished surfaces. I have seen guys try to use a wire brush. You might as well take a hammer to the tile. If you scratch that glaze, you’re done. There is no fixing a scratched porcelain surface without it looking like a hack job. The mechanics of the scrub are as important as the chemical. You should work in small, circular motions, focusing on a two foot by two foot area at a time. The friction generates a small amount of heat which helps the solvent penetrate deeper. It is back-breaking work. Your knees will hurt, and your hands will be tired, but it is the only way to ensure the tile is truly clean. If the haze is particularly thick, you may need a heavy duty floor scraper with a fresh blade, but only if you have the steady hand of a surgeon. One slip and you are replacing a tile in the middle of the floor. For more on maintaining the structural integrity of your tile work, see these grout restoration secrets for long lasting results.
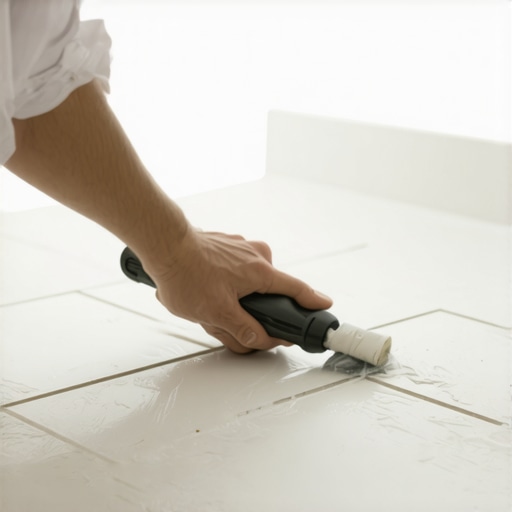
The professional choice for haze removal
The most effective tool for large scale epoxy haze removal is an orbital floor machine equipped with a specialized resin-removal pad and a high-pH surfactant solution. For a residential bathroom, you are likely doing this by hand, but the principle remains the same. You need a surfactant to lower the surface tension of the water so the dissolved resin can be suspended and wiped away. If you just scrub and then let the liquid dry, the resin will just re-settle and cure again. You need a wet vacuum to suck up the slurry immediately after scrubbing. This is the step most DIY folks miss. They scrub it loose, wipe it with a wet rag, and then wonder why the haze is still there the next morning. You are just spreading the plastic thinner. I always use a two-bucket system. One bucket for the cleaning solution and one bucket of clean water for rinsing your pads and rags. Every time a rag touches the floor, it needs to be clean. If you are using a dirty rag, you are just painting with epoxy. This process is even more difficult when you have to work around chic baseboard designs that transform rooms in 2025 because the chemicals can strip the paint or finish off the wood. Protect your perimeters with high-quality painter’s tape and plastic sheeting before you start throwing solvents around.
| Method | Effectiveness | Risk Level | Best Application |
|---|---|---|---|
| Benzyl Alcohol Solvent | High | Medium | Cured haze over 24 hours |
| White Nylon Scrub Pad | Medium | Low | General surface haze |
| Steam Cleaner | Low | High | Small localized spots |
| Mechanical Scraper | High | Extreme | Large chunks or drips |
| Acidic Cleaners | Zero | High | Never use on epoxy |
Heat as a weapon against cured polymers
Heat can be used to soften epoxy resin because it is a thermoset plastic, meaning it becomes more pliable as the temperature rises toward its glass transition point. A commercial grade steam cleaner can sometimes be used to hit the haze with concentrated heat. This is a delicate operation. If you get the grout too hot, you can actually damage the bond in the joints. You want to soften the haze on the face of the tile, not the grout between them. I have used a heat gun on low settings for stubborn drips, but you have to be careful not to thermal shock the tile, which can cause it to crack. Once the resin is softened by the heat, you hit it immediately with the white pad and the solvent. It is a one-two punch that usually knocks the haze out. You also need to consider the climate of your job site. In the swampy humidity of Houston, epoxy stays tacky longer, making the initial cleanup a nightmare of smeared resin. In the dry heat of Phoenix, it flashes and cures almost before you can get your sponge wet. You have to adapt your speed to the environment. If the room is hot, the epoxy is going to cure faster. I always tell my guys to turn the AC down to 65 degrees before we even open the epoxy buckets. It gives us an extra ten minutes of working time, and in this business, ten minutes is the difference between a perfect floor and a three day cleanup.
“A floor is only as good as the subfloor beneath it; deflection is the enemy of every joint.” – Master Flooring Axiom
Preventing the epoxy disaster in future showers
The best way to manage epoxy haze is to prevent it during the installation phase by using a sacrificial wax or a grout release agent on the tile surface. If you are working with a porous natural stone or a highly textured porcelain, a grout release is non-negotiable. It fills the microscopic pores of the tile so the epoxy cannot get a foothold. After the grout is cured, the release agent washes off with water, taking any stray resin with it. I also recommend using the three-bucket wash system during the initial install. Most installers use one bucket until it looks like milk. That is a recipe for disaster. You need a fresh bucket for every thirty square feet. It sounds like overkill, but it saves you the agony of the haze later. If you are designing showers with a style trendy ideas for small bathrooms, you are likely using intricate mosaic patterns. These have thousands of linear feet of grout joints. The surface area for potential haze is massive. You have to be meticulous. I have seen beautiful marble mosaics turned into a gray, foggy mess because the installer was too lazy to change his wash water. It is a tragedy of the trade. If you take the time to do it right, epoxy is the best grout on the market. It is waterproof, stain-proof, and will outlast the house. But if you do it wrong, you will be calling me to spend three days on my knees with a bottle of solvent.
- Always wear chemical-resistant gloves when handling epoxy haze removers.
- Test the solvent on a spare tile or a hidden corner to ensure it does not discolor the glaze.
- Use a wet vacuum to remove the slurry, never let it air dry.
- Work in small sections to prevent the solvent from evaporating.
- Rinse the area with a neutralizing agent or clean water after the haze is removed.