
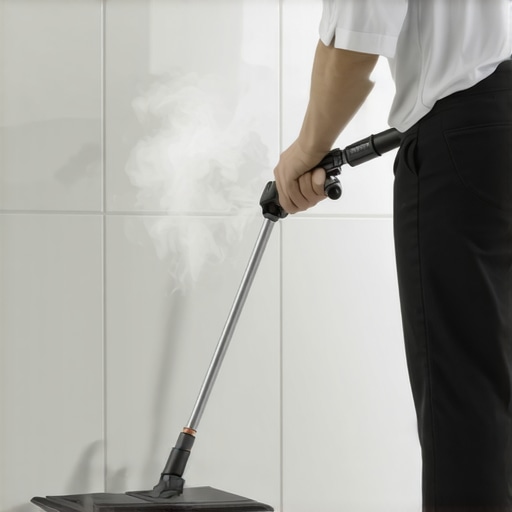
I have spent twenty five years watching people ruin perfectly good tile installations because they treat grout like an afterthought. Most guys skip the leveling compound during the initial build. They think the underlayment will hide the dip. It won’t. I spent three days grinding concrete on a job last month just so the floor wouldn’t click like a castanet. When you ignore the structural reality of your floor, you end up with grout that cracks, pits, and traps every ounce of grime from your shoes. My shop is full of samples from people who bought big box store specials and wonder why their floors look gray after six months. The reality is that cementitious grout is a porous, thirsty network of capillaries. If you are not using a professional steam mop, you are simply moving liquid dirt from one hole to another. This technical breakdown explains how to use high pressure vapor to maintain the molecular integrity of your floor joints without compromising the bond to the thin set below.
The microscopic betrayal of cementitious grout
Grout cleaning with a professional steam mop requires an understanding of porous cement surfaces, capillary action, and thermal disinfection. Professional steam units generate dry vapor at temperatures exceeding 212 degrees Fahrenheit to expand the pores of the grout, allowing pressurized water molecules to lift embedded contaminants without the need for acidic chemicals. Traditional mopping is a failure of physics. When you drag a damp string mop across a tile floor, the surface tension of the water carries suspended solids directly into the lowest point of the floor. That lowest point is your grout line. Over time, these solids settle and harden, creating a dark patina of bacteria and household grease. Steam changes the state of the dirt. By introducing heat, we lower the viscosity of oils and fats trapped in the grout. The steam mop does not just wash the surface. It penetrates.
“A floor is only as good as the subfloor beneath it; deflection is the enemy of every joint.” – Master Flooring Axiom
This axiom applies to cleaning as well. If your subfloor is flexing, your grout is cracking. If your grout is cracking, steam will find those fissures and potentially reach the subfloor. You must ensure your installation is stable before applying high pressure vapor.
Why your mop bucket is a lie
Surface tension and dirty water recycling are the primary reasons why traditional mopping fails to clean tile grout lines effectively. When you use a bucket, you are essentially cleaning with a dilute solution of the very dirt you just removed from the previous room. Steam mops solve this by using only fresh, distilled water converted into a gaseous state. This gas has a much smaller molecular size than liquid water. It can enter the microscopic pits in the cement and lime mixture that constitutes your grout. If you want a truly clean floor, you have to stop thinking about scrubbing and start thinking about extraction. For more insights on maintaining your surfaces, you should check out these tile cleaning tips for a sparkling bathroom in 2025 which highlight the shift toward chemical free maintenance. We are seeing a massive move away from harsh bleaches which actually degrade the grout structure over time. Bleach eats the lime. Steam preserves it. It is that simple.
The thermal physics of steam disinfection
Professional steam mops must maintain a constant internal boiler temperature of at least 250 degrees Fahrenheit to produce low moisture vapor. This dry steam is the only way to effectively clean without soaking the subfloor assembly or causing moisture to pool behind your baseboards. The physics are clear. Heat is a catalyst. When the steam hits the cold tile, it undergoes a phase change back to liquid, releasing latent heat. This sudden thermal energy break the chemical bonds of the dirt. If you use a cheap, consumer grade steamer, you are mostly just spitting hot water on the floor. That is a recipe for disaster. Excess water can seep into the expansion gaps at the perimeter. If that water reaches a plywood subfloor, you are looking at rot. If it hits a concrete slab with high moisture vapor emission rates, you are looking at mold. Always work in sections. Blast the grout, then immediately wipe away the liquefied filth with a microfiber cloth. Do not let it settle back into the pores.
| Feature | Consumer Steam Mop | Professional Vapor System | Chemical Scrubbing |
|---|---|---|---|
| Internal Temperature | 210F | 250F – 320F | Ambient |
| Pressure (PSI) | 15 – 20 PSI | 60 – 90 PSI | Manual Pressure |
| Moisture Content | 15% – 20% | 5% – 6% (Dry Vapor) | 100% Liquid |
| Grout Penetration | Surface Only | Deep Capillary | Chemical Only |
| Drying Time | 10 – 15 Minutes | Under 2 Minutes | 20 – 30 Minutes |
A checklist for the steam professional
Preparation for steam cleaning involves a mechanical removal of debris and an inspection of grout integrity to prevent moisture intrusion into the subfloor. You cannot just plug in the machine and go. You need a protocol. Follow these steps to ensure you do not destroy your investment.
- Vacuum the entire surface with a HEPA filter vacuum to remove abrasive sand that can scratch the tile glaze.
- Inspect for missing grout chunks or cracked tiles where steam could penetrate to the thin set.
- Ensure your chic baseboard designs that transform rooms in 2025 are protected with a barrier if they are made of MDF or non waterproof materials.
- Use distilled water to prevent calcium buildup in the steam mop boiler.
- Test a small, inconspicuous area to check for color fastness of the grout pigment.
- Work from the furthest corner toward the exit to avoid walking on damp, opened pores.
The ghost in the expansion gap
Perimeter expansion joints are the most overlooked part of flooring maintenance and require careful steam management to avoid damaging wall bases and subfloors. Every floor needs to breathe. We leave a gap at the edge of the room. This gap is usually covered by baseboards. If you are reckless with your steam mop, you will shoot high pressure vapor directly into this gap. In my years as an installer, I have seen dozens of baseboards warped because a homeowner got too aggressive with a steamer. You should look at baseboards makeover ideas to elevate your space but remember that no matter how good they look, they are not structural dams. They will fail if they are constantly hit with 250 degree steam. Keep the mop head at least an inch away from the wall. Use a hand tool with a microfiber wrap for the edges. Control the moisture. If you don’t, the subfloor will swell. The floor will heave. Then you’ll be calling me to rip it all out and start over.
“Grout is the fuse of the flooring system; it is designed to show stress before the tile fails.” – TCNA Handbook Standards
This means if your grout is constantly dirty or cracking, your floor is telling you something about the structural movement of your house.
The grout restoration reality check
Grout restoration is a process of deep cleaning followed by penetrating sealer application to close the capillary network of the cement. Steam cleaning is the first step. It opens the pores. But if you stop there, you have left the door wide open for the next round of dirt. You must seal the grout once it is dry. For those dealing with severely stained joints, knowing grout restoration secrets for long lasting results is vital. Sometimes steam isn’t enough. Sometimes the pigment is gone. In those cases, you need to look at how to refresh grout without replacing it using epoxy colorants. An epoxy sealer is the only thing that actually makes grout waterproof. Standard silane or siloxane sealers are water resistant, not waterproof. They still allow vapor transmission. In a high moisture environment like a shower, this matters. If you’re building a new space, consider showers with a style trendy ideas for small bathrooms that utilize larger format tiles to minimize the amount of grout you have to maintain in the first place.
The physics of water quality and boiler life
Hard water minerals like calcium and magnesium will cause calcification of the heating element in any professional steam mop. I see people use tap water all the time. It is a mistake. The minerals in your water don’t evaporate. They turn into a hard crust inside the boiler. Eventually, this crust breaks off and clogs the steam ports. Even worse, it can be spat out onto your floor, leaving white streaks on your dark grout. Use distilled water. It costs a dollar a gallon. It will save you from buying a new three hundred dollar machine every year. If you are working in a region with high mineral content in the city water, this is not a suggestion. It is a requirement for the longevity of your equipment. A professional treats his tools with respect. If you don’t care for the machine, the machine won’t care for your floors. The heat transfer efficiency drops as the scale builds up. You might think you’re cleaning at 250 degrees, but the scale is insulating the water, and you’re barely hitting 190. At that temperature, you’re not disinfecting. You’re just making the floor wet. Use the right water. Get the right results. Your showers that wow modern designs for 2025 deserve a level of maintenance that matches their aesthetic value. Don’t let a clogged steamer ruin the look of your porcelain marble. Keep it clean. Keep it dry. Keep it professional.
The 1/8 inch that ruins everything
Grout joint width determines the structural stability of the tile installation and dictates the steam cleaning pressure required. A narrow 1/16 inch joint is much harder to clean than a 1/4 inch joint. The steam has less room to expand. This increases the back pressure on the mop head. If you have narrow joints, you need to move slower. You need to let the heat soak. If you have wide, sanded grout joints, you need to be careful not to erode the sand. High pressure can literally sandblast the grout out of the joint if it is poorly mixed or old. This is why I prefer eco-friendly tile solutions for sustainable homes in 2025 which often utilize high density, low porosity materials that require less aggressive cleaning. The goal is always to maintain the bond. The moment you start seeing sand on the bottom of your microfiber pad, you are using too much pressure. Back off. The floor isn’t a sidewalk. It’s an engineered surface. Treat it with the technical respect it requires and it will last a lifetime. Ignore the physics, and you’ll be seeing me for a replacement estimate sooner than you think.