
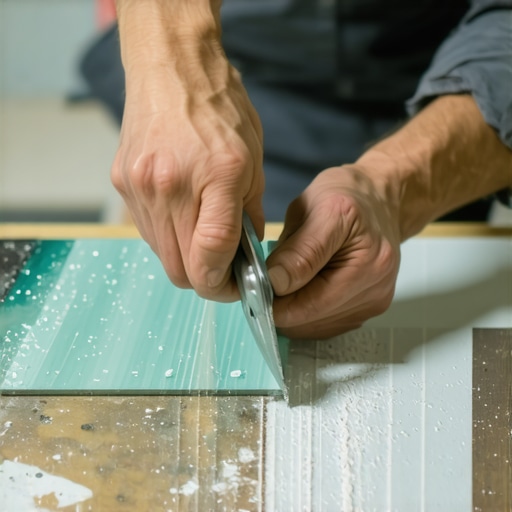
Glass tile installation is not a hobby for the faint of heart. It is a structural engineering exercise that demands respect for material science. Most installers approach glass the same way they approach ceramic or porcelain, and that is exactly why they fail. Glass is an amorphous solid with a unique molecular structure that lacks a crystalline lattice. When you apply stress to this material via a cutting blade, you are not just removing material, you are managing a series of microscopic shockwaves. If those waves are not dampened correctly, the edges will chip, the backing will delaminate, and your expensive backsplash will look like it was installed by a blind amateur. The secret is not just the blade. It is the physics of the saw, the chemistry of the water, and the patience of the operator. I spent three days grinding concrete on a job last month just so the floor would not click like a castanet, and that same level of obsessive prep applies to your tile saw. If your saw tray has even a 1/32 inch wobble, you have already lost the battle. Glass has no forgiveness. You have to be perfect from the first score to the final polish.
The physics of the diamond blade interface
Diamond blades for glass tile must feature a continuous rim and a high grit count, typically between 800 and 1000, to minimize mechanical vibration and edge chipping during the cut. Unlike segmented blades used for stone, a glass blade needs a soft bond. The diamond particles must break away at a specific rate to reveal fresh, sharp edges. If the bond is too hard, the diamonds get dull, and the blade starts to bounce. That bounce is what creates those tiny, annoying chips along the top edge of the glass. You are looking for a blade that feels almost smooth to the touch. This is the only way to ensure the cut is a grind rather than a hack. When the blade enters the glass, it creates a kerf. If that kerf is not perfectly straight, the lateral pressure against the side of the tile will cause the glass to shatter. This is why saw alignment is more important than the brand of the saw itself.
| Blade Type | Grit Rating | Application | Chip Risk |
|---|---|---|---|
| Segmented | 200-400 | Concrete and Brick | Extreme |
| Turbo | 400-600 | Hard Porcelain | High |
| Continuous Rim | 800-1000 | Glass and Mosaic | Very Low |
Managing thermal stress and water temperature
Wet saws for glass tile require a constant stream of cold water to act as both a coolant and a lubricant, preventing thermal expansion that leads to cracking. When the diamond blade hits the glass, the friction generates localized heat that can reach hundreds of degrees in a fraction of a second. Because glass is a poor conductor of heat, that energy stays right at the cut line. This creates a temperature gradient between the cut edge and the rest of the tile. If that gradient becomes too steep, the glass will crack from internal stress. This is known as thermal shock. You need to ensure your water pump is not just trickling, but actually bathing the blade. The water also serves to carry away the glass slurry. If that slurry stays in the cut, it acts as a secondary abrasive that ruins the polish of the edge. Fresh water is always better than recycled slurry water for this reason. I have seen guys use a bucket of dirty water for three days. That is how you get scratched surfaces and dull cuts.
“A floor is only as good as the subfloor beneath it; deflection is the enemy of every joint.” – Master Flooring Axiom
The masking tape strategy for edge protection
Masking tape applications on the face of glass tile provide a sacrificial layer that stabilizes the surface tension and reduces vibration-induced splintering. While some pros think this is an unnecessary step, the physics suggest otherwise. The tape holds the surface together at the exit point of the blade. When the diamond edge finishes its rotation, it tends to pull upward on the material. With glass, this upward force often lifts small flakes of the surface. A high-quality blue painter tape creates enough resistance to keep those flakes in place until the cut is complete. You should apply the tape tightly, ensuring there are no air bubbles where water can seep in and lift the adhesive. Mark your lines on the tape with a fine-point permanent marker. This also helps with visibility, as the white or silver backing of many glass tiles can make it difficult to see a pencil line through the water spray. It is a simple step, but it is often the difference between a waste pile and a finished wall.
The zero-chip pre-cut checklist
- Check the saw tray for lateral movement and adjust the rollers.
- Verify that the diamond blade is specifically rated for glass.
- Clean the water reservoir and ensure the pump flow is unobstructed.
- Apply masking tape to the cut line to dampen surface vibrations.
- Dress the blade with a dressing stone to expose fresh diamonds.
- Ensure the tile is fully supported by the tray to prevent snapping.
The mechanical snap versus the motorized cut
Manual tile cutters use a carbide scoring wheel to create a controlled fracture line, allowing the glass to snap along the score with minimal edge deformation. This method is often superior for straight cuts because it involves no heat. You are essentially using the glass’s own internal tension against it. The key is a single, firm pass. If you score the glass twice, you create two competing fracture lines, and the snap will be jagged. Once scored, the pressure from the breaking bar must be even. If you apply pressure too quickly, the crack can wander. For intricate shapes or L-cuts, the wet saw is mandatory, but for straight runs, the snap is cleaner. When you are working on showers that wow, the precision of these cuts becomes the focal point. A snapped edge often requires less polishing than a sawed edge because the fracture follows the molecular bonds of the glass rather than grinding through them. However, if the glass is tempered, you cannot cut it at all. It will explode into a thousand tiny pieces the moment the surface tension is broken.
Smoothing the jagged edge with diamond pads
Diamond sanding pads or rubbing stones are vital for honing the cut edge of glass tile, removing micro-fissures and creating a factory-finish bevel. Even the best cut will have some sharpness. You cannot leave that edge raw, especially near chic baseboard designs or at eye level in a shower. I use a progression of pads, starting at 120 grit and moving up to 400. You want to hold the pad at a 45-degree angle to the edge and work in one direction. Do not scrub back and forth. You are looking to create a slight micro-bevel. This not only looks better, but it also makes the tile safer to handle. If you are doing a lot of glass work, invest in a set of wet-polishing pads that attach to a variable-speed grinder. It will save your hands and produce a finish that is indistinguishable from the factory edge. This attention to detail is what separates a professional from someone who just bought a saw at a big-box store. If you ignore the edges, the grout will not sit correctly, and you will see every imperfection once the lights hit the wall.
“Glass tile requires a 95 percent mortar contact coverage to prevent visible air pockets and structural failure.” – Master Flooring Axiom
Environmental factors and adhesive chemistry
Glass tile adhesives must be high-polymer modified thin-sets specifically formulated for non-porous surfaces to ensure a permanent chemical bond and prevent delamination. Because glass does not absorb water, standard mortars cannot form a mechanical bond. They simply sit on the surface. You need the polymers in the thin-set to create a chemical bridge between the glass and the substrate. Furthermore, the color of your thin-set matters. Most glass tile is translucent. If you use a grey mortar, your beautiful blue tile will look like mud. Always use a bright white, glass-grade thin-set. You also have to be careful with the notched trowel. You must knock down the ridges of the mortar with the flat side of the trowel before setting the tile. If you leave the ridges, they will show through the glass as long, ugly shadows. For those committed to eco-friendly tile solutions, glass is a great choice as it is often recycled, but its installation remains a high-stakes technical challenge. If you fail at the adhesive stage, it doesn’t matter how clean your cuts were. The floor will fail, the tiles will pop, and you will be back to square one.
Final thoughts on glass integrity
Maintaining the integrity of the glass during the cut is about respecting the material. You cannot rush it. You cannot use dull tools. You have to listen to the saw. A saw that is struggling has a higher pitch. A saw that is cutting perfectly has a consistent, low-frequency hum. If the sound changes, stop the cut. Check your water. Check your blade. It is better to waste five minutes checking your equipment than to waste a fifty-dollar sheet of mosaic tile. Once the tiles are set, remember that tile cleaning becomes much easier if the installation was done right the first time. No jagged edges means no places for mold or soap scum to hide. Take your time, mind your physics, and keep your water cold. That is how you win in the world of glass tile.