
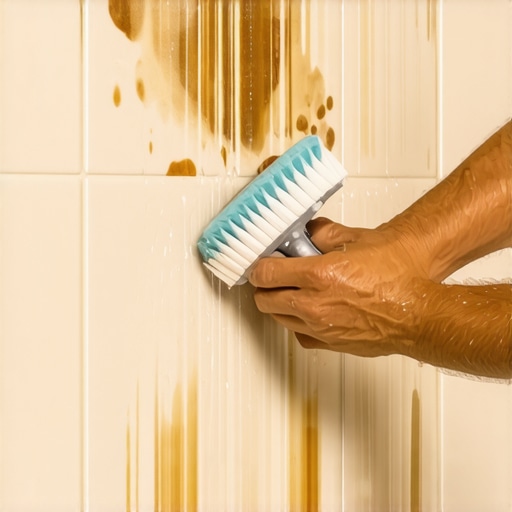
Most guys skip the leveling compound. They think the underlayment will hide the dip. It won’t. I spent three days grinding concrete on a job last month just so the floor wouldn’t click like a castanet. That same level of neglect happens in bathrooms across the country every single day. People ignore the structural and chemical reality of their tile until it is a white, crusty mess. If you want a floor or a wall that lasts, you have to respect the materials. My knees are shot from twenty five years of crawling over thin-set and oak dust, but I can tell you exactly why your shower looks like a limestone cave. It is not a mystery, it is chemistry. Mineral buildup is the result of dissolved calcium and magnesium ions precipitating out of your water supply and forming a hard, crystalline lattice on your surfaces.
The chemical war against calcium
Removing mineral buildup requires acidic dissolution to break the ionic bonds of calcium carbonate and magnesium sulfate without etching the glaze of the tile or eroding the cementitious grout. Success depends on dwell time and pH balance rather than aggressive mechanical abrasion. When hard water hits a warm surface, the water evaporates and leaves behind solid minerals. Over time, these minerals bond to the tile at a molecular level. You cannot simply wipe this away. You need a chemical reaction that turns that solid rock back into a liquid state or at least a soft slurry that can be rinsed. I have seen homeowners try to scrape it off with a putty knife, which is the fastest way to ruin a perfectly good porcelain finish. You have to be smarter than the rock.
I walk into my shop every morning and the smell of floor wax and cured wood is the first thing that hits me. It reminds me that every material has a limit. Tile is no different. The minerals in your water are essentially building a new, unwanted layer of stone on top of your ceramic. This is especially problematic in showers that wow because the visual impact of the design is lost under a veil of white film. This film is often calcium carbonate, also known as calcite. It has a Mohs hardness of 3, while your tile glaze is usually between 5 and 7. This gap in hardness is your only advantage. You can use tools that are harder than the minerals but softer than the tile, but chemical intervention is always the professional choice.
“A tile installation is only as durable as the substrate it rests upon. Deflection and moisture migration are the primary catalysts for bond failure.” – Master Flooring Axiom
Why your subfloor is lying to you
The integrity of a tile surface starts with a rigid substrate that prevents the micro-cracking of grout lines where minerals love to anchor themselves. If your floor has even a millimeter of deflection, the grout will develop hairline fractures that suck in hard water through capillary action, making cleaning nearly impossible. I have seen $20,000 bathrooms ruined because the installer didn’t check the joist spacing. When that floor flexes, the grout breaks. Once the grout breaks, it becomes a sponge for minerals. You can scrub the tile all day, but if the minerals are deep in the grout pores because of structural failure, you are fighting a losing battle. You need to ensure your grout is solid and properly maintained using grout restoration secrets before you even worry about the tile face.
The physics of this are simple. Water carries the minerals into the cracks. The cracks are caused by movement. If you want a clean shower, you need a stable shower. I have spent decades telling people that the pretty stuff on top is only ten percent of the job. The other ninety percent is the concrete, the backer board, and the waterproofing membrane. If those are done right, your tile stays flat and your grout stays sealed. When everything is tight, the minerals have nowhere to hide. They stay on the surface of the tile where a mild acid can dissolve them. If the minerals get behind the tile because of a subfloor dip, you are looking at a full tear-out, not a cleaning job.
The molecular reality of calcium carbonate
Mineral deposits on shower tile are primarily calcium carbonate, a substance that reacts aggressively to low pH solutions by releasing carbon dioxide gas and dissolving into water-soluble salts. This reaction is the only way to effectively clear the microscopic pores of the tile without causing permanent surface etching. You have to understand that the glaze on a tile is essentially a thin layer of glass. Glass is tough, but it is not invincible. If you use an acid that is too strong, like hydrochloric, you will eat the minerals, but you will also eat the glaze. Once that glaze is gone, the tile is finished. It will stain if you even look at it wrong. This is why I always preach about dwell time. Give the acid time to work so you do not have to use a stronger chemical.
| Cleaning Agent | pH Level | Effectiveness | Risk Factor |
|---|---|---|---|
| White Vinegar | 2.5 | Moderate | Low |
| Citric Acid | 2.2 | High | Low |
| Sulfamic Acid | 1.2 | Very High | Moderate |
| Phosphoric Acid | 1.5 | High | Moderate |
| Baking Soda | 8.3 | Low | Very Low |
As seen in the table, the pH level is the key. White vinegar is a staple, but for heavy buildup, you might need sulfamic acid. Sulfamic acid is a dry powder that you mix with water. It is the gold standard for masonry cleaning because it is effective but less volatile than other acids. When I am prepping a floor for a high-end install, I make sure every chemical I use is compatible with the material. You should do the same. If you are working on natural stone like marble or travertine, you cannot use any of these acids. Acid will melt marble. For natural stone, you are stuck with mechanical removal and pH-neutral cleaners, which is why I always tell people to stick to porcelain in a wet environment.
The 1/8 inch that ruins everything
The gap between your tile and the baseboard or tub must be filled with 100 percent silicone sealant rather than hard grout to allow for thermal expansion and prevent mineral traps. When installers use grout in these corners, the grout inevitably cracks and crumbles, creating a jagged environment where hard water pools and minerals calcify. This is where the ghost in the machine lives. That tiny gap is the most common place for failure. I see it all the time when I am looking at chic baseboard designs. If the transition isn’t handled correctly, the minerals will wick up into the baseboard and rot the wood or the MDF. You need a clean, flexible bead of silicone that sheds water and prevents the minerals from finding a foothold.
Maintenance is a matter of discipline. After you clean the minerals off, you need to seal the grout. Grout is just sand and cement. It is a filter. If you don’t seal it, it will pull every mineral and every bit of soap scum right into the middle of the joint. I recommend a high-quality penetrating sealer. It doesn’t change the look of the grout, but it fills those microscopic voids so the water just beads up and rolls off. This is a vital part of tile cleaning tips that actually work. If you are tired of scrubbing, stop letting the minerals get inside the floor in the first place.
A step by step restoration process
To successfully remove stubborn deposits, you must follow a structured protocol that involves pre-hydration, chemical application, mechanical agitation, and neutralization. This process ensures that the acidic cleaner focuses its energy on the mineral layer rather than being absorbed into the grout core. It is a common mistake to apply acid to dry grout. The dry grout will drink the acid like a man in a desert, and the acid will weaken the cement bond from the inside out. Always wet the tile with plain water first. This fills the grout pores and keeps the cleaner on the surface where the minerals are.
- Apply a 1:1 solution of white vinegar and water or a dedicated sulfamic acid cleaner.
- Allow the solution to sit for at least ten minutes without drying out.
- Scrub the tile with a stiff nylon brush, avoiding any metal bristles that can leave grey marks.
- Rinse the area thoroughly with clean water to remove all chemical residue.
- Check for remaining spots and repeat the process if necessary.
- Once dry, apply a penetrating sealer to all grout lines to prevent future mineral bonding.
If the grout is beyond a simple cleaning, you might need to look at how to refresh grout without replacing it. Sometimes the minerals have lived there so long they have chemically altered the grout color. In those cases, a grout colorant or epoxy coating is the only way to get that uniform look back. It is a lot of work, but it is cheaper than a sledgehammer. I have spent many nights on my hands and knees with a tiny brush, and I can tell you that patience is the most important tool in your kit.
“Cementitious grout is naturally porous and will absorb contaminants through capillary action unless a hydrophobic barrier is established.” – Master Flooring Axiom
The ghost in the expansion gap
Mineral buildup is often a symptom of poor drainage or clogged weep holes in the shower system that allow water to sit and stagnate against the tile. When water cannot escape, it undergoes evaporative concentration, leaving behind thick deposits of magnesium silicate and calcium sulfate that are much harder to remove than standard surface scale. If you see minerals building up specifically around the drain or in the bottom corners, your shower might not be sloped correctly. This is a structural engineering problem. A shower floor should have a quarter inch of slope per linear foot. If it is flatter than that, the water hangs out, and the minerals move in.
I remember a job where the client complained about white crust on their beautiful new trendy ideas for small bathrooms. I took a level to the floor and found a dip. The water was pooling. Every time they showered, a fresh layer of minerals was being baked onto the tile by the bathroom fan. We had to pull the tile, float the floor properly with a deck mud bed, and reinstall. It was an expensive lesson in physics. Don’t be that guy. Ensure your drainage is perfect and your surfaces are wiped down after use. A simple squeegee can prevent eighty percent of mineral buildup. It is low-tech, but it works.
Finally, consider the environmental impact of your choices. If you are looking for eco-friendly tile solutions, remember that durability is the ultimate form of sustainability. A floor that lasts fifty years is better for the planet than a cheap floor you replace every five years. Proper maintenance and mineral removal extend the life of your installation. Use the right chemistry, respect the structure of the subfloor, and keep your grout sealed. If you have questions about a specific material, you can always contact us for technical advice. I have spent my life in the dust so you don’t have to. Keep it clean, keep it dry, and keep it level.