
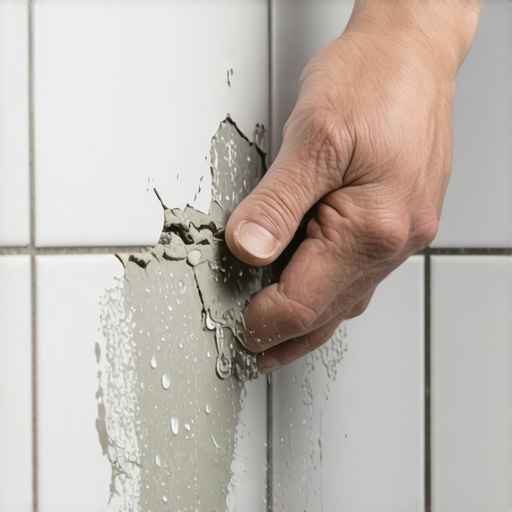
The rot that starts in the corner
Repairing crumbled grout in a damp shower corner requires removing all loose material, treating underlying moisture issues, and replacing the grout with a flexible, high-performance sealant or epoxy. Most failures occur because of structural movement or water saturation that compromises the cementitious bond. Simply smearing new grout over the old crumbling mess is a recipe for mold growth and structural decay within months. You must address the change of plane where two walls meet, as this area experiences the most stress from house settling and thermal expansion.
I spent three days grinding concrete on a job last month just so the floor wouldn’t click like a castanet. That experience taught me that the surface is a liar. The real story is always underneath. When I see grout turning into dust in a shower corner, I know I am looking at a movement problem or a waterproofing failure. Most guys skip the leveling compound or the proper backing. They think a little bit of paste will hide the dip or the gap. It won’t. If that corner isn’t stable, no amount of expensive grout will save it from the inevitable cracking that follows. I have seen beautiful tile jobs worth thousands of dollars ruined because the installer did not understand the physics of a change of plane.
The physics of the change of plane
A change of plane occurs wherever two surfaces meet at an angle, such as where the shower floor meets the wall or where two walls join in a corner. These areas are subject to differential movement, meaning the walls move independently of each other. If you use standard cement-based grout in these corners, it will crack because it is a rigid material. The Tile Council of North America (TCNA) requires these joints to be treated as expansion joints, usually filled with 100 percent silicone sealant rather than hard grout.
“A floor is only as good as the subfloor beneath it; deflection is the enemy of every joint.” – Master Flooring Axiom
When you look at a crumbling corner, you are likely seeing the result of ‘tucking,’ where the installer forced grout into a spot that needed flexibility. Over time, as the house breathes with the seasons, that rigid grout is crushed and turned into the sand you see on your shower floor. This is especially true in regions with high humidity or extreme temperature swings where building materials expand and contract significantly. You need to understand that grout is not a structural adhesive. It is a filler. When the filler is asked to hold two moving walls together, it fails every single time.
Why your subfloor is lying to you
Subfloor deflection and moisture wicking are the primary hidden causes of grout failure in wet environments. Even if the tile looks flat, a subfloor that flexes even a fraction of an inch under load will translate that movement directly to the grout lines. In a shower, this movement is often exacerbated by the weight of the water and the person using it. If the waterproofing membrane behind the tile was not installed correctly, water can seep into the wall cavity, causing wood studs to swell and push against the tile assembly from behind.
You can learn more about grout restoration secrets for long-lasting results to see how professional-grade materials differ from what you find at a local hardware store. The chemistry of the bond is everything. If you are dealing with a damp corner, the moisture has likely penetrated the thin-set. This creates a hydrostatic pressure situation where the water wants to escape, and the easiest path is through the porous grout. This constant moisture weakens the polymer chains in modern modified grouts, leading to the crumbling effect that looks like wet sugar.
The chemistry of a lasting seal
High-performance grouts use epoxy resins or advanced polymers to create a non-porous barrier that resists moisture and movement. Standard cementitious grout is naturally porous, containing microscopic voids that allow water to pass through. When you repair a corner, switching to a 100 percent silicone caulk that matches your grout color is the professional standard. Silicone remains flexible for decades, allowing the walls to move without breaking the seal. This prevents water from getting behind the tile where it can cause catastrophic rot to the framing and baseboards in adjacent rooms.
| Material Type | Flexibility Rating | Moisture Resistance | Best Use Case |
|---|---|---|---|
| Cementitious Grout | Low | Low | Wide floor joints |
| Epoxy Grout | Medium | High | High-traffic commercial |
| 100% Silicone | Maximum | Total | Corners and transitions |
| Acrylic Caulk | Medium | Low | Dry area baseboards |
The molecular structure of epoxy grout is a cross-linked polymer network. This makes it nearly impossible for water to penetrate. However, even epoxy can struggle in a moving corner if it is applied too thickly. This is why the industry standard remains the flexible joint. If you are looking for how to refresh grout without replacing it, you must first ensure that the grout you are refreshing is actually structurally sound. If it is crumbling, you cannot refresh it. You must excavate it.
The 1/8 inch that ruins everything
The width of the grout joint determines the type of material you must use and how it will perform under stress. For joints smaller than 1/8 inch, unsanded grout is typically used, while joints larger than 1/8 inch require sanded grout for strength. In a corner, if the gap is too tight, there is no room for a proper sealant bead to sit. Professionals often have to widen the corner gap slightly with a diamond blade to ensure there is enough surface area for the new silicone or epoxy to grab onto. Without that mechanical bond, the new material will just peel away like a scab.
“Cementitious grout is not waterproof; it is a filter that manages water flow while providing aesthetic consistency.” – TCNA Handbook Standards
- Remove all old grout using a carbide-tipped rake or oscillating tool.
- Vacuum the joints to remove every speck of dust and loose debris.
- Clean the area with denatured alcohol to remove soap scum and oils.
- Ensure the area is completely dry, using a heat gun if necessary.
- Apply a high-quality silicone or epoxy specifically rated for wet areas.
- Tool the joint immediately to create a smooth, concave surface that sheds water.
Modern solutions for high moisture areas
Utilizing eco-friendly and waterproof tile systems is the best way to prevent future grout crumbling. Modern installers are moving toward integrated systems where the tile, grout, and waterproofing are designed to work together. This is especially important when designing showers that wow in modern homes. Using high-density porcelain tile with a low absorption rate also helps, as it prevents the tile itself from sucking the moisture out of the grout during the curing process, which is a common cause of weak, crumbly grout.
If you are working with small spaces, check out showers with a style for ideas on how to minimize joints. The fewer joints you have in a wet corner, the lower your risk of failure. Large format tiles have fewer grout lines, but they require a perfectly flat substrate. Any hump in the wall will create a ‘lippage’ issue that makes the corner joints even harder to seal. When I’m on a job, I spend more time with my levels and straightedges than I do with my float. If the wall is plumb and the corner is square, the grout has a fighting chance. If not, you are just fighting physics, and physics always wins. For further maintenance, look into tile cleaning tips for a sparkling bathroom in 2025 to ensure your new repair lasts as long as possible.