
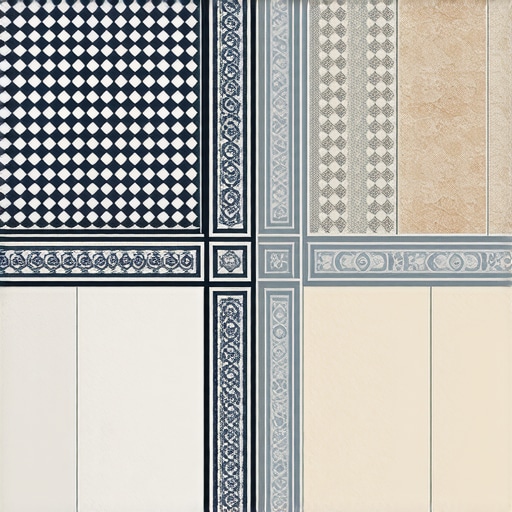
Most guys skip the leveling compound. They think the underlayment will hide the dip. It won’t. I spent three days grinding concrete on a job last month just so the floor wouldn’t click like a castanet. That is the reality of a master install. You do not just slap tile down. You build a foundation. If your subfloor is not within one eighth of an inch over ten feet, your transition will fail before the grout even dries. I have seen fifteen thousand dollar jobs ruined by a quarter inch hump. People want the aesthetic of a herringbone meeting a running bond. They forget that tile is a rigid mineral product. It does not bend. It does not forgive. When you move from a bathroom to a hallway, you are dealing with physics and structural integrity. A floor is only as good as the subfloor beneath it. Deflection is the enemy of every joint. This guide is for people who want a floor that lasts fifty years, not five.
The subfloor secret that kills your design
Subfloor preparation for tile transitions requires a flatness tolerance of 1/8 inch over 10 feet to prevent lippage and cracked grout lines. You must use self-leveling underlayment (SLU) and mechanical grinding to ensure the substrate is perfectly planar before the first piece of porcelain or ceramic tile is set in thin-set mortar. If you ignore the substrate, the transition between a hexagon pattern and a large format tile will create a tripping hazard. I have seen installers try to shim tiles with extra mortar. That is a mistake. Mortar shrinks as it cures. A thick bed of mortar under one tile and a thin bed under the next leads to uneven heights. You need to understand the ANSI A108 standards. These are not suggestions. They are the laws of the trade. When I am on a job, I am looking at the deflection rating of the joists. If you are putting heavy stone over a bouncy floor, your transition will snap. You need a stiffening layer of plywood or a decoupling membrane like Schluter-DITRA. This membrane allows the tile and the subfloor to move independently. It prevents the lateral stress from telegraphing into your beautiful transition. Without it, the change in pattern becomes a focal point for structural failure. You should also consider the moisture vapor emission rate of the slab. High moisture ruins the adhesive bond. I always use a calcium chloride test before I even think about patterns.
Geometry and the physics of the joint
Transitioning tile patterns involves calculating the grout joint alignment and the mechanical bridge between two distinct geometric layouts to maintain visual continuity and structural balance. You cannot just stop one pattern and start another. You need a threshold or a boundary marker. Think about the center line of the room. If you are running a chevron pattern into a grid, the point of contact needs a metal profile or a transitional stone sill. The physics of the joint dictate that stress will accumulate where the patterns meet. This is why expansion joints are mandatory in large areas. You cannot have more than twenty five feet of continuous tile without a break. In areas with high sunlight, that number drops to fifteen feet. Heat makes tile expand. If you have two different patterns, they might expand at different rates depending on the kiln-fire temperature of the clay. I have seen tiles tent up like a mountain because the installer forgot the perimeter gap. You need to leave a space under the baseboards. It is not just for looks. It is a breathing room for the house. If you are looking for baseboards makeover ideas to elevate your space, remember they must cover that expansion gap. The same applies to chic baseboard designs that transform rooms in 2025. They serve a functional engineering purpose. They hide the move room.
“A floor is only as good as the subfloor beneath it; deflection is the enemy of every joint.” – Master Flooring Axiom
Why grout lines are your best friend or worst enemy
Grout selection for pattern transitions depends on pigment consistency and the chemical composition of the bonding agent to ensure the visual break between patterns is intentional rather than accidental. You have sanded grout, unsanded grout, and epoxy grout. Never use unsanded grout for a joint wider than an eighth of an inch. It will crack. If you are transitioning between a tight-joint marble and a wide-joint rustic tile, the grout is the bridge. You need to match the water-to-powder ratio exactly. I use a scale. I do not eyeball it. If you add too much water, the grout becomes weak and the color will be blotchy. For high moisture areas like showers with a style, you need a high-performance grout. If the grout fails, the transition fails. Water gets under the tile, the mortar emulsifies, and the whole thing pops off. This is especially true for showers that wow where intricate patterns meet. You should also know how to refresh grout without replacing it if you are dealing with an old transition. However, for a new install, get it right the first time. Use grout restoration secrets for long-lasting results to keep that transition looking sharp. For eco-friendly tile solutions for sustainable homes in 2025, look at recycled content grouts that offer the same compressive strength. The Janka scale is for wood, but in tile, we talk about the MOHS hardness. If your transition is between a soft travertine and a hard porcelain, the grout will wear differently over time. You have to account for that.
The bathroom moisture trap in modern showers
Waterproofing a tile transition in a shower requires a continuous liquid-applied membrane or a sheet membrane system that extends beyond the pattern change to prevent capillary action from rotting the wall studs. In places like Seattle or Houston, where the air is heavy with water, your vapor barrier is the only thing standing between you and black mold. When you transition from a mosaic shower floor to a large format wall tile, the change of plane is the most vulnerable spot. You must use 100 percent silicone caulk at all inside corners and plane changes. Never use grout in a corner. The house moves, the corner settles, and grout cracks. Silicone stays flexible. It handles the dynamic load. If you are doing tile cleaning tips for a sparkling bathroom in 2025, you will realize that sealed transitions are much easier to maintain. Dirt loves to hide in cracked grout. I always tell my clients that a linear drain transition is better than a center point drain for large tiles because it eliminates the need for envelope cuts. These diagonal cuts destroy the pattern flow. If you want a seamless look, you have to engineer the slope perfectly. The TCNA Handbook has specific details for curbless entries. It is not just about the look. It is about the flow rate of the water versus the porosity of the stone.
| Transition Method | Best For | Durability Level | Skill Level Required |
|---|---|---|---|
| Metal Schluter Profile | Clean Modern Lines | Very High | Moderate |
| Natural Stone Sill | Traditional Doorways | High | Low |
| Flush Grout Joint | Same Material/Different Pattern | Medium | Very High |
| Expansion Joint | Large Commercial Areas | Excellent | High |
Expansion joints and the law of thermal movement
Thermal expansion in tile transitions is a mechanical necessity governed by the coefficient of linear thermal expansion of the ceramic body and the substrate. If you are in Phoenix, the dry heat will make your subfloor shrink while the tiles bake in the sun. If you do not have a flexible transition, the tiles will shear away from the mortar. This is a common failure. People want that butt-joint look where tiles touch. It is a recipe for disaster. You need a minimum of 1/16 inch joint for even the most precise rectified tile. I have seen click-lock vinyl buckle because it was locked under a heavy kitchen island. Tile is the same. It needs to move. A contrarian data point to consider is that while people want the thickest underlayment, too much cushion actually causes the locking mechanisms on LVP to snap under pressure. In tile, a thick bed of mortar that is not combed correctly creates air pockets. Those pockets are weak points. When a high heel or a heavy table leg hits that spot, the tile cracks. You need 95 percent mortar coverage in wet areas and 80 percent in dry areas. I use a suction cup tool to pull up a tile and check the coverage during every install. If I see parallel ridges that have not collapsed, I know the installer is lazy. You have to back-butter large tiles. It is the only way to ensure a monolithic bond. If you are curious about our policies, check the privacy policy or contact us for more details on structural flooring specs.
“Movement joints are not an option; they are a requirement for the survival of the installation.” – TCNA Guidelines
- Check subfloor flatness with a 10 foot straightedge.
- Apply a primer if using self-leveling compounds.
- Ensure 95 percent mortar coverage for all transitions.
- Use metal profiles to protect the edges of the tile.
- Apply 100 percent silicone to all change-of-plane joints.
- Acclimate natural stone tiles for 48 hours on site.
The final word on pattern transitions
Getting a transition right is about patience and precision. You have to think three steps ahead. Before you spread a single trowel of thin-set, you should have your layout lines snapped on the floor. You should know exactly where every cut tile will land. If you end up with a sliver of tile at the transition, your layout is wrong. Shift the whole floor. It is better to have half-tiles on both sides than a full tile on one and a one-inch strip on the other. That is the mark of an amateur. A master installer treats the transition as the anchor of the room. It is where the eye goes. If the grout lines do not line up or if the height is off by a millimeter, it will haunt you every time you walk across it. Use leveling clips. They are the best invention in the last twenty years for large format tile. They hold the tile in place while the mortar sets, preventing slump. Remember, the adhesive chemistry matters. A modified thin-set with polymers is much stronger than a dry-set mortar. It bites into the tile and the substrate. Do not buy the cheap stuff. Your floor is the only part of your house you touch every single second. Build it like you mean it.