
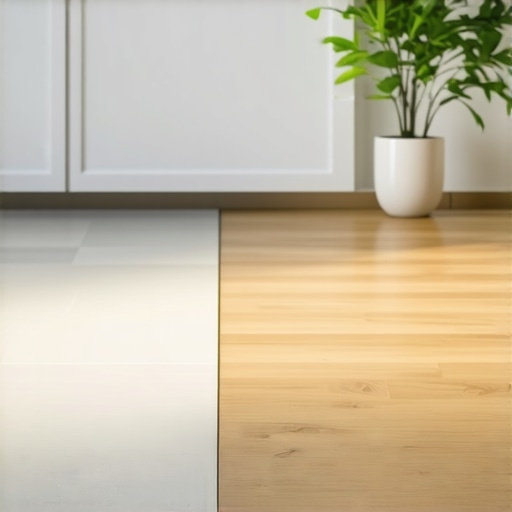
Most guys skip the leveling compound. They think the underlayment will hide the dip. It won’t. I spent three days grinding concrete on a job last month just so the floor wouldn’t click like a castanet. That is the reality of modern flooring. You cannot hide a bad subfloor under a pretty product. When you are looking at the transition between tile and luxury vinyl plank, you are not looking at a decorative strip. You are looking at a structural intersection where two fundamentally different materials meet. One is a rigid, mineral based slab held in place by a cementitious bond. The other is a thermoplastic, flexible plank that moves with every degree of temperature change. If you do not respect the physics of that meeting point, your floor will fail. It is not a matter of if, but when.
The myth of the flat floor
Subfloor preparation requires an absolute flatness of 3/16 of an inch over a 10 foot radius to ensure transition success. Using a self leveling compound and a concrete grinder is the only way to achieve the ASTM F710 standards necessary for Luxury Vinyl Plank and porcelain tile to sit flush at their meeting point. Most residential slabs have humps and valleys that cause locking mechanism failure at the transition line if not corrected before the first tile is set. I have seen guys try to shim a transition with scraps of roofing felt. It is a hack move that leads to a bouncy floor. You need to use a straightedge. You need to identify the high spots. You need to realize that the transition starts six feet back from the doorway. If the subfloor is not dead flat, the transition strip will sit at an angle, creating a trip hazard and a point of mechanical stress that will eventually snap the tongue of your LVP. [image_placeholder_1]
Materials that refuse to cooperate
Luxury Vinyl Plank and ceramic tile have vastly different coefficients of thermal expansion which dictates the transition design. While porcelain tile is dimensionally stable, LVP expands and contracts based on ambient humidity and temperature fluctuations. This movement requires a functional expansion gap of at least 1/4 inch at the transition point to prevent plank buckling or grout cracking. The chemistry of LVP is mostly PVC and calcium carbonate. When the sun hits that vinyl through a window, it grows. The tile, being fired earth, stays exactly where it is. If you butt them tight against each other, the vinyl has nowhere to go but up. That is how you get a peak in the middle of your floor that looks like a mini mountain range. You need a transition profile that allows the vinyl to slide underneath it while remaining pinned on the tile side.
Height management and subfloor prep
Calculating the total assembly height including thin-set and underlayment is the only way to achieve a flush transition between materials. You must account for the 1/4 inch notched trowel depth, the tile thickness, and the LVP wear layer plus its integrated pad. Achieving a zero threshold look often requires grinding the concrete deeper on the tile side or using a plywood shim under the vinyl. I once worked a job where the tile was 1/2 inch thick and the vinyl was 5mm. That is a massive cliff. You can use a reducer, but if the client wants it flush, you are looking at a lot of prep work. You have to feather out a patch over four feet to make that height difference disappear to the eye. If you don’t, you are just building a stumbling block in the middle of a hallway.
The mechanical reality of the T-molding
A T-molding transition strip provides the necessary vertical coverage and lateral movement space for floating floor systems. These profiles utilize a metal track or adhesive bond to stay secure while the expansion shoulder hides the required 1/4 inch gap between the rigid tile and the flexible vinyl. People hate T-moldings because they think they look cheap. But do you know what looks cheaper? A floor that has pulled away from the tile leaving a dark, dusty gap full of dog hair. The T-molding is an engineering necessity for a floating floor. It acts as a bridge. It allows the vinyl to breathe. If you try to caulk that joint instead of using a molding, the caulk will pull away in six months because it cannot handle the shear force of the floor moving back and forth.
| Material Type | Expansion Rate | Installation Method | Movement Requirement |
|---|---|---|---|
| Porcelain Tile | Negligible | Thin-set Mortar | Rigid Bond |
| SPC Vinyl Plank | Low to Moderate | Click-Lock Floating | 1/4 Inch Perimeter Gap |
| WPC Vinyl Plank | Moderate to High | Click-Lock Floating | 3/8 Inch Perimeter Gap |
| Natural Stone | Minimal | Medium Bed Mortar | Rigid Bond |
Moisture barriers and chemical bonds
Managing moisture vapor emission rates is mandatory before installing LVP against tile on a concrete slab. High MVER levels can degrade the adhesive bond of the tile and cause mold growth under the vinyl planks. Using a 6 mil poly film or a liquid moisture barrier protects the subfloor integrity and prevents the transition strip from lifting due to substrate dampness. I have pulled up floors where the underside of the vinyl was slimy because someone didn’t run a calcium chloride test. They just slapped it down. The moisture gets trapped between the non-porous vinyl and the concrete. It migrates to the transition where there is an opening and starts to rot the subfloor or the adhesive holding your transition track. If you are doing tile cleaning and notice the grout near the vinyl is always damp, you have a moisture problem underneath.
“A floor is only as good as the subfloor beneath it; deflection is the enemy of every joint.” – Master Flooring Axiom
Transitioning near wet zones like showers
Waterproof transitions in bathrooms require 100 percent silicone sealant and specialized profiles to prevent subfloor rot. When LVP meets modern showers, the transition must be hermetically sealed to stop water from migrating under the floating floor. Using Schluter profiles or aluminum reducers ensures that the edge of the vinyl is protected from delamination caused by standing water or high humidity. Bathrooms are high stress environments for flooring. You have steam, you have spills, and you have constant temperature swings. If you don’t seal the edge of that vinyl where it hits the tile, water will get into the locking mechanism. Once that happens, the core of the plank will swell, even if it claims to be waterproof. Waterproof usually means the material won’t break down, but it doesn’t mean the water won’t sit under it and grow a science project.
- Check subfloor levelness with a 10 foot straightedge.
- Vacuum all dust to ensure adhesive tracks bond properly.
- Leave a 1/4 inch gap for vinyl expansion under the molding lip.
- Verify that the tile edge is clean and free of excess thin-set.
- Apply a bead of silicone at the transition if in a high moisture area.
Baseboards as the final structural lock
Installing baseboards after the floor transition ensures a clean finish that hides the necessary expansion perimeters. Utilizing chic baseboard designs allows you to pin the perimeter of the floor while still allowing for lateral movement. You should never nail the baseboard into the flooring itself; always nail into the wall studs to maintain the floating floor’s ability to shift. I see this all the time. A DIYer nails the baseboard right through the vinyl into the subfloor. Now the floor is locked. When the seasons change, the floor wants to move but the nail is holding it. The result is a massive crack in the middle of the room or the locking joints snapping. The baseboard and the transition strip are there to cover the gaps that let the floor live. Treat them with respect. If your grout is looking rough at the edges, you might need to look at grout restoration secrets to fix the damage caused by floor movement.
The physics of underlayment compression
Selecting the correct underlayment density is vital to prevent the transition from becoming a point of failure. While most people want the thickest underlayment, too much cushion actually causes the locking mechanisms on LVP to snap under pressure. You need an underlayment with high compressive strength to support the transition track and the weight of foot traffic at the doorway. If the padding is too soft, the vinyl will dip every time you step on the transition. That vertical movement is what kills the joint. It is like bending a paperclip back and forth. Eventually, it just breaks. Stick to high density foam or felt that is specifically rated for the mil thickness of your vinyl. Anything over 3mm of soft foam is asking for trouble at the tile interface.
“The integrity of a floating floor is maintained by its ability to move as a single unit without mechanical restriction.” – NWFA Installation Guidelines
The 1/8 inch that ruins everything is the difference between a pro job and a disaster. You have to be precise. You have to use the right tools. If you are unsure about the chemistry of your adhesives or the flatness of your slab, you are better off calling a pro. A failed floor transition is not just ugly; it is a structural failure that will cost you twice as much to fix later. Take the time to grind the floor. Take the time to measure your heights. Do it right the first time so you don’t have to see me in your house with a demo hammer in six months.