
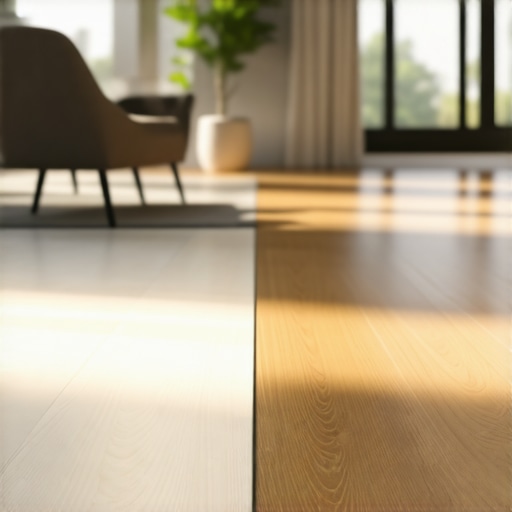
I spent three days grinding concrete on a job last month just so the floor wouldn’t click like a castanet. Most guys skip the leveling compound. They think the underlayment will hide the dip. It won’t. I have seen countless luxury vinyl plank installations fail because the installer ignored a three-millimeter deviation in the subfloor. When you walk across a floor and hear that hollow ticking sound, you are hearing the death of a locking mechanism. It is the sound of plastic fatigue. A floor is a structural system, not a rug. If the foundation is uneven, the surface will eventually shatter. I have spent twenty-five years fixing these mistakes, and the transition between two different materials like ceramic tile and luxury vinyl plank (LVP) is where the most carnage happens.
The 1/8 inch that ruins everything
A successful transition from tile to luxury vinyl plank depends on a subfloor flatness tolerance of 1/8 inch over a 10-foot radius. This specific measurement ensures the locking joints of the LVP do not experience excessive deflection. Proper subfloor preparation involves using self-leveling compound to bridge the height gap between the tile mortar bed and the neighboring substrate. Most installers fail because they ignore the microscopic peaks in the concrete. When you are dealing with LVP, especially Stone Plastic Composite (SPC), the core is rigid. Rigidity is great for indentation resistance, but it is a nightmare for subfloor telegraphing. If there is a pebble-sized bump under that plank, it will eventually work its way through the wear layer or snap the tongue and groove. I carry a ten-foot straightedge on every job. If I see light under that rail, I am not laying a single plank until the grinder comes out. The chemistry of the bond matters too. If you are using a pressure-sensitive adhesive for a glue-down LVP transition, the concrete must be free of all hydrostatic pressure and efflorescence. Moisture is the silent killer of the transition zone. If the tile was laid on a wet slab and the LVP is being installed next to it, the moisture will migrate toward the cooler, less breathable LVP and cause the edges to curl. This is why I always use a calcium chloride test or an in-situ RH probe before I even open a box of flooring.
“A floor is only as good as the subfloor beneath it; deflection is the enemy of every joint.” – Master Flooring Axiom
The ghost in the expansion gap
Luxury vinyl plank requires a mandatory expansion gap of at least 1/4 inch around the entire perimeter and at all vertical obstructions. This space allows the PVC core to expand and contract with temperature fluctuations without causing buckling or joint separation. Failure to maintain this gap at the tile transition will lead to the floor lifting off the subfloor. Many homeowners think that because a floor is waterproof, it is stable. That is a dangerous myth. While the water won’t rot the plastic, heat will make it grow. If you jam that LVP tight against a tile edge, the floor has nowhere to go. It will peak at the seams. I have seen floors lift three inches off the ground because an installer didn’t leave a gap under the baseboards. Speaking of which, you should check out some chic baseboard designs that transform rooms in 2025 to see how to cover these gaps properly. The transition strip itself, whether it is a T-molding or a reducer, must be anchored to the subfloor and not to the flooring itself. If you nail a transition through the LVP, you have effectively pinned the floor. It can no longer move. The next time the sun hits that floor through a sliding glass door, the planks will buckle because they are trapped by your transition strip.
The structural lie of waterproof flooring
Waterproof luxury vinyl plank is only waterproof from the top down, not from the bottom up. If water gets under the locking joints at the tile interface, it can trap moisture and lead to mold growth or adhesive failure. Ensuring a watertight seal at the transition requires 100% silicone sealant in high-moisture areas like showers or kitchens. This is especially relevant when you are working near showers that wow, as these areas are prone to splashes. People buy LVP because they want a floor they can mop with a bucket, but the subfloor doesn’t share that enthusiasm. If you have tile in a bathroom and LVP in the hallway, that transition point is a highway for water. I always recommend a bead of silicone in the expansion channel of the transition strip. It keeps the water out but stays flexible enough to allow the floor to breathe. We also need to talk about the wear layer. A 20-mil wear layer is the professional standard. Anything less is just a sticker on a board. If you are transitioning from a hard, abrasive surface like ceramic tile to a softer vinyl, that transition point will see higher friction. You need a wear layer that can handle the grit that naturally migrates from the tile grout lines onto the vinyl surface. Poorly maintained grout can actually act like sandpaper on your new LVP. If your tile is looking rough, you might want to look into grout restoration secrets for long lasting results before you install the new floor.
| Feature | Ceramic Tile | Luxury Vinyl Plank (SPC) | Transition Requirement |
|---|---|---|---|
| Expansion Rate | Negligible | High (Thermal) | 1/4 Inch Gap |
| Subfloor Tolerance | 1/4″ over 10′ | 1/8″ over 10′ | Flash Patching Required |
| Installation Method | Thin-set Mortar | Click-Lock or Glue-down | T-Molding or Reducer |
| Moisture Resistance | High | High (Surface Only) | Silicone Sealant |
Why your subfloor is lying to you
Concrete slabs often contain hidden moisture that can compromise the integrity of luxury vinyl plank transitions. Using a vapor barrier with a perm rating of less than 0.1 is necessary for any LVP installation over concrete to prevent alkaline salts from attacking the adhesive bond. I have walked onto jobs where the concrete looked bone dry, but the moisture meter told a different story. If you don’t use a 6-mil poly film, you are asking for trouble. The moisture comes up through the capillary pores in the concrete and gets trapped under the vinyl. This creates a greenhouse effect. If you have tile next to it, the tile might be fine because it is breathable through the grout, but the vinyl will bubble. I always tell my clients to invest in a high-quality underlayment with a high IIC (Impact Insulation Class) rating. Not only does it help with the sound, but it provides a secondary thermal break. If the floor is too cold, the vinyl becomes brittle. If it is too hot, it becomes too soft. You are looking for that Goldilocks zone of 65 to 85 degrees Fahrenheit. Anything outside of that and you are risking the mechanical failure of the click system. When you are transitioning from a thick tile to a thinner LVP, you will likely need a reducer strip. Don’t just use a generic one. Get the one that matches the specific mil-thickness of your floor. A mismatch of even a millimeter creates a trip hazard that will catch every toe and every vacuum cleaner that passes over it.
The technical checklist for a perfect transition
- Measure the height difference between the tile and the subfloor using a digital caliper.
- Select a T-molding for equal height transitions or a reducer for height variances.
- Undercut door jambs to allow the LVP to slide underneath with the required expansion gap.
- Clean the tile edge thoroughly to ensure any transition adhesive bonds to the substrate.
- Apply a moisture-blocking primer to the concrete if RH levels exceed 85%.
- Check the squareness of the tile line to ensure the LVP doesn’t require awkward diagonal cuts.
Once the transition is in place, you need to consider the surrounding aesthetics. The way the floor meets the wall is just as important as the way it meets the tile. Using the right trim can make a cheap floor look like a million bucks. Take a look at some baseboards makeover ideas to elevate your space to see how to finish the job correctly. Also, keep in mind that maintaining the tile side of the transition is vital. Dirt and grime from the tile can spill over. Following tile cleaning tips for a sparkling bathroom in 2025 will help keep the entire area looking cohesive. If you are an environmentally conscious homeowner, you might want to look into eco-friendly tile solutions for sustainable homes in 2025 to ensure your materials align with your values. The transition is the most technical part of the job. It is where the physics of two different materials collide. If you respect the expansion gaps and the subfloor tolerances, you will have a floor that lasts decades. If you rush it, you will be calling me in six months to rip it out.
“Deflection is the enemy of every joint; a floor is only as good as the subfloor beneath it.” – Master Flooring Axiom
The chemistry of the bond
Modified thin-set mortar used for tile creates a rigid bond, whereas luxury vinyl plank requires a flexible environment to accommodate movement. This fundamental difference in material science means the transition strip must act as a mechanical buffer between the rigid tile and the dynamic LVP. I often see people try to grout the gap between tile and vinyl. This is a massive mistake. Grout is rigid. It has zero tensile strength when it comes to movement. As soon as the temperature changes, that grout will crack and turn into dust. You must use a flexible color-matched caulk or a professional transition profile. I prefer metal profiles because they offer a cleaner line and better durability against heavy foot traffic. When installing near showers with a style, the humidity is even higher, making the choice of transition material even more important. Aluminum or brass profiles won’t rust or degrade in the damp air. If you are going for a modern look, a schluter-type strip provides a very thin, almost invisible transition that architects love. But remember, the thinner the transition, the more perfect your subfloor must be. There is no room for error when you are aiming for a flush finish. You have to be a surgeon with the grinder. Every high spot must be erased. Every low spot must be filled. Only then can you achieve that high-end look that homeowners crave without the headache of future repairs.