
I smell like WD-40 and oak dust most days. That is the reality of twenty-five years in the trenches of the flooring industry. I have spent more time on my knees with a moisture meter than I have in my own bed. You want to talk about aesthetics. I want to talk about structural integrity. Most guys skip the leveling compound. They think the underlayment will hide the dip. It won’t. I spent three days grinding concrete on a job last month just so the floor wouldn’t click like a castanet. That job taught me that shortcuts are just long paths to failure. When you are staring down a twelve by twenty-four inch piece of porcelain that costs twenty dollars a square foot, you cannot afford a mistake. Cutting a hole for a shower valve or a toilet flange is the moment of truth. If you mess it up, you are not just out a tile. You are out your reputation. We are going to look at the physics of the cut and why your subfloor is the secret variable in every plumbing penetration.
The diamond core bit solution for dense porcelain
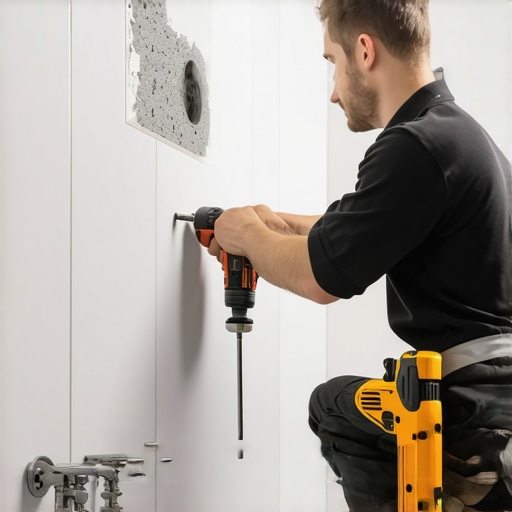
Cutting a hole in tile for plumbing requires a diamond-tipped core bit paired with a high-torque drill. Professionals use a wet-cutting method to manage heat and prevent the porcelain from cracking. Using a template ensures the bit does not skate across the surface of the finished tile during the initial contact.
You cannot use a standard masonry bit on porcelain. Porcelain is a vitrified material, fired at temperatures exceeding two thousand degrees. It is harder than granite on the Mohs scale. A masonry bit will simply glow red and die before it makes a dent. You need industrial diamonds. These bits are often vacuum-brazed, meaning the diamond particles are fused to the steel core in a vacuum furnace. This prevents the diamonds from stripping away under the intense friction of the grind. When the bit touches the tile, it is not cutting. It is grinding at a molecular level. If you are working on showers that wow modern designs for 2025, your holes must be surgically precise. Any jagged edge is a stress point that can lead to a crack months after the installation is finished.
“A floor is only as good as the subfloor beneath it; deflection is the enemy of every joint.” – Master Flooring Axiom
Why cheap drill bits destroy expensive bathroom projects
Cheap drill bits fail because they lack the proper diamond density and bond strength to handle the thermal loads of vitrified tile. Low-grade tools generate excessive heat which causes the steel core to expand. This expansion creates a wedge effect that snaps the tile from the inside out during drilling.
I have seen guys buy the five-dollar bits from the discount bin. They get halfway through the first hole and the bit is smoking. They try to push harder. That is the second mistake. Pressure is the enemy of a clean cut. You need to let the diamonds do the work. The physics of the process rely on the diamond grit scraping away the ceramic material. If you apply too much PSI, you heat up the material too fast. In regions like Houston where the humidity is high, the moisture in the air does nothing to cool your bit. You need a constant stream of water. Water acts as a lubricant and a coolant. It carries the microscopic tile dust out of the kerf, preventing the bit from clogging. Without water, the slurry becomes a thick paste that increases friction and heat. This is the same reason why grout restoration secrets for long-lasting results always emphasize cleaning out the joints properly. Dust is the enemy of every chemical and mechanical bond in this trade.
The danger of the skating drill bit
A skating drill bit occurs when the smooth glaze of the tile prevents the diamond edge from catching a purchase. This causes the bit to slide across the finished surface, creating permanent scratches that cannot be polished out. Using a wood template or starting at an angle is the fix.
I always keep a piece of half-inch plywood in my kit. I drill a hole in the plywood the same size as my diamond bit. I tape that plywood to the tile. This creates a guide. It stops the bit from wandering. If you don’t have a template, you have to start the drill at a forty-five degree angle. Once the bit bites into the glaze and creates a crescent-shaped groove, you slowly move the drill to a ninety-degree position. You have to be steady. If your hands shake, the bit will grab and kick back. I have seen guys break their wrists when a large core bit catches on a piece of aggregate in the tile body. This is especially true when you are working near chic baseboard designs that transform rooms in 2025 where the tile meets the wall. There is no room for error there.
| Bit Type | Optimal RPM | Material Suitability | Cooling Method |
|---|---|---|---|
| Vacuum Brazed Diamond | 10,000 – 14,000 | Porcelain, Granite, Quartz | Dry or Wet |
| Electroplated Diamond | 2,000 – 4,000 | Glass, Soft Ceramic | Must be Wet |
| Carbide Tipped Spade | 500 – 800 | Wall Tile Only | Dry |
The physics of thermal shock in ceramics
Thermal shock happens when a localized area of the tile is heated rapidly by friction while the rest of the tile remains cool. This temperature differential causes internal stress. Because porcelain has high compressive strength but low tensile strength, it will shatter to relieve that internal pressure.
Think about a glass bottle in a freezer. If you pour boiling water on it, it explodes. The same thing happens at a smaller scale when you drill. You are creating a hot spot. If you don’t use water, that hot spot spreads. The tile expands at different rates. This is why professional installers are obsessed with cooling. We use sponges or specialized water delivery systems. Even when we are working on baseboards makeover ideas to elevate your space, we think about how the materials will expand and contract. If you are drilling a hole for a pipe, that pipe might carry hot water later. If the hole is too tight, the pipe will expand and crack the tile. You need a minimum of an eighth of an inch gap around the entire pipe. That gap is then filled with a flexible sealant, not hard grout. Hard grout will crack as the pipe moves.
“Thermal shock during the drilling process causes micro-fractures that compromise the integrity of the entire tile installation.” – TCNA Technical Bulletin
Measuring the offset for shower valves
Measuring the offset for shower valves requires calculating the distance from the finished subfloor and the two nearest walls. You must account for the thickness of the thin-set mortar and the backer board. A mistake of even one-sixteenth of an inch can prevent the decorative trim plate from covering the hole.
I use a laser for this. Tape measures are fine for rough-in, but tile is about precision. You have to know exactly where that valve sits in relation to your tile layout. I always layout my tiles on the floor first. I find the center of the valve and mark it on the tile with a wax pencil. If the valve falls on a grout line, it is actually easier. You can notch each tile. But if it falls in the center of a large format tile, you are back to the core bit. Don’t forget that the tile will sit about a quarter inch off the wall once you apply the mortar. If you don’t account for that, your hole will be off center. This kind of attention to detail is what separates a master from a handyman. It is the same logic used in how to refresh grout without replacing it. You have to understand the depth of the material you are working with.
- Verify the subfloor is flat within one-eighth inch over ten feet.
- Mark the center point of the plumbing pipe on the tile face.
- Secure a guide template to prevent the drill bit from wandering.
- Apply water constantly during the drilling process to mitigate heat.
- Release pressure as you approach the back of the tile to avoid blowout.
Finalizing the penetration with grout and trim
Finalizing the plumbing penetration involves sealing the gap between the tile and the pipe with a 100 percent silicone sealant. This prevents water from migrating behind the tile into the wall cavity. The decorative escutcheon or trim plate is then installed over the sealed hole for a finished look.
Never use grout to seal around a pipe. Grout is porous and rigid. It will allow water to seep through, and it will crack when the pipe vibrates. Silicone is the only way to go. It stays flexible. This is part of the long-term maintenance of the home. When you are looking for tile cleaning tips for a sparkling bathroom in 2025, you will find that clean silicone is much easier to maintain than cracked grout. If you did your job right, the trim plate will slide right over the hole with no gaps visible. If you see a gap, you didn’t measure your offset correctly. In the desert heat of Phoenix, those materials will move more than you think. Proper sealing is the only thing protecting your subfloor from rot. I have torn out enough rotten plywood to know that a tube of silicone is the cheapest insurance you can buy.