
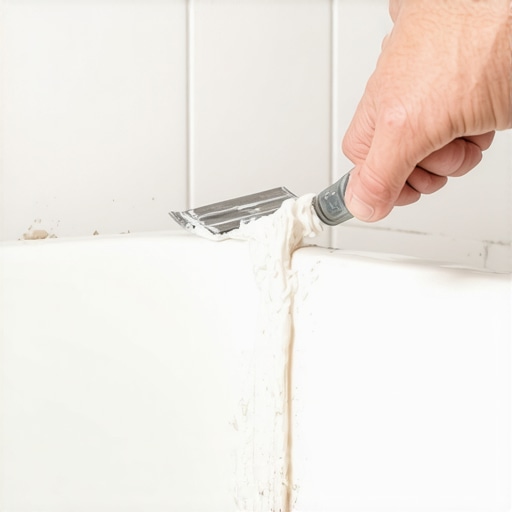
Removing old caulk from a bathtub is not a cosmetic upgrade. It is a structural necessity for the longevity of your home. Most guys skip the leveling compound. They think the underlayment will hide the dip. It won’t. I spent three days grinding concrete on a job last month just so the floor wouldn’t click like a castanet. The same principle applies to your shower. If that sealant is failing, the substrate is drinking water every time you wash. I have seen subfloors rot through because someone thought they could just smear a new layer of silicone over the old, moldy acrylic. That is a recipe for a structural disaster that will cost you thousands in tile and floor repairs later.
The structural reality of failed bathtub seals
Bathtub sealant failure occurs when the chemical bond between the silicone polymer and the ceramic tile or acrylic tub breaks down due to osmotic pressure and structural deflection. When a tub is filled with water, it settles. This movement, even if it is only a fraction of an inch, puts immense stress on the sealant bead. If the caulk has lost its elasticity, it will pull away from the wall. This creates a microscopic gap. Water moves through these gaps via capillary action, where it reaches the cement backer board or, worse, the plywood subfloor. Once moisture penetrates the wall cavity, you are dealing with potential mold growth and rot that remains hidden until the day your foot goes through the floor. Maintaining these joints is the only way to prevent a total bathroom failure.
Chemical warfare against oxidized silicone
Silicone caulk removal requires understanding the molecular adhesion of Room Temperature Vulcanizing (RTV) silicone to non-porous surfaces. Silicone does not just sit on top of the tile. It forms a chemical bond. As it ages, it undergoes oxidative degradation, becoming brittle and yellowed. To remove it effectively, you must break those bonds without scarring the finish of your showers or tubs. I prefer a mechanical approach followed by a chemical solvent. You cannot just pull at it. You have to slice the bond line. I use a sharp utility knife to cut the sealant along the top and bottom edges. It is a slow, methodical process. If you rush, you will scratch the acrylic or chip the tile. After the bulk is gone, the stubborn residue remains. This is where chemical softeners like mineral spirits or specialized caulk removers come into play. They swell the silicone, making it easier to scrape away with a plastic tool. This ensures the new sealant will actually stick to the substrate rather than just floating on top of old residue.
“A floor is only as good as the subfloor beneath it; deflection is the enemy of every joint.” – Master Flooring Axiom
The 1/8 inch gap that ruins everything
Surface preparation for new grout and sealant is the stage where most DIY projects fail because they ignore the cleanliness protocol. After you think the old caulk is gone, it is usually not. There is a thin, oily film of silicone left behind. Nothing sticks to silicone, not even more silicone. You must scrub the joint with denatured alcohol or 99 percent isopropyl alcohol. This removes the oils and ensures a pristine bonding surface. If you are also dealing with tile cleaning tips for a sparkling bathroom in 2025, you know that keeping these joints dry is half the battle. Check out more at tile cleaning tips for a sparkling bathroom in 2025. I always use a vacuum to pull dust out of the gap before the final wipe. Any dust left behind acts as a bond breaker. If that bond fails, you are right back where you started with water leaking into your baseboards and walls.
| Sealant Type | Chemical Base | Adhesion Level | Flexibility Rating |
|---|---|---|---|
| 100% Silicone | RTV Polymer | High | Excellent |
| Siliconized Latex | Acrylic Blend | Medium | Moderate |
| Polyurethane | Organic Polymer | Maximum | Low |
The physics of expansion and contraction in wet areas
Movement joints in bathrooms are required by TCNA standards because every material in your bathroom expands and contracts at different rates. The ceramic tile on your wall is rigid. Your acrylic tub or cast iron pan moves when it gets hot or heavy. The joint between them is a dynamic transition. If you fill this gap with grout, it will crack within weeks. This is why we use 100 percent silicone. It can stretch and compress without losing its seal. I have walked into jobs where people used hard grout in the corners of showers, and it looked like a spiderweb of cracks. You have to respect the physics of the house. If you want to learn about grout restoration secrets for long-lasting results, you have to understand that grout belongs on the flat surfaces, and caulk belongs in the changes of plane. For more info, see grout restoration secrets for long-lasting results. This is the difference between a job that lasts twenty years and one that lasts twenty minutes.
“Movement joints in ceramic tile installations shall be located where tile surfaces abut restraining surfaces such as perimeter walls, curbs, or pipes.” – TCNA Handbook for Ceramic Tile Installation
- Slice the caulk at a 45-degree angle along both edges.
- Use a plastic scraper to peel the main bead away from the tub.
- Apply a silicone softener to the remaining residue for 20 minutes.
- Scrub the joint with a stiff nylon brush and isopropyl alcohol.
- Let the joint dry for at least 4 hours before applying new sealant.
The ghost in the expansion gap
Substrate moisture is the hidden killer of new installations because homeowners often apply new caulk before the joint is completely dry. If you trap water behind the new bead, it will cause delamination from the inside out. I often use a hair dryer to force moisture out of the deep crevices of the baseboards and showers. You want that gap bone-dry. If you are looking at showers that wow modern designs for 2025, remember that the best design is a dry one. Visit showers that wow modern designs for 2025 to see how the pros manage these transitions. When you apply the new caulk, do not just wipe it with a wet finger. Use a specialized smoothing tool or a dry finger to ensure the sealant is forced into the corners of the joint. This creates a mechanical lock that resists the pressure of water. A properly applied bead should be concave, allowing water to shed away from the wall and into the tub. This is simple engineering that prevents massive structural headaches down the road. If you have questions about your specific setup, you can always contact us for guidance.