
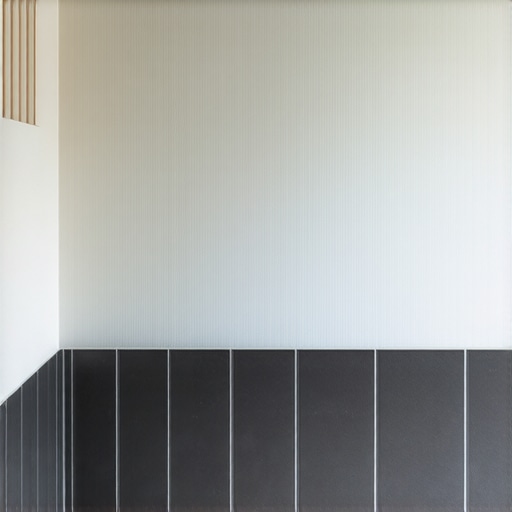
The Mistake of Tiling All the Way to the Ceiling
I once walked into a house where a custom bathroom renovation had just been finished. The homeowner was proud of the floor to ceiling porcelain. It looked like a luxury magazine shoot. Six months later, I got the call. The top row of tiles had literally sheared off the wall and shattered in the tub. The house was a new build in a high humidity zone. It was settling. The installer had forgotten that buildings are living, breathing structures that move. He had packed the top joint with hard grout instead of a movement-rated sealant. I spent three days grinding down cured thin-set just to fix a mistake that could have been avoided with a simple gap. My hands still smell like the WD-40 I use to clean my trowels, and my lungs are full of the dust of someone else’s failure. Tiling to the ceiling is a structural commitment, not just a style choice. If you do not account for the physics of your home, gravity and shifting foundations will eventually win the war against your vanity.
The hidden danger of vertical weight loads
Tiling to the ceiling increases the total dead load on your wall studs and floor joists by hundreds of pounds. This added mass can cause deflection in the subfloor, leading to cracked grout lines and loose tiles at the base. Most residential walls are built for drywall, not the heavy burden of full height stone or thick porcelain. When you stack tile ten feet high, the pressure on the bottom course is immense. This is especially true if you are using showers that wow modern designs for 2025 which often feature large format pieces. These slabs are beautiful but heavy. The bond between the tile and the substrate must be perfect. If the wall flexes even a fraction of an inch under the weight, the bond breaks. This is not a matter of if, but when. I have seen 12 by 24 inch tiles pop off like bottle caps because the installer didn’t use a high polymer thin-set rated for heavy vertical loads. The chemistry of the adhesive is the only thing fighting gravity. You need a mortar with high sag resistance, often labeled as LHT (Large Heavy Tile) mortar. Without it, the tiles will slowly slide down the wall during the curing process, even if it is only by a millimeter. That tiny movement creates a void in the thin-set. That void becomes a failure point.
“A floor is only as good as the subfloor beneath it; deflection is the enemy of every joint.” – Master Flooring Axiom
The physics of structural deflection and movement joints
Structural deflection is the bending of a material under a load, and every ceiling and floor experiences it. In a bathroom, the ceiling is often connected to the roof trusses or the floor joists of the room above. These elements move with wind, snow loads, and even the simple act of someone walking across the upstairs hallway. If your tile is jammed tight against the ceiling, that movement has nowhere to go. It travels straight into the tile. This results in the grout at the top cracking or, worse, the tile itself fracturing. You must leave a movement joint. This is a 1/8 inch or 1/4 inch gap at the very top that is filled with 100 percent silicone sealant rather than cementitious grout. The silicone acts as a shock absorber. It allows the house to move while the tile stays still. I see guys skip this all the time because they want that clean look. It is a rookie move. The same applies to the corners of the shower. Every change of plane requires a flexible joint. If you use grout in a corner where two tiled walls meet, it will crack within a year. This is the primary reason for grout restoration secrets for long lasting results. You cannot fix physics with more grout. You fix it with the right materials.
Molecular bonding and the chemistry of thin-set
Modern thin-set is a complex cocktail of Portland cement, sand, and water-retention agents mixed with liquid polymers. These polymers, such as ethylene-vinyl acetate, create a bridge between the tile and the substrate. When you tile to the ceiling, the shear stress on these polymer chains is constant. The adhesive must withstand the downward pull of gravity while also resisting the lateral forces of the house shifting. If you are tiling over a waterproof membrane, the bond is even more sensitive. You need a mortar that is chemically compatible with the membrane. Many people think they can just buy a bag of the cheapest stuff at the big box store. That is how you end up with a pile of broken ceramic on your floor. High quality mortars have a higher concentration of polymers which increases their tensile strength. This allows them to absorb some of the vibration and movement of the wall. I always tell people that the tile is the suit, but the thin-set is the skeleton. If the skeleton is weak, the suit falls off. This is a non-negotiable fact of masonry. We are dealing with microscopic interactions at the interface of the tile backer and the adhesive. If that interface is contaminated with dust or if the mortar is mixed with too much water, the chemical bond fails. It looks fine for a month, then it starts to sound hollow when you tap it. That hollow sound is the sound of your money disappearing.
| Substrate Type | Max Tile Weight (psf) | Adhesive Requirement | Deflection Limit |
|---|---|---|---|
| Drywall (Greenboard) | 5 lbs | ANSI A118.1 | L/360 |
| Cement Backer Board | 15 lbs | ANSI A118.4 | L/360 |
| Extruded Foam Board | 20 lbs | ANSI A118.15 | L/720 |
| Concrete Masonry | Unlimited | ANSI A118.4 | L/360 |
The mistake of ignoring the moisture vapor curve
Tiling all the way to the ceiling creates a vapor barrier that can trap moisture behind the wall if not properly vented. In a high steam environment like a shower, moisture penetrates the grout lines. This is a natural process called capillary action. If the tile goes to the ceiling, and the ceiling itself is also tiled or sealed tight, the moisture has no escape route. Over time, this leads to the degradation of the wall studs. It also fuels the growth of mold. I have ripped out walls where the studs were so soft you could poke a finger through them. This happened because the moisture was trapped behind the tile with no way to evaporate. Using tile cleaning tips for a sparkling bathroom in 2025 won’t help if the rot is inside the wall. This is why I advocate for a small gap or a breathable paint at the very top. You also need a high performance ventilation fan that is rated for the square footage of the room. Without proper airflow, the ceiling becomes a condensation point. Water droplets will sit on the top edge of your tile and seep into the joint. If that joint is not 100 percent silicone, you are inviting disaster into your home. The chemistry of mold is simple. It needs moisture, warmth, and organic material. If you give it a damp wall cavity, it will thrive.
The visual weight and the baseboard transition
From an architectural standpoint, tiling to the ceiling can make a small bathroom feel like a vertical tunnel. It closes in the space. Many designers suggest it to make the room look taller, but it often has the opposite effect. It emphasizes the boundaries of the room. If the ceiling is not perfectly level, tiling to the top will highlight the slope. You will have a full tile on one side and a sliver of a tile on the other. It looks terrible. A better approach is to stop the tile a few inches short of the ceiling or use a decorative border. This allows you to hide any inconsistencies in the architecture. It also provides a clean transition for baseboards makeover ideas to elevate your space. When you have tile meeting the floor and the ceiling, you have multiple hard surfaces fighting each other. It is better to have a break. In some cases, people try to use chic baseboard designs that transform rooms in 2025 as a crown molding substitute, which can work if the expansion gaps are handled correctly. But usually, the best look is a clean, painted strip of wall at the top. It provides a visual breather for the eyes.
- Check the level of the ceiling before starting the first row of tile.
- Ensure the wall studs are spaced 16 inches on center or less for heavy tile.
- Apply a liquid waterproofing membrane to the substrate to prevent moisture wicking.
- Select a polymer-modified thin-set that meets ANSI A118.15 standards.
- Leave a 1/8 inch gap at all internal corners and at the ceiling line.
- Use color-matched 100 percent silicone sealant for all movement joints.
- Back-butter large format tiles to ensure 95 percent coverage in wet areas.
Maintenance of high altitude grout lines
Grout at the ceiling level is harder to clean and more prone to cracking because of the rising heat and steam. Hot air rises. In a shower, the highest concentration of steam hits the top three rows of tile. This constant thermal expansion and contraction puts a strain on the grout. Over time, the grout becomes brittle. If you are struggling with old installations, you might need to know how to refresh grout without replacing it. But for new installs, the secret is using a high quality epoxy or high performance cementitious grout that has been treated with a sealer. Standard grout is porous. It is like a sponge. It will soak up the oils from the steam and the soaps. Then the mold starts. Keeping the ceiling line clean is a chore most homeowners ignore. Who wants to get on a ladder every week to scrub the grout? This is why stopping the tile lower is often the smarter choice for long term maintenance. If you must tile to the top, make sure you are using eco friendly tile solutions for sustainable homes in 2025 that include antimicrobial properties in the glaze. It will save you a lot of headache in five years.
“Movement joints are not optional; they are the insurance policy for your ceramic investment.” – TCNA Handbook logic
Regional considerations for tile installation
The climate of your region dictates how much your house will move and how your tile will react. In a place like Houston, the humidity is a constant factor. The wood framing in your walls will expand and contract significantly as the seasons change. If you tile to the ceiling there, you better have those movement joints perfectly executed. In a dry climate like Phoenix, the wood can shrink so much that it pulls the wall away from the ceiling joists. This creates a gap that can snap the top row of tiles. I have worked in both environments. The rules of physics do not change, but the intensity of the movement does. You have to understand the local building codes and the moisture vapor transmission rates of your specific area. In coastal regions, the salt air can even affect the curing process of some adhesives. It is a complex game of chemistry and environment. Most people just see a pretty tile. I see a structural system that is under constant attack from the atmosphere. Do not underestimate the power of the environment. If you ignore the regional reality, your beautiful ceiling height tile will be on the floor in a few seasons. If you have issues with your current setup, you can always contact us for a professional evaluation of your substrate. We also have a privacy policy that protects your data when you reach out for advice. Tiling is an art, but it is built on a foundation of cold, hard science. Don’t let a aesthetic trend ruin the structural integrity of your bathroom walls. Stop, think, and measure before you glue that final row to the top.