
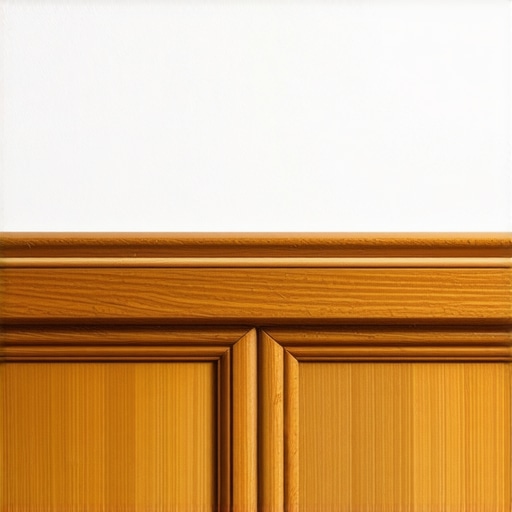
I have spent twenty-five years on my knees with a moisture meter in one hand and a level in the other. I smell like WD-40 and oak dust most days. Most guys skip the leveling compound. They think the underlayment will hide the dip. It won’t. I spent three days grinding concrete on a job last month just so the floor wouldn’t click like a castanet. That job taught me that if the subfloor is not flat to within 3/16 of an inch over 10 feet, your baseboards will never sit right. When the floor moves, the caulk cracks. If the floor clicks, the seal breaks. Baseboards are not just trim. They are the structural lid on the expansion gap that keeps your entire floor from failing during a humidity spike.
The expansion gap requirement for structural integrity
Expansion gaps are the necessary 1/4 to 1/2 inch spaces left between the edge of a hardwood or LVP floor and the wall to allow for thermal expansion and seasonal humidity shifts. Without these gaps, the floor will buckle, cup, or snap locking joints as the material grows. This gap is the reason we use baseboards. You are covering a hole that must exist for the floor to survive. Most amateurs try to jam the baseboard tight against the floor or fill the gap with hard putty. That is a recipe for disaster. The connection between the wall and the floor is a living, moving joint. You need a method that accounts for this micro-movement while maintaining a sharp, professional aesthetic. Using baseboards makeover ideas to elevate your space starts with understanding that the floor is a moving machine, not a static painting.
“A floor is only as good as the subfloor beneath it; deflection is the enemy of every joint.” – Master Flooring Axiom
The physics of the perimeter gap
Perimeter expansion gaps act as a safety valve for organic flooring materials like solid oak or engineered wood which respond to hydroscopic pressure. When the air gets heavy with moisture, wood cells swell. If they hit a wall, the energy goes upward. This creates crowning or peaking. I have seen solid 3/4 inch walnut rip the drywall right off the studs because the installer forgot to leave a gap. The baseboard sits over this gap, but it should not be pinned to the floor. It should be nailed to the wall studs. This allows the floor to slide underneath the baseboard like a piston in a cylinder. When you caulk the top of that baseboard where it meets the wall, you are creating a secondary seal that must be flexible enough to handle the slight vibration and shifting of the house frame. This is why the tape method is not about vanity. It is about creating a precise mechanical bond.
The tape technique that eliminates smears
Painter’s tape serves as a temporary mechanical dam that defines the caulk bead width and prevents the siliconized acrylic latex from migrating into the texture of the drywall or the grain of the wood. Most people just run a bead and swipe it with a wet finger. That leaves a thin, hazy film of caulk on the wall that attracts dust and eventually turns yellow. By applying two parallel lines of tape, one on the wall 1/8 inch above the baseboard and one on the top edge of the trim itself, you create a channel. You fill that channel, tool it flat, and pull the tape while the caulk is still wet. This leaves a thick, consistent body of material that can stretch without tearing. It is the difference between a floor that looks like it was hacked together and one that looks like it was engineered by a pro. For those looking for a chic baseboard designs that transform rooms in 2025, this crisp line is the non-negotiable standard.
Molecular properties of modern sealants
High-performance caulk utilizes long-chain polymers and elastomeric resins to provide a balance between adhesion and elongation. When you select a tube at the store, ignore the cheap stuff. You want something with a 35 percent or higher movement capability. Cheap caulk is filled with calcium carbonate, which is basically chalk. It dries brittle. When the house settles in the winter, that chalk snaps. Professional grade siliconized acrylics contain internal plasticizers that stay oily and flexible for decades. This is vital when you are dealing with transitions to wet areas. If you are maintaining a bathroom, you might also look into tile cleaning tips for a sparkling bathroom in 2025 to ensure the substrate is clean before the tape ever touches the surface. Dirt is the enemy of adhesion.
Comparison of flooring sealant materials
| Material Type | Elasticity Rating | Dry Time | Ideal Gap Width |
|---|---|---|---|
| Siliconized Acrylic | High | 4 to 6 hours | 1/8 inch |
| Pure Silicone | Maximum | 24 hours | 1/4 inch |
| Polyurethane | Extreme | 48 hours | 1/2 inch |
The geometry of the bead profile
Bead geometry refers to the cross-sectional shape of the caulk once it has been tooled into the corner between the wall and the baseboard. A concave bead, which is what you get when you use a finger, is actually weaker because the center is thin. A flat, triangular bead created by the tape method provides more mass. This mass is what allows the sealant to dissipate the energy of movement. Think of a rubber band. A thick one is harder to snap than a thin one. In areas like showers that wow modern designs for 2025, this geometry is even more important because the caulk is also fighting water pressure and soap scum. If the bead is too thin, it will peel away from the tile in a matter of months.
“Every square foot of tile or wood is an island; if the joints are rigid, the island will crack.” – TCNA Technical Manual
Step by step checklist for the tape secret
- Vacuum the gap between the wall and baseboard to remove all drywall dust and sawdust.
- Wipe the top of the baseboard with a microfiber cloth and denatured alcohol to remove oils.
- Apply the wall tape line exactly 1/16 to 1/8 inch above the baseboard edge.
- Apply the trim tape line 1/16 inch down from the top edge of the baseboard.
- Cut the caulk nozzle at a 45 degree angle to a size that matches your gap.
- Run a continuous bead with steady pressure. Do not stop and start.
- Smooth the bead with a plastic caulking tool or a gloved finger dipped in soapy water.
- Pull the tape immediately at a 45 degree angle away from the bead.
- Do not touch the bead for at least six hours.
Humidity and regional climate factors
Regional climate conditions dictate the acclimation period and the necessary caulk flexibility required for a stable installation. In the swampy humidity of Houston, wood is at its maximum size during the summer. If you install and caulk then, the gaps will open up massive in the winter. In the dry heat of Phoenix, the wood is shrunken. If you caulk a tight gap in the desert, the wood will expand in the monsoon season and crush the caulk bead until it squishes out like toothpaste. You have to understand the equilibrium moisture content of your specific city. I always tell clients that the floor they see in July is not the floor they will see in January. This is why we use the tape method to ensure the bead is beefy enough to survive the stretch. Proper grout restoration secrets for long-lasting results often follow the same logic. You are managing the physics of a building that is constantly breathing.
The danger of over-insulating the subfloor
While most people want the thickest underlayment, too much cushion actually causes the locking mechanisms on LVP to snap under pressure. This is a contrarian point that sales guys hate. They want to sell you the 10mm gold-plated foam. But if that foam has too much give, the floor bounces. When the floor bounces, the baseboard stays still. This vertical movement shears the caulk right off the wall. I have seen beautiful homes where the caulk looked like shredded wheat because the floor was too bouncy. You want a high-density underlayment with a high compression strength. This keeps the floor stable and the baseboard seal intact. If your floor is already failing, you might need to know how to refresh grout without replacing it or how to stabilize the subfloor before you worry about the paint. It all starts at the bottom.
Why your subfloor is lying to you
Concrete slabs look flat, but they are full of waves and dips that the naked eye cannot see. If you do not use a straightedge, you are guessing. When the baseboard follows a dip in the floor, it creates a massive gap at the top that is too big to caulk properly. I have seen guys try to fill a 1/2 inch gap with caulk. It looks like a slug crawling along the wall. The tape secret only works if the gap is consistent. If the subfloor is a mess, the baseboard will be a mess. You have to grind the high spots and fill the low spots. I once worked a job where the slab was so out of level I had to use three bags of self-leveling underlayment just in the hallway. If I had not, the homeowner would have blamed the caulk when it inevitably cracked. If you are doing a full renovation, including showers with a style trendy ideas for small bathrooms, ensure the plumber and the floor guy are on the same page regarding the subfloor elevation. A level floor is the foundation of every high-end finish. If you have questions about your specific project, you can always contact us for technical guidance.