
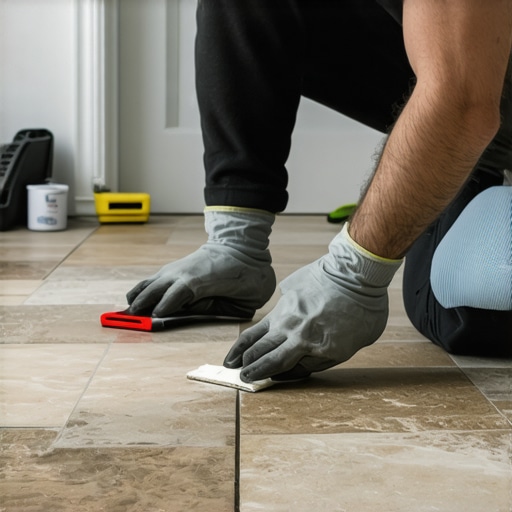
Most guys skip the leveling compound. They think the underlayment will hide the dip. It won’t. I spent three days grinding concrete on a job last month just so the floor wouldn’t click like a castanet. That same shortcut mentality kills natural stone jobs before they even start. If you don’t seal that stone before the grout hits it, you have essentially tattooed your floor with permanent stains. Natural stone like marble, travertine, and slate is not a solid mass. It is a collection of microscopic straws. These capillaries are hungry. When you spread wet grout across an unsealed stone, those straws suck the pigment and polymers deep into the heart of the tile. You will never get it out. I have seen fifteen thousand dollar floors ruined in an afternoon because someone wanted to save twenty minutes on a sealer coat.
The invisible pores that ruin your finish
Sealing natural stone tiles before grouting requires applying a high quality penetrating sealer or grout release to the tile surface to prevent pigment absorption and grout haze. This process ensures that the porous surface of the stone does not permanently soak up the dyes and binders found in the grout mixture. When we talk about porosity, we are looking at the volume of open space relative to the total volume of the stone. A piece of Carrara marble might look smooth, but its crystalline structure is full of voids. If you are working in showers, this becomes even more critical due to constant water exposure. You can see some of these principles in action when designing showers that wow modern designs for 2025 where material integrity is the priority.
“A floor is only as good as the subfloor beneath it; deflection is the enemy of every joint.” – Master Flooring Axiom
The physics of grout haze are simple. Grout is a mixture of cement, sand, and colorant. When water is added, it becomes a transport mechanism. If the stone is not sealed, the water carries the smallest particles of colorant into the stone pores. Once the water evaporates, the colorant is locked inside. This is why a white marble floor can end up looking gray or muddy after using a charcoal grout. It is not just on the surface. It is inside the stone. To prevent this, you need a penetrating sealer. These sealers use a solvent or water carrier to pull fluoropolymers into the stone. Once the carrier evaporates, the polymers remain, lining the pores and creating a high surface tension that repels liquids.
Why your subfloor is lying to you
Subfloor preparation is the foundation of every successful stone installation because any movement or deflection will crack the rigid stone and compromise the sealer bond. You must ensure the subfloor meets the L/720 deflection standard for natural stone. While ceramic tile can handle L/360, stone is brittle. It does not bend. It breaks. I always check for dips with a ten foot straightedge. If I find a low spot, I do not reach for the thin-set to fill it. I use a high strength self leveling underlayment. If the subfloor is not flat to within 1/8 inch over ten feet, your stone is at risk. This flatness is also vital for the installation of chic baseboard designs that transform rooms in 2025, as a wavy floor creates ugly gaps at the wall base.
| Stone Type | Porosity Level | Sealer Type Recommended | Acclimation Time |
|---|---|---|---|
| Travertine | Very High | Solvent-based Penetrating | 48 Hours |
| Marble | Medium | Solvent or Water-based | 24 Hours |
| Slate | High | Color Enhancer | 24 Hours |
| Granite | Low | Water-based Penetrating | 24 Hours |
Solvent based sealers generally have smaller molecular structures than water based ones. This allows them to penetrate deeper into tight grained stones like granite. However, in poorly ventilated showers, the fumes can be a nightmare. Water based sealers have improved significantly and are often safer for residential use. The trick is the application. You do not just spray it and walk away. You have to flood the surface. Let it sit for ten minutes, but do not let it dry. If it starts to dry, add more. After the stone has taken its fill, you must buff away every drop of excess. If you leave a puddle, it will dry into a sticky, white film that requires a diamond pad to remove. This is the difference between a pro job and a disaster.
The chemical dance of penetrating sealers
Applying a sealer before grouting acts as a protective shield that simplifies the cleaning process and preserves the natural color of the stone. This is often referred to as a grout release. For stones with high texture like tumbled travertine or cleft slate, a specific grout release product might be better than a standard sealer. Grout release is designed to be easily washed off during the final grout cleanup, taking the excess grout residue with it. If you are struggling with old installations, you might look into grout restoration secrets for long lasting results to fix previous mistakes. Here is your pre-grout checklist:
- Vacuum every joint and crevice to remove construction dust and debris.
- Wipe the stone surface with a damp microfiber cloth to remove fine dust.
- Ensure the stone is bone dry before applying sealer; trapped moisture causes hazing.
- Apply the sealer using a low pressure sprayer or a lamb’s wool applicator.
- Wait at least 24 hours after sealing before starting the grouting process.
One contrarian point I always tell my apprentices is that more protection is not always better. While most people want the thickest layer possible, over saturating a stone can lead to breathability issues. Stone needs to breathe. If you trap moisture under a thick, non breathable topical sealer, the minerals in the stone can react and cause efflorescence, which is that white, crusty salt that grows on the surface. Always use a breathable, penetrating impregnator for natural stone. This allows water vapor to escape while preventing liquid water and oils from entering.
The 1/8 inch that ruins everything
The precision of the grout joint and the cleanliness of the tile edges determine the longevity of the sealer and the overall structural integrity of the floor. If your joints are too tight, the grout cannot properly fill the void, leading to pinholes. These pinholes are magnets for dirt and moisture. When we talk about tile cleaning, keeping those joints sealed is half the battle. You can find more on maintenance at tile cleaning tips for a sparkling bathroom in 2025. If you are installing in a high humidity region like the Gulf Coast, your drying times for sealers will double. Don’t rush it. If the sealer is still tacky, the grout will bond to it and create a mess that no amount of scrubbing will fix.
“Natural stone is a living material; treat it with the respect its geological history demands.” – Master Flooring Axiom
After the grout has cured for several days, you must apply a second coat of sealer. This time, you are sealing the grout itself. This creates a continuous hydrophobic barrier across the entire surface. If you skip this, the grout will act like a wick, drawing dirty mop water into the edges of your stone tiles. This causes a dark framing effect known as picture framing. It is permanent. It looks like the edges of your tiles are wet even when they are dry. The only way to prevent it is a rigorous sealing schedule before and after grouting. For those interested in vertical transitions, check out baseboards makeover ideas to elevate your space to see how to finish the room once the floor is cured. Proper sealing is the only way to keep your natural stone looking like it did in the showroom.