The hidden rot under your feet
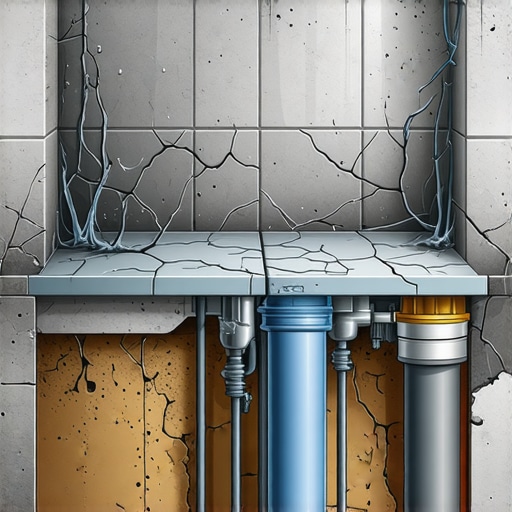
Most guys skip the leveling compound. They think the underlayment will hide the dip. It won’t. I spent three days grinding concrete on a job last month just so the floor wouldn’t click like a castanet, and that was just a dry bedroom. In a bathroom, the stakes are ten times higher. If your shower subfloor is damp, it is not just a nuisance. It is a slow motion structural disaster that will eventually eat your floor joists and invite mold to live in your walls. A wet subfloor usually points to a failure in the waterproofing membrane or the transition between the tile and the drain. When water gets trapped under the tile, it has nowhere to go but down into the plywood or concrete. This saturates the material, leading to rot and expensive repairs.
The science of moisture migration in bathrooms
A damp subfloor happens when the hydrostatic pressure of standing water finds a microscopic breach in the pan liner or the topical waterproofing system. This often occurs because the installer failed to create a proper pre-slope under the liner, which means water sits in the mortar bed instead of moving toward the weep holes in the drain assembly. When water sits, it moves through capillary action. It travels upward and outward, eventually reaching the perimeter of the shower. Once it hits the wall plate, it begins to wick into the studs and the subfloor outside the shower footprint. This is why you might see peeling paint on the other side of the bathroom wall or darkened grout lines that never seem to dry out. It is a relentless movement of molecules from wet to dry.
“A floor is only as good as the subfloor beneath it; deflection is the enemy of every joint.” – Master Flooring Axiom
Why your baseboards are the first red flag
When your subfloor is holding moisture, your baseboards will be the first messengers of the coming disaster because they sit at the lowest point of the wall. Wood and MDF baseboards are incredibly thirsty. They will pull water from a damp subfloor via capillary action, causing the bottom edge to swell, the paint to crack, or the caulk line to pull away from the wall. If you notice your baseboards are discolored or feel soft to the touch, the leak has already moved beyond the shower pan and is actively rotting the structural perimeter. This is a common sight in showers that wow modern designs for 2025 when the waterproofing isn’t carried high enough or the baseboard transition isn’t sealed correctly. Check the corners. If the miter joints are opening up at the floor level, you have a moisture problem.
The chemistry of grout and thin-set failure
Grout is fundamentally porous and acts like a mineral sponge unless it is a high-performance epoxy resin or has been meticulously sealed with a solvent-based penetrator. Standard cementitious grout allows water to pass through to the setting bed. If the thin-set used was a cheap, unmodified variety, it can lose its bond when constantly submerged. Modern installations require polymer-modified thin-set which provides a chemical bond that resists moisture degradation. However, even the best adhesive cannot save a floor where water is trapped between the tile and a non-sloped membrane. This creates a stagnant pool of alkaline water that breaks down the grout from the inside out. You can learn about grout restoration secrets for long lasting results but remember that no topical fix can cure a saturated subfloor.
The 1/8 inch that ruins everything
In the world of professional flooring, 1/8 of an inch is a massive distance, and if your subfloor has a deflection of more than that over 10 feet, your tile will crack. Most homeowners think the tile is the structural layer. It is not. The tile is the decorative skin. The subfloor is the skeleton. If the skeleton moves, the skin tears. When the skin tears, water enters the subfloor. I have seen countless showers fail because the installer did not account for the weight of the mortar bed and the water. The floor joists flexed, the grout lines cracked, and the moisture moved into the subfloor within weeks of the first shower. This is why checking for levelness is the most boring but vital part of the job. You can try to how to refresh grout without replacing it but if the subfloor is moving, those cracks will return by next Tuesday.
| Waterproofing Method | Permeability Rating | Application Difficulty | Average Lifespan |
|---|---|---|---|
| CPE/PVC Pan Liner | Low | High | 15-20 Years |
| Liquid Membrane | Very Low | Medium | 25+ Years |
| Sheet Membrane | Lowest | Medium | Lifetime |
| Hot Mop Asphalt | Medium | Professional Only | 10-15 Years |
The physics of the weep hole blockage
Every three-piece shower drain has small channels called weep holes that allow water that has seeped through the grout to escape into the plumbing. If the installer was sloppy and covered these holes with thin-set or mortar, the water becomes trapped. It builds up in the mud bed like a swamp. Eventually, the water level rises high enough to find the seams in the subfloor. You will notice a musty smell that never goes away, even if you follow tile cleaning tips for a sparkling bathroom in 2025. The smell is the scent of anaerobic bacteria growing in the dark, wet space beneath your feet. You must use pea gravel or a specialized weep hole protector to keep these channels open.
“Tile is never waterproof; it is the system beneath the tile that protects the structure.” – TCNA Handbook Principle
How to perform a moisture audit on your bathroom
To identify a leak before it destroys your home, you need to be a detective and look for subtle changes in material texture and color. Start by checking the perimeter of the shower with a non-invasive moisture meter. If the readings are over 15 percent in the subfloor or wall plates, you have an active leak. Look for darkening of the grout lines that persists hours after the shower has been used. This indicates the setting bed is saturated. Check the baseboards for swelling. If you have a crawlspace, go under the house with a flashlight. Look for water stains on the plywood or drips coming from the drain assembly.
- Check the drain flange for visible gaps between the metal and the tile.
- Inspect the internal corners of the shower for cracked grout or caulk.
- Look for efflorescence which is a white salty powder on the grout lines.
- Verify that the baseboards are not soft or discolored at the floor line.
- Use a moisture meter to check the walls up to 12 inches high.
The regional climate impact on subfloor health
In humid regions, a damp subfloor will never dry on its own, leading to rapid fungal growth and structural softening. In drier climates, the moisture might evaporate fast enough to hide the problem for a while, but it will still leave behind mineral deposits that eventually crack your tiles. Regardless of where you live, the subfloor must be kept dry to maintain its structural integrity. If you find a leak, do not wait. The longer water sits, the deeper it travels into the framing of your home. If you are planning a renovation, look into eco friendly tile solutions for sustainable homes in 2025 that prioritize long term durability over cheap, fast installation. A dry subfloor is a happy subfloor. It is the only way to ensure your bathroom lasts for decades instead of years.
Comments
3 responses to “The Real Reason Your Shower Subfloor Is Damp and How to Spot the Leak”
This article really hits home about the importance of proper waterproofing in showers. I recently had a minor leak that I ignored, thinking it was just a small problem with the grout. Turns out, it was the first sign of a bigger issue—my subfloor was already compromised. Since reading this, I realize how crucial it is to check the weep holes and ensure the membrane system is correctly installed. I especially appreciated the tip about inspecting the baseboards for early signs of water damage; I’ve noticed some swelling there but never connected it to the shower leak. My question is, what’s the most effective way to detect moisture behind wall tiles without tearing everything apart? Are there reliable moisture meters or imaging techniques that homeowners can use for early diagnosis, or should we always call in professionals for a thorough inspection? Any advice would be appreciated because preventing the rotting and mold growth early seems vital for a long-lasting bathroom.
This is a very insightful post that really emphasizes the importance of catching moisture issues early, especially in showers where water is constantly involved. I’ve seen firsthand how small leaks, often unnoticed, can lead to major structural problems down the line. Your point about the baseboards acting as an early warning system resonates with me—I’ve had to replace baseboards twice due to unnoticed moisture intrusion. I also find that regular use of a moisture meter around the shower perimeter, especially checking behind tiles at the corners and grout lines, can help detect early signs of saturation before visible damage appears. Is anyone here using thermal imaging cameras for non-invasive inspections? I’ve heard they can be quite effective at locating hidden leaks within walls or under floors. For homeowners, what would you recommend as the best approach—professional testing or investing in some good-quality equipment for DIY inspections? I think combining both might be the most proactive way to prolong the life of our bathrooms, don’t you think?
This post sheds light on a critical aspect of bathroom maintenance that many homeowners overlook—the importance of properly diagnosing and addressing subfloor dampness early on. It’s eye-opening to realize how even a small overlooked detail, like an improperly sealed baseboard or a blocked weep hole, can escalate into serious structural problems and mold issues over time. I’ve personally experienced a situation where a slow leak wasn’t detected until the baseboards started warping, which then led me to investigate more thoroughly using a moisture meter. What’s interesting is how regional climate can significantly influence the risk; humid areas seem to make it even more challenging to keep the subfloor dry without proper ventilation. Does anyone have recommendations for affordable yet effective moisture detection tools that homeowners can use in their own inspections? I believe that being proactive with these inspections can save homeowners a lot of money and stress down the line, especially with the knowledge that early signs can be subtle yet telling.