
I spent three days grinding concrete on a job last month just so the floor wouldn’t click like a castanet. The homeowner was baffled. They had already paid another guy to lay the tile, but within two weeks, the grout was turning a swampy orange and the water was pooling in the back left corner like a miniature lake. This is the reality of modern flooring. People see a pretty surface in a magazine and forget that a shower is a mechanical drainage system first and a piece of art second. I have seen fifteen thousand dollar walnut floors cup like potato chips, but nothing beats the slow, expensive rot of a shower pan that was built flat. Most installers think they can fix a bad slope with a little extra thin-set under the tile. They are wrong. You cannot cheat the physics of water with a bag of modified mortar. If your subfloor or your mud bed is not pitched at a precise quarter inch per foot, your tile is effectively a bucket. Once the water gets trapped under that stone, it stays there. It breeds bacteria. It dissolves the bond of your adhesive. Eventually, it finds a way into your floor joists. This is not about aesthetics. This is about structural integrity and the chemistry of moisture management.
The geometric failure of the flat pan
Shower drainage fails when the pitch is less than one quarter inch per foot of run. A functional shower floor requires a consistent slope toward the drain to overcome the surface tension of water and the capillary action within the grout joints. If the subfloor is level rather than sloped, standing water becomes inevitable regardless of tile quality. The drain is the lowest point by design, yet installers often create birdbaths by failing to screed the mortar bed with mechanical precision.
When we talk about the mechanics of a shower, we are talking about the pre-slope. Many guys skip the pre-slope. They put the waterproof liner flat on the plywood or the slab and then build the slope on top of the liner. That is a recipe for a foul smelling bathroom. Water goes through the grout, through the mortar, hits the flat liner, and just sits there. It cannot get into the weep holes of the drain because there is no gravity to push it there. You need a slope under the liner and a slope on top of the liner. This is the standard set by the Tile Council of North America, yet it is ignored every single day by contractors looking to save four hours of labor. I have walked into hundreds of homes where the showers look beautiful but the air smells like a damp basement. That is the smell of a flat pan.
“A floor is only as good as the subfloor beneath it; deflection is the enemy of every joint.” – Master Flooring Axiom
Why your mud bed is lying to you
A mortar bed must be a high-compression mix of sand and Portland cement to maintain slope. If the installer uses a mix that is too wet, the mud bed will shrink and crack as it cures, creating hollow spots and dips. These imperfections disrupt the hydrostatic flow of water toward the waste line, leading to pooling and efflorescence. Proper screeding and tamping are the only ways to ensure the structural stability of the shower pan.
I prefer a dry pack mortar. It should have the consistency of wet beach sand. If you can squeeze a handful and it stays in a ball without dripping water, you have the right mix. This allows you to beat the mud into place, creating a dense, unyielding surface that won’t move when you walk on it. If your installer used a self-leveling compound or a sloppy thin-set bed, they have already lost the battle. The weight of the water and the person standing in the shower will cause the tile to shift. Over time, this movement breaks the seal of the grout, allowing even more water to infiltrate the system. It is a cycle of failure that ends with a sledgehammer and a dumpster. You have to respect the materials. You have to respect the cure times. If you rush a shower pan, you are just building a ticking time bomb behind your baseboards.
| Material Factor | Recommended Specification | Failure Result |
|---|---|---|
| Shower Slope Pitch | 1/4 inch per foot | Standing water and mold |
| Mortar Mix Ratio | 4:1 Sand to Cement | Cracking and subsidence |
| Cure Time | 24 to 72 hours | Adhesive bond failure |
| Membrane Type | Bonded Waterproofing | Substrate water damage |
The chemistry of the bonding agent
Polymer-modified thin-set provides the chemical bond necessary to keep tile attached to a sloped surface. Modern mortars use liquid polymers to increase flexural strength and water resistance. Without these additives, the constant thermal expansion and contraction of the shower floor would cause the bond to shear, resulting in loose tiles and leaking. Choosing the correct ANSI A118.11 mortar is mandatory for long-term durability.
I have seen guys use cheap, unmodified thin-set on a waterproof membrane. It will not stick. The membrane is non-porous, and the thin-set needs to dry by evaporation. If the water has nowhere to go, the thin-set stays wet for weeks. Then the homeowner walks in, the tile shifts, and the slope is ruined. You need to understand the molecular reality of what is happening under your feet. When you use a high-performance modified mortar, you are creating a chemical bridge between the tile and the pan. This is especially vital if you are using eco-friendly tile solutions which often have lower absorption rates. The less porous the tile, the harder the mortar has to work to hold onto it. If you don’t get 95 percent coverage on the back of that tile, you are leaving air pockets. Air pockets collect water. Water breeds the ghost in the expansion gap.
“The integrity of the waterproof envelope is non-negotiable; a single pinhole is a gateway to structural rot.” – TCNA Installation Handbook
The weep hole disaster
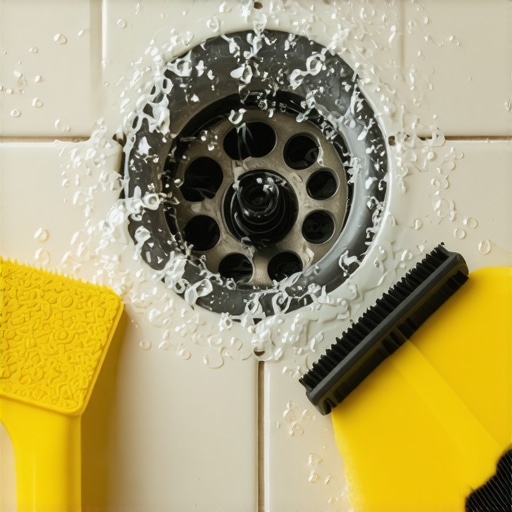
Blocked weep holes in a traditional three-piece drain prevent the secondary drainage of the mortar bed. When water permeates the grout, it must travel through the mud bed to the weep holes located at the base of the drain assembly. If these holes are clogged with mortar or debris, the water becomes trapped, leading to a saturated pan and foul odors. Proper protection of these holes with crushed stone or specialized spacers is a critical installation step.
This is the most common mistake in the industry. An installer finishes the pan, dumps the tile, and smears grout everywhere, never realizing they just plugged the lungs of the shower. If the pan cannot breathe, it dies. You will notice the bottom row of wall tiles starting to change color. That is the moisture wicking up from the saturated floor. It is gross, it is avoidable, and it is a sign of an amateur. You should always ask your installer how they plan to protect the weep holes. If they look at you with a blank stare, fire them on the spot. You can try tile cleaning tips to fix the surface, but you can’t clean the mold out of the center of a mud bed. Once it is in there, it is part of the house until you rip it out.
- Verify the pre-slope with a digital level before the liner is installed.
- Ensure the waterproofing membrane is integrated into the drain flange.
- Use a flood test to check for leaks and pooling before laying any tile.
- Inspect the grout density to ensure maximum water shedding.
- Check the expansion joints at the perimeter for proper silicone sealant.
Large format tile traps
Large tiles on a shower floor create geometric conflicts with the required slope. Because large format tiles cannot bend, they must be envelope cut to follow the pitch toward a central drain. Failure to properly miter these tiles results in lippage, where the edges of the tiles stick up, creating trip hazards and pooling points. For optimal drainage, tiles should be two inches square or smaller to naturally follow the contour of the pan.
If you want those big, beautiful 12×24 tiles in your shower, you better be using a linear drain. A linear drain allows for a single plane of slope, which is the only way to avoid the lippage nightmare. If you try to use large tiles with a traditional center drain, you are asking for trouble. The installer will have to cut the tiles diagonally from the corners of the drain to the corners of the room. It looks busy, it is hard to do right, and it often creates sharp edges. Most people are better off sticking to a mosaic. The extra grout lines actually provide better slip resistance and allow the floor to follow the curve of the slope perfectly. It is about choosing the right tool for the job. Don’t let a designer talk you into a floor that doesn’t work. Gravity does not care about your design aesthetic. It only cares about the path of least resistance. Keep your grout lines clean and your slope steep. That is the secret to a shower that lasts thirty years. If you need more help, you can always contact us for a professional consultation on your next project. Just remember, the 1/8 inch you ignore today is the leak you pay for tomorrow.