
Most guys skip the leveling compound. They think the underlayment will hide the dip. It won’t. I spent three days grinding concrete on a job last month just so the floor wouldn’t click like a castanet. That job involved forty eight inch porcelain planks that cost twenty dollars a square foot. If you miss a low spot by even a sixteenth of an inch, those planks act like a see-saw. You step on one end, the other end pops up, and the grout snaps. It is a mess that smells like failure and wasted money. I had to use a diamond cup wheel on a seven inch grinder to take down a high ridge in the center of the room. The dust was thick enough to chew, but it was the only way to get the subfloor within the tolerance required by the TCNA.
The subfloor is lying to you
Subfloor flatness is the most critical variable when installing large format tiles. Any deviation greater than one eighth inch over ten feet will cause lippage and structural failure. You must use a straightedge to identify low spots and high points before applying thin-set mortar or underlayment. Most homeowners assume the wood or concrete beneath their feet is true. It never is. Wood subfloors flex, and concrete slabs often have humps near the control joints. If you try to bridge a half inch dip with extra mortar, you are creating a shrinkage point. As the water evaporates from the thin-set, the mortar pulls the tile down into the dip. This creates an uneven surface that will catch your toes and break your vacuum cleaner wheels. I have seen guys try to use cardboard or extra layers of mesh to fill gaps. That is a crime against the trade. You use self-leveling underlayment or you don’t do the job. There is no middle ground when the tile is larger than fifteen inches on any one side. The physics of leverage dictates that the longer the tile, the more it will amplify any imperfection in the plane below it.
“A floor is only as good as the subfloor beneath it; deflection is the enemy of every joint.” – Master Flooring Axiom
The physics of the mechanical bond
Large format tiles require polymer modified mortar that meets ANSI A118.15 standards to ensure a permanent bond. These adhesives contain high performance polymers that provide flexibility and shear strength. Without these additives, the heavy tile will debond due to thermal expansion or vibration. You need to understand the chemistry here. Portland cement forms crystals as it hydrates. These crystals lock into the microscopic pores of the tile and the subfloor. But porcelain is dense. It barely has any pores. That is why you need the polymers. They act like a chemical bridge. They sticky-tack themselves to the back of the tile while the cement does the heavy lifting on the concrete side. If you use a cheap, unmodified mortar on a large tile, you are basically just setting it in mud. It might stay for a year, but the first time the house settles or the temperature swings, that bond will snap like a dry twig. You will hear a hollow sound when you walk across it. That is the sound of a failed installation. [image_placeholder_1]
The strike that saves the joint
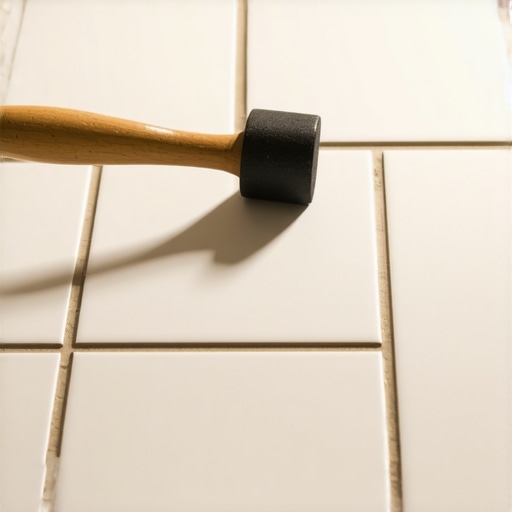
The rubber mallet is the mechanical tool used to achieve mortar ridge collapse during tile installation. By applying a percussive force, you flatten the trowel ridges into a solid bed of adhesive. This process removes air voids that lead to cracked tiles and hollow spots. You don’t just hit the tile anywhere. You start from the center and move toward the edges. This pushes the air out instead of trapping it in the middle. Think of it like putting a screen protector on a phone. If you trap a bubble, you have a weak spot. On a floor, that bubble is a pocket of air where the tile is unsupported. If a heavy chair leg lands on that spot, the tile will crack. The mallet strike also ensures that the tile is fully embedded into the mortar. I like to use a white rubber mallet to avoid leaving black scuff marks on light colored porcelain or natural stone. It is a small detail, but it saves an hour of cleaning later. You are looking for that specific sound change. A dull thud means the tile is seated. A higher pitch means there is still an air gap.
The ghost in the expansion gap
Expansion joints are essential components of a tile assembly that prevent buckling and tenting. According to TCNA EJ171, you must leave a perimeter gap of at least one quarter inch at all vertical surfaces. This space allows the floor system to expand and contract without compressing the tile. I have walked into houses where the tile was pushing so hard against the drywall that it actually lifted the baseboards off the floor. People think grout is flexible. It is not. Grout is just colored cement. It has zero movement capacity. If you grout the tile all the way to the wall, you have created a rigid sheet. When the sun hits that floor through a window, the tiles expand. With nowhere to go, they push against each other until the weakest link gives way. Usually, that means the tile pops off the floor in a V-shape. This is called tenting. To avoid this, you leave the gap and cover it with baseboards. If you are looking for ways to finish these edges, check out baseboards makeover ideas to elevate your space. A good baseboard transition is the difference between a pro job and a DIY disaster.
| Tile Size | Required Flatness | Mortar Type | Max Lippage |
|---|---|---|---|
| 12×12 Ceramic | 1/4″ per 10′ | Standard Modified | 1/32″ |
| 24×24 Porcelain | 1/8″ per 10′ | ANSI A118.15 Large Heavy Tile | 1/32″ |
| 48×48 Porcelain | 1/8″ per 10′ | High Polymer S1 Deformable | 1/64″ |
| Wood Plank Tile | 1/8″ per 10′ | Non-Sag Medium Bed | 1/32″ |
Managing the weight of showers and heavy glass
Shower floors and wet areas require slope to drain and hundred percent mortar coverage to prevent water pooling. The weight of glass enclosures can also cause stress fractures in large tiles if the underlying bed is hollow. You have to be careful with showers. If you are doing a modern bathroom, you might want to look at showers that wow modern designs for 2025 for inspiration. But don’t let the looks fool you. Beneath that pretty tile is a complex waterproofing system. I always double butter the tiles in a shower. That means I put mortar on the floor and a thin layer on the back of the tile itself. This ensures there are no paths for water to travel under the tile. If water gets under there and sits, it will start to smell like a swamp. You will see the grout turning dark and staying dark long after the shower is dry. That is a sign of saturated thin-set. Eventually, it will eat through the adhesive and the tiles will start wiggling.
“95 percent coverage is mandatory in wet areas; anything less is an invitation for mold and bond failure.” – TCNA Handbook
Grout restoration and long term health
Grout maintenance is the primary factor in the longevity of a tile floor. Using high quality sealers or epoxy grouts prevents staining and moisture penetration into the adhesive layer. Most people ignore their grout until it turns black. By then, the dirt has deeply penetrated the cement structure. You can learn about grout restoration secrets for long lasting results to fix old installations. If your grout is just slightly dingy, you might want to know how to refresh grout without replacing it. The key is to never use harsh acids. Acids eat the lime in the cement and make the grout more porous. It becomes a vicious cycle. The more you clean with bad chemicals, the faster it gets dirty. I recommend a neutral pH cleaner and a soft brush. If you treat the grout right, it will hold the tiles in place for decades. If you don’t, you will be calling me in five years to rip the whole thing out and start over.
The Master Installer Checklist
- Check subfloor for flatness using a 10-foot straightedge.
- Ensure moisture levels in concrete are below 75 percent RH.
- Use a 1/2 inch by 1/2 inch square notch trowel for tiles over 15 inches.
- Back-butter every single tile to ensure 95 percent coverage.
- Use a leveling system with wedges to prevent lippage between planks.
- Leave a 1/4 inch expansion gap at all perimeter walls and cabinets.
- Wait at least 24 hours before walking on or grouting the new surface.
The 1/8 inch that ruins everything
Lippage occurs when the edge of one tile is higher than the adjacent tile, creating a tripping hazard. This defect is usually caused by subfloor irregularities or improper troweling techniques. If you have a one eighth inch lip, it is not just ugly. It is a structural weak point. Every time a heavy object rolls over that lip, it hits the edge with a massive amount of force. This is called impact loading. Over time, that force will shatter the edge of the tile or break the bond with the floor. You cannot fix lippage once the mortar is dry. You have to get it right while the mud is wet. That is why the rubber mallet is so important. You use it to tap the high side down until it is flush. I use my fingers to feel the joints. Your eyes can play tricks on you with shadows, but your fingertips never lie. If you feel a catch, you hit it again. If it won’t go down, you pull the tile up and check for a clump of mortar or a piece of debris. Never leave a lip. It will haunt you forever.