
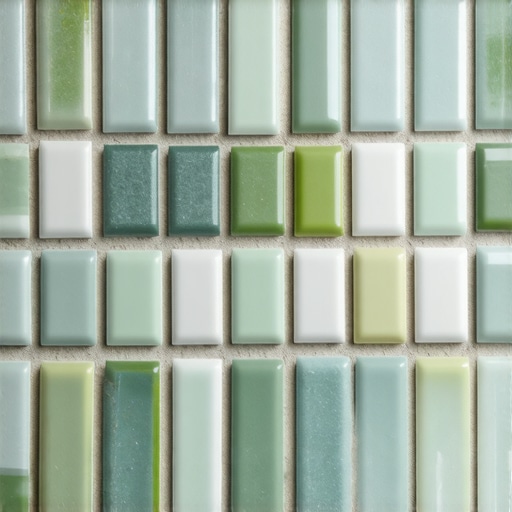
Most guys skip the leveling compound. They think the underlayment will hide the dip. It won’t. I spent three days grinding concrete on a job last month just so the floor wouldn’t click like a castanet. That job was for a high end client who wanted a penny tile mosaic in a 200 square foot bathroom. If you have ever laid penny tile or any small mosaic on mesh sheets, you know the nightmare. You lay the sheets down, and even if you are careful, you see the ghost of the grid. You see the lines where one sheet ends and the next begins. It looks like a cheap motel job. It looks amateur. The reality of a professional installation is not about the tile itself. It is about the physics of the substrate and the chemical bond of the adhesive. If your floor is not flat to within an eighth of an inch over ten feet, your mosaic will telegraph every single hump and hollow in that slab. I do not care how expensive the marble is. If the subfloor is junk, the finish is junk. I smell like WD-40 and oak dust most days because I spend more time on the prep than the pretty stuff. That is the hallmark of a master. We do not just slap things down and hope the grout hides the sins. Grout is not a structural repair agent. It is a filler. If you want a floor that looks like a single monolithic slab of stone, you have to understand the mechanics of the sheet. Keep your moisture meter handy and your level closer.
Why your subfloor is lying to you
A subfloor that looks flat to the naked eye is often a landscape of rolling hills and valleys that will destroy a mosaic installation. To achieve a continuous look with mosaic sheets, the substrate must be perfectly planar. Mosaics have no structural integrity of their own. They follow the contour of whatever they sit on. If there is a dip, the mesh sheet will sag into it, opening the joints at the top. If there is a hump, the joints will pinch. This creates a visible line that no amount of scrubbing will fix. You must use a high quality self leveling underlayment or a mud bed to create a true plane. This is the only way to ensure the sheets sit flush against one another without height variations. This is especially true when integrating baseboards makeover ideas to elevate your space because the transition at the wall will highlight any lack of levelness. When the tile meets the wall, a crooked floor creates a tapered gap that is impossible to hide with trim. You want that baseboard to sit tight against the tile. That only happens if you did the hard work on the concrete first.
“A floor is only as good as the subfloor beneath it; deflection is the enemy of every joint.” – Master Flooring Axiom
The math of the interlocking mesh
Interlocking mosaic sheets are designed to mask the transition between sections by using staggered edges rather than straight lines. When you look at a sheet of hexagonal or pebble tile, the edges are usually offset. The mistake amateurs make is pushing these sheets too tight together. You have to maintain the exact same spacing between the sheets as the spacing between the individual tiles on the sheet itself. This requires a digital caliper or a very steady eye. If the tiles on the sheet are an eighth of an inch apart, the gap between the sheets must be an eighth of an inch. If it is a sixteenth of an inch off, the human eye will pick it up instantly. This is what we call the grid effect. To avoid this, I always recommend dry fitting the entire floor. Lay it out without glue. Walk on it. Look at it from different angles. If you see a line now, you will see it ten times more once the grout is in. This is a common issue in showers that wow modern designs for 2025 where the light hits the floor from a low angle, casting shadows in every uneven joint. You have to stagger the sheets. Never lay them in a straight grid. Offset the rows like you are laying bricks. This breaks up the visual pattern and prevents the eye from following a single continuous line across the room.
Chemistry in the mortar bed
The choice of thin-set mortar determines whether your mosaic stays where you put it or slides into a crooked mess during the curing process. For small mosaics, you cannot use a standard large format tile mortar. You need a polymer modified thin-set with high sag resistance. The water to powder ratio must be exact. If it is too wet, the tiles will swim. If it is too dry, you will not get the 95 percent coverage required for a wet area. I use a three sixteenths inch V-notch trowel for most mosaics. Anything larger and the mortar will squeeze up through the joints, making a mess that you have to pick out later. If you are working on showers with a style trendy ideas for small bathrooms, the moisture resistance of the mortar is non negotiable. You are building a system, not just a surface. The bond coat is the bridge between your waterproofing membrane and the stone. If that bridge is weak, the tile will delaminate. I have seen guys use mastic in showers. That is a crime. Mastic is organic. It will rot. It will mold. Always use a cement based mortar that meets ANSI A118.4 standards. This ensures the chemical bond can withstand the constant thermal expansion and contraction of a bathroom environment.
| Mortar Type | Open Time | Best Use Case | Cure Time |
|---|---|---|---|
| Unmodified | 20 min | Concrete subfloors only | 24 hours |
| Polymer Modified | 30-40 min | Most residential tiles | 24 hours |
| Rapid Set | 10-15 min | Commercial repairs | 4 hours |
| Epoxy Mortar | 60 min | Chemical resistance | 12 hours |
The 1/8 inch that ruins everything
Precision cutting around drains and corners is the difference between a high end architectural finish and a DIY disaster. When you get to the edge of the room, you cannot just hack at the mesh with a pair of nippers. You need a wet saw with a fresh diamond blade. Every cut must be calculated to maintain the expansion gap at the perimeter. The TCNA requires a quarter inch gap around the edges of any tile installation. This gap is later covered by chic baseboard designs that transform rooms in 2025. If you butt the tile tight against the wall, the floor has nowhere to go when the house settles or the temperature changes. The floor will tent. It will pop. I have seen entire bathrooms lift off the floor because the installer forgot the expansion joint. This is especially critical with glass mosaics. Glass has a different expansion coefficient than ceramic or stone. It is brittle. It will crack if it is under pressure. Use a high quality silicone sealant in the corners instead of grout. Grout is rigid. Silicone is flexible. This allows the floor to breathe without cracking the delicate mosaic pieces.
“Movement joints are not optional; they are the insurance policy for your craftsmanship.” – Tile Council of North America
Managing the shower pan slope
In a shower, the mosaic must follow a complex three dimensional curve toward the drain while remaining visually flat. This is the hardest part of the job. You are trying to wrap a flat sheet of tile around a funnel shape. This is why small mosaics are used in showers. They can conform to the slope. However, this is also where the sheet lines become most apparent. To fix this, you often have to cut the mesh and place individual tiles by hand around the drain assembly. It is tedious. It takes hours. But it is the only way to avoid the birdbath effect where water pools in a low spot. If you are looking for tile cleaning tips for a sparkling bathroom in 2025, the first tip is to install the floor correctly so water actually drains. Standing water leads to mineral buildup and grout erosion. If you are struggling with old grout, you might want to know how to refresh grout without replacing it, but for a new build, the goal is longevity. Use a pre-sloped foam tray if you are not confident in your mud work. They provide a perfect two percent grade every time, making the mosaic sheets lay much flatter than a hand dumped bed.
- Check subfloor for deflection using a straight edge.
- Apply a liquid waterproofing membrane in at least two coats.
- Dry lay the mosaic sheets to verify the pattern alignment.
- Use a white thin-set for glass or light colored stone to prevent shadowing.
- Collapse the ridges of the mortar with a flat trowel before laying the tile.
- Clean the joints of excess mortar while it is still wet.
The final vanish of the grout line
Selecting a grout color that perfectly matches the base tone of the tile is the ultimate trick for hiding sheet boundaries. High contrast grout is the enemy of the mosaic sheet. If you have white tile and black grout, every tiny misalignment will scream at you. If you use a matching grout, the lines disappear. The floor becomes a texture rather than a pattern. For those interested in eco friendly tile solutions for sustainable homes in 2025, many modern grouts are now low VOC and made from recycled materials. Once the grout is dry, you must seal it. Grout is porous. It is basically a hard sponge. If you do not seal it, it will absorb dirty mop water and turn gray. I always recommend grout restoration secrets for long lasting results to my clients so they know how to maintain that look. A well sealed floor will look new for a decade. A neglected floor will look like a basement in two years. Use a high quality penetrating sealer. It does not change the look of the stone, but it fills the microscopic pores to keep the gunk out. If you have questions about specific materials, you can always contact us for a professional consultation. We have seen every failure imaginable, and we know how to prevent them before the first bag of mortar is opened.