
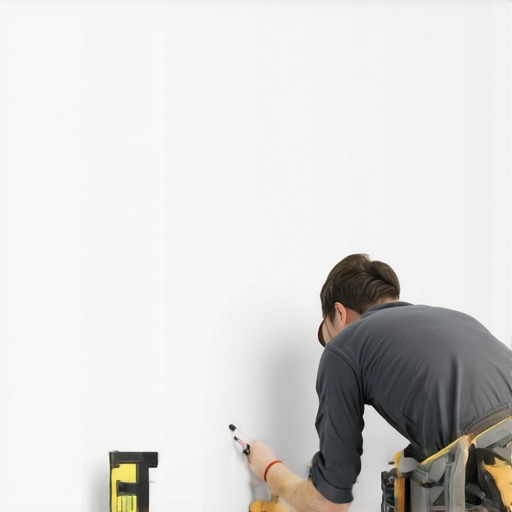
Why your bathroom wall is lying to you
Bathroom walls are rarely flat because moisture cycles cause studs to warp and drywall mud to build up at the corners. These undulating surfaces create gaps between straight trim and the wall. Scribing is the only professional method to remove material from the baseboard to match the specific contour of your home. I spent three days grinding concrete on a job last month just so the floor wouldn’t click like a castanet. The homeowner thought I was being difficult. Then we tried to install the baseboards. The walls were so wavy you could have surfed them. I had to scribe every single foot of that trim. It taught me that a flat floor is only half the battle when the vertical surfaces are working against you. Most installers just use a whole tube of caulk. It looks like garbage after six months. If you want a fit that looks like it grew out of the wall, you have to embrace the physics of the scribe. It is a slow, methodical process that requires an understanding of how wood reacts to the damp environment of a bathroom. This is not about being fast. It is about being right.
The geometry of a perfect scribe
Scribing involves using a compass or dedicated tool to transfer the profile of an irregular wall onto a piece of wood trim. By keeping the tool perpendicular to the wall and following the bumps, you create a cut line that mirrors the wall’s defects. This ensures a tight fit without relying on excessive fillers. You are essentially creating a negative image of the wall on the back of your baseboard. When you use a scribe tool, you are not just drawing a line. You are measuring the deviation of the drywall. Drywall hangers often build up mud at the tape joints. This creates a hump every sixteen or twenty-four inches. If you force a straight board against that hump, it will bow. That tension eventually pulls the nails out or cracks the paint. A scribed board sits neutral. It has no internal tension because it fits the space it was meant to occupy. This is the difference between a house that feels solid and one that feels like it was slapped together by a developer in a hurry.
“A floor is only as good as the subfloor beneath it; deflection is the enemy of every joint.” – Master Flooring Axiom
The chemistry of bathroom moisture
Bathroom moisture exists in two forms: liquid water from splashes and airborne vapor from showers. These molecules penetrate the cellular structure of wood baseboards through a process called hygroscopy. This causes the wood fibers to swell at different rates than the gypsum in the drywall, leading to joints that pull apart. You must consider the Equilibrium Moisture Content of your wood. If you take a board from a dry warehouse and nail it into a humid bathroom, it will grow. I have seen baseboards expand by an eighth of an inch in a single week. That expansion has to go somewhere. If the board is tight against the walls at both ends, it will cup. This is why acclimation is the most ignored step in flooring. You need to let those boards sit in the room for at least seventy-two hours. Use a pin-type moisture meter to check the levels. You want the trim to be within two percent of the subfloor moisture. This is science, not guesswork. If you skip this, your scribe will be a waste of time because the wood will change shape after you install it.
Tooling for the perfect scribe
The right tools for scribing include a high-quality carpenter’s compass, a sharp pencil, and a jigsaw with a fine-tooth scrolling blade. Specialized scribing tools like the Collins Coping Foot or the Starrett ProSite Protractor can increase accuracy for complex angles. For most bathroom jobs, a simple compass with a locking nut is sufficient. You need a tool that will not slip while you are dragging it across the texture of the wall. I prefer a pencil with a hard lead, maybe a 2H. This gives you a crisp line that won’t smudge when you start cutting. If you use a fat carpenter’s pencil, you lose a sixteenth of an inch of accuracy. In the world of high-end trim, a sixteenth is a mile. You also need a solid work surface. Don’t try to cut these on your knees. Set up some sawhorses and use a sacrificial piece of plywood so you can support the trim through the entire cut.
| Tool Type | Precision Level | Best Material | Difficulty |
|---|---|---|---|
| Standard Compass | Moderate | Pine, MDF | Low |
| Parallel Scribe | High | Hardwood, PVC | Medium |
| Coping Foot Jigsaw | Very High | Oak, Walnut | High |
| Block and Pencil | Low | Primed Pine | Very Low |
Physics of the back-bevel cut
A back-bevel cut is a technique where the jigsaw blade is angled away from the face of the board to create a sharp leading edge. This reduces the amount of material that actually touches the wall, making it easier to fine-tune the fit with a rasp or sanding block. I usually set my jigsaw to a five or seven-degree angle. This ensures that the very front of the baseboard hits the wall first. If you cut it perfectly square, any tiny high spot on the wall will keep the whole board from sitting flush. The back-bevel is a secret of the trade. It allows for a microscopic gap behind the visible edge where you can hide the imperfections of the drywall. It also makes the caulking process much cleaner. You are not trying to fill a giant cavern. You are just sealing a hairline transition. This is especially vital when you are working with baseboards makeover ideas to elevate your space because higher-profile trim shows every flaw.
Integration with tile and grout systems
When installing baseboards over tile, you must account for the grout lines and the lack of a perfectly level floor surface. The baseboard should never be jammed down into the grout because the floor needs to be able to move independently of the walls. I always leave a tiny gap, maybe the thickness of a credit card, between the bottom of the wood and the tile. This prevents the wood from wicking up water if the floor gets wet. If you are dealing with an old bathroom where the tiles are uneven, you may need to scribe the bottom of the baseboard as well as the back. This is common in historic homes. You want the trim to follow the dip of the floor without showing a massive gap. If your grout is looking rough, you should look into how to refresh grout without replacing it before you put the trim on. It is much harder to fix the grout once the baseboards are nailed in place. Clean lines at the floor are just as important as clean lines at the wall.
“Proper acclimation is not a matter of time but a matter of reaching equilibrium moisture content.” – NWFA Standard
- Check wall for high spots using a six-foot level.
- Identify stud locations and mark them with blue tape.
- Acclimate baseboards to the bathroom environment for 72 hours.
- Set the compass to the widest gap between the board and the wall.
- Scribe the line while keeping the compass perfectly horizontal.
- Cut with a jigsaw using a back-bevel angle of 5 to 7 degrees.
- Test fit and use a hand plane or rasp for micro-adjustments.
- Seal the back of the wood with a primer to prevent moisture absorption.
Finishing and sealing techniques
The final step of a scribed installation is the application of a high-quality, flexible sealant that can handle the expansion and contraction of the bathroom. Siliconized acrylic latex is generally the best choice because it is paintable and offers better elasticity than standard painters caulk. Do not use pure silicone for the top edge of the baseboard because paint will not stick to it. You will end up with a mess. Apply a thin bead and wipe it with a damp finger or a profiling tool. Because you scribed the board, the bead should be very small. This is where the aesthetic value comes in. A thin line of caulk disappears. A thick line of caulk screams that you made a mistake. If you are looking for chic baseboard designs that transform rooms in 2025, remember that the best design is a perfect fit. No amount of fancy profile can hide a poor installation.
Final checks for a professional finish
Before you pack up your tools, walk the room. Look at the corners. In a bathroom, the inside corners are where the moisture will hit first. Make sure your cope joints are tight. Never miter an inside corner in a bathroom. Miters will open up as the house breathes. A coped joint will stay tight even as the wood moves. Check the transition near the shower. If the baseboard is near a splash zone, use a bit of clear silicone on the bottom edge where it meets the tile. This creates a waterproof dam. It will stop water from getting under the trim and rotting the drywall or the bottom plate of the wall. This is the level of detail that separates a master from a handyman. It is the physics of the house. It is the chemistry of the water. It is the pride of a job done right. If you have questions about specific materials for your project, you can always contact us for professional guidance on your next flooring or trim upgrade.