
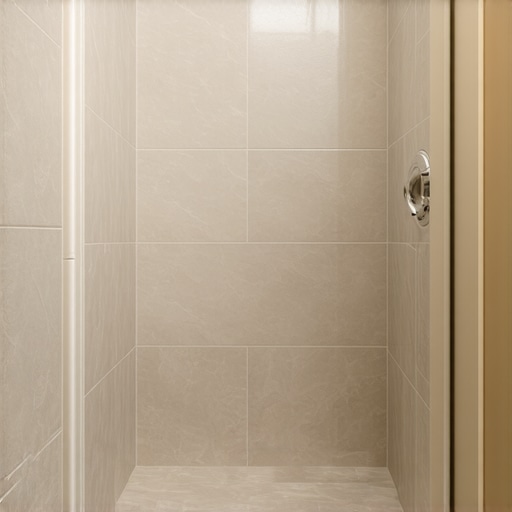
The Secret to Tiling a Perfect Shower Recess Niche
Most guys skip the leveling compound. They think the underlayment will hide the dip. It won’t. I spent three days grinding concrete on a job last month just so the floor wouldn’t click like a castanet. That same philosophy applies to your shower walls. If your studs are out of plumb by even an eighth of an inch, your niche is going to look like a funhouse mirror. I have spent twenty-five years fixing the mistakes of installers who thought a shower niche was just a box in a wall. It is not. It is a structural engineering challenge where water physics meets ceramic geometry. A niche is a hole you are intentionally cutting into a waterproof system. If you do not respect the chemistry of the bond and the physics of the slope, you are just building a very expensive rot-box. We are going to examine the molecular reality of thin-set, the capillary action of grout, and the absolute necessity of a structural substrate that does not move.
The gravity of a failed waterproofing system
Waterproofing membranes, liquid-applied barriers, and integrated niche flanges are the only things standing between your home and a five-figure mold remediation bill. When you cut into that wall, you are breaking the plane of protection. You cannot just slap some tile on greenboard and call it a day. In the humid regions of the Southeast, I have seen vapor drive push moisture through tile and rot studs from the inside out. You need a Class I vapor retarder. I prefer a bonded waterproof membrane that is continuous from the wall into the niche. If you have a gap, water will find it. Water is a universal solvent. It wants to go where it is not supposed to be. For inspiration on what a functional and beautiful setup looks like, check out showers that wow modern designs for 2025 before you start your teardown. The secret is not the tile; it is the red or orange stuff you put on before the tile. Every joint, every corner, and every screw head must be buried in membrane. If I see a single speck of gray cement board, the job is not ready for tile.
“A floor is only as good as the subfloor beneath it; deflection is the enemy of every joint.” – Master Flooring Axiom
Why your niche framing is lying to you
Kiln-dried lumber, structural blocking, and plumb lines are the foundation of a niche that does not crack your grout within six months. Wood moves. It breathes. It expands and contracts with the humidity of your bathroom. If you use a standard 2×4 that was sitting in a puddle at the big-box store, it will shrink as it dries inside your wall. That shrinkage creates stress on the tile. I always use engineered lumber or metal studs for niche framing if I can. They are stable. They stay straight. You need to frame the niche so that it fits the tile, not the other way around. Do not get stuck with a tiny sliver of tile at the top. Calculate your layout before you hammer a single nail. The bottom plate of your niche must be pitched. I am not talking about a steep hill, but a one-eighth to one-quarter inch slope toward the shower drain. If that shelf is level, water will sit there. If water sits there, your grout will fail. It is simple physics. For those looking to upgrade their overall bathroom aesthetic, chic baseboard designs that transform rooms in 2025 can provide a great transition from the wet area to the rest of the suite.
The chemistry of modified thin set and polymer bonds
Polymer-modified mortar, ethylene vinyl acetate, and tensile bond strength are the chemical components that determine if your niche tile stays on the wall or falls on your toes. In a wet environment, you cannot use mastic. Mastic is basically organic glue that turns back into mush when it gets wet. You need a C2ES1 or C2ES2 rated thin-set. These are cementitious mortars that have been boosted with polymers. These polymers create a flexible skeleton within the cement. This is vital because tiles, especially large format ones, have a different coefficient of thermal expansion than the wood or metal studs behind them. When you take a hot shower, everything expands. The polymer allows the mortar to flex without breaking the bond. I have seen guys use cheap unmodified thin-set on a niche and the tiles literally popped off because of the vibration from a heavy shower door. Do not be that guy. Spend the extra twenty bucks on the high-grade bag. The molecular bond of a high-performance mortar is the only thing fighting gravity in that niche. This same attention to detail is what we recommend when people look into eco-friendly tile solutions for sustainable homes in 2025.
Gravity and the pitch of the bottom shelf
Hydrostatic pressure, surface tension, and capillary action are the forces that will ruin your niche if you do not understand the slope. Water has a high surface tension. It likes to bead up. If your shelf is flat, the water will sit in a pool, held there by its own molecular attraction. Over time, that water will seep into the grout. Grout is porous. Even the best epoxy grout can have micro-fissures. Once water gets under the tile, it starts the freeze-thaw cycle of destruction, even in a room that never freezes. The heat from the shower expands the trapped water, and as it cools, it creates a vacuum that pulls more water in. You must provide a path for that water to escape. A slight pitch of 1/4 inch per foot is the industry standard. I like to use a solid piece of stone or quartz for the sill. It eliminates grout lines on the surface where water sits the most. If you have to use tile, make sure your grout joints are packed tight. If you ever see discoloration, you need to look at grout restoration secrets for long lasting results to fix it before the substrate rots.
| Substrate Component | Material Standard | Performance Metric |
|---|---|---|
| Framing | Engineered Wood/Metal | Zero Warp Tolerance |
| Waterproofing | Liquid/Sheet Membrane | ASTM C627 Rated |
| Adhesive | Modified Thin-set | ANSI A118.15 |
| Grout | High-Performance Epoxy | Stain/Vapor Resistant |
Grout joints and the micro fracture risk
Non-sanded grout, epoxy resins, and pigment stability are what you should be thinking about during the final stages of the niche. Most niches use smaller tiles or mosaics. This means a lot of grout. Grout is the weakest link in the chain. I prefer epoxy grout for niches because it is non-porous. It is basically plastic. It does not need to be sealed, and it will not absorb the soapy water that runs off your shampoo bottles. While most people want the thickest underlayment or the widest grout joints for a ‘rustic’ look, too much space in a niche actually invites cracking. Keep your joints tight, usually around 1/16 to 1/8 of an inch. If your joints are too big, the grout can shrink and pull away from the tile edge. That is where the leaks start. If your grout is already looking rough, check out how to refresh grout without replacing it. For a total bathroom overhaul, don’t forget the details outside the shower like baseboards makeover ideas to elevate your space to match your new high-end tile work.
“Standard C627 describes the Robinson Floor Test which evaluates the durability of a tiling assembly under load.” – TCNA Handbook
- Confirm all framing is plumb and square before installing cement board.
- Ensure a 1/4 inch pitch on the bottom shelf for proper drainage.
- Apply two coats of liquid waterproofing membrane to all niche surfaces.
- Use alkali-resistant mesh tape on all internal niche corners.
- Allow 24 hours for mortar to cure before applying high-performance grout.
- Clean grout haze immediately to prevent permanent surface staining.
The finishing touch on the perimeter
Schluter strips, mitered edges, and bullnose tiles define the transition from the wall to the niche. This is where the amateurs are separated from the pros. A mitered edge is beautiful, but it is fragile. If you don’t back-fill the miter with epoxy, it will chip the first time you drop a bottle of soap. I prefer a metal profile edge. It provides a clean, modern line and protects the edge of the tile from impact. It also gives you a definitive stop for your grout. Remember that the niche is a focal point. If the lines do not line up with the main wall grout lines, it will look like an afterthought. Plan your vertical layout so that a full tile or a centered cut spans the niche. This requires math. If you hate math, you shouldn’t be tiling a shower. Every measurement matters. For more maintenance tips to keep that new niche looking sharp, see tile cleaning tips for a sparkling bathroom in 2025. If you run into trouble or need a pro to handle the structural side, you can always contact us for expert advice on your next project. Protecting your investment starts with the details that nobody sees once the tile is up.