
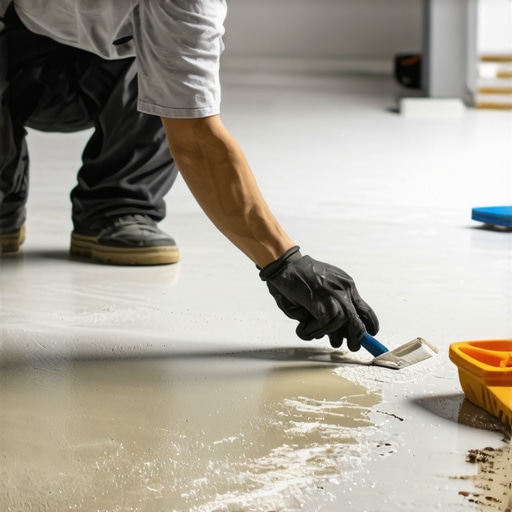
I spent three days grinding concrete on a job last month just so the floor wouldn’t click like a castanet. Most guys skip the leveling compound. They think the underlayment will hide the dip. It won’t. This same lack of discipline is what ruins an epoxy grout job. I have been doing this for 25 years. My hands smell like WD-40 and I have oak dust in my lungs, but my floors do not fail. Tiling a shower or a kitchen floor with epoxy is the final boss of flooring challenges. It is not just about aesthetics. It is a structural engineering task where you are dealing with a chemical reaction that waits for no one. If you mess up, you are not just cleaning a spill, you are removing cured plastic from expensive porcelain with a diamond blade. It is a nightmare you want to avoid.
The sticky reality of epoxy resins
Epoxy grout consists of a two part resin system that creates a waterproof and chemical resistant bond through an exothermic reaction. Unlike standard cementitious grout, epoxy does not rely on the evaporation of water to harden. Instead, it undergoes a molecular transformation where the resin and hardener cross-link to form a dense, non-porous lattice. This makes it the only real choice for showers or high-traffic tile areas that face constant moisture. If you are looking for grout restoration secrets, the first secret is using the right material for the environment. Epoxy is the gold standard for longevity, but it is a beast to handle.
A disaster in the master suite
I once walked into a house where a homeowner tried to do a DIY epoxy job on a 120 square foot bathroom. It was a massacre. The walls were covered in a hazy, sticky film that had already begun to cure. They used too much water too early, which emulsified the resin and spread it like a grey grease over every square inch of the marble. They had to replace three rows of tile. This happened because they did not understand the pot life of the product. When you mix Part A and Part B, the clock starts ticking. In a room that is 80 degrees, you might only have 30 minutes before that bucket becomes a solid rock. Temperature is everything. If the room is hot, the molecules move faster, the reaction accelerates, and you lose your window of opportunity. You must work in small batches. Never mix the whole bucket at once unless you have a crew of four guys behind you with sponges ready.
“A floor is only as good as the subfloor beneath it; deflection is the enemy of every joint.” – Master Flooring Axiom
The chemistry inside the bucket
The chemical bond of epoxy grout is formed by the reaction between Bisphenol A resin and a polyamine hardener. When these two components meet, the nitrogen atoms in the hardener attack the epoxide rings, opening them and linking the chains together. This is a covalent bond, which is significantly stronger than the ionic bonds found in portland cement. This density is why epoxy is waterproof. There are no capillaries for the water to travel through. While most people want the thickest underlayment to fix floor issues, too much cushion actually causes the locking mechanisms on modern floors to snap under pressure, and similarly, a moving subfloor will eventually stress even the strongest epoxy joint. You need a rigid substrate. If your plywood is bouncing, your grout will eventually pop, even if it is epoxy. You must check for deflection before the first tile is set.
| Feature | Standard Cement Grout | Epoxy Grout |
|---|---|---|
| Porosity | High (Requires Sealer) | Zero (Self-Sealing) |
| Chemical Resistance | Low | High |
| Pot Life | 90 to 120 Minutes | 30 to 45 Minutes |
| Flexural Strength | Low | Very High |
Substrate preparation is a non-negotiable law
Substrate preparation involves ensuring the tile joints are completely free of thin-set, debris, and moisture before the epoxy is applied. Any moisture trapped in the thin-set will try to escape as vapor. Since epoxy is a vapor barrier, that moisture gets trapped, leading to pressure that can cause the grout to delaminate. I use a vacuum with a HEPA filter to suck every grain of dust out of the joints. If you leave even a little bit of dust, the epoxy bonds to the dust instead of the tile edge. This is a common failure point. You also need to ensure your baseboards are removed or protected. If you get epoxy on your trim, you are replacing the trim. For inspiration on how to handle your perimeters, look at these baseboards makeover ideas to ensure your finish looks professional.
The clean water bucket brigade
Cleaning epoxy grout requires a three bucket system and specific surfactants to break the surface tension of the resin. The first bucket is for the initial strike, where you remove the bulk of the haze. The second bucket is for the secondary rinse, and the third bucket is for the final polish. You must use white nylon scrub pads. Do not use those cheap yellow sponges from the grocery store. They are too soft and will pull the grout out of the joint. You need the mechanical agitation of the nylon to break the resin bond on the tile surface. If you see a haze forming, you have about twenty minutes to get it off. If you miss it, you will be looking at how to refresh grout articles, but those won’t help you with cured epoxy. You will need a specialized citrus based gel stripper and a lot of elbow grease.
- Verify substrate temperature is between 60 and 80 degrees Fahrenheit.
- Mix only half-gallon batches to maintain a workable pot life.
- Use a dedicated epoxy float with a hard rubber face to prevent joint pulling.
- Change rinse water every 50 square feet to prevent resin redistribution.
- Wear nitrile gloves and change them frequently to avoid sticky fingerprints on the tile.
Modern showers and the waterproof myth
Modern showers utilize topical waterproofing membranes like Kerdi or Wedi that require a specific chemical compatibility with the grout used. People think that because they used epoxy grout, they don’t need a waterproof membrane behind the tile. That is a dangerous lie. Water can still get in through the change of plane joints where the wall meets the floor if you didn’t use 100 percent silicone. Epoxy is stiff. It does not like movement. In those corners, you need a flexible sealant. If you are designing showers that wow, you have to plan for the movement of the house. A house breathes. It expands in the summer and shrinks in the winter. If you grout your corners with epoxy, they will crack. It is a physical certainty.
Why your subfloor is lying to you
Subfloor levelness is measured by a straightedge across a ten foot span where the deviation must not exceed one eighth of an inch. Most people think their floors are flat. They are not. I have seen slabs that look like the rolling hills of Kentucky. If you lay large format tile on an unlevel floor, you get lippage. Epoxy grout makes lippage look even worse because of the way light reflects off the dense surface. You have to grind the high spots. I spent half my career on a concrete grinder for a reason. You can’t fix a bad subfloor with grout. You fix it with prep. If you want to see showers with a style that actually lasts, you start with the framing and the plumbing, not the pretty patterns.
The cleanup protocol that saves your tile
The final cleanup of epoxy grout involves a specialized emulsifying wash that prevents the formation of a permanent resin haze. You can use a mixture of water and a little bit of white vinegar, but I prefer the manufacturer-provided packets. These packets contain surfactants that keep the resin in suspension so it can be wiped away. If you don’t use them, the resin just moves around the tile. It is like trying to wash grease off a plate without soap. It doesn’t work. You also need to be careful with tile cleaning tips. Using the wrong chemicals later on can dull the finish of the epoxy. Check out these tile cleaning tips to maintain that factory shine. You worked hard for it, so don’t ruin it with bleach.
Baseboards and the expansion gap mystery
Perimeter expansion gaps must be maintained at all vertical surfaces to allow the floor system to move independently of the wall structure. This is where baseboards come in. They are not just for looks. They hide the gap that prevents your tile floor from tenting. If you shove your epoxy grout all the way to the drywall, the floor has nowhere to go when the house settles. Something has to give, and usually, it is the grout joint in the middle of the room. I leave a quarter inch gap everywhere. It is a professional standard that separates the masters from the hacks. People want things to look seamless, but seamless is a recipe for structural failure. Respect the gap.