
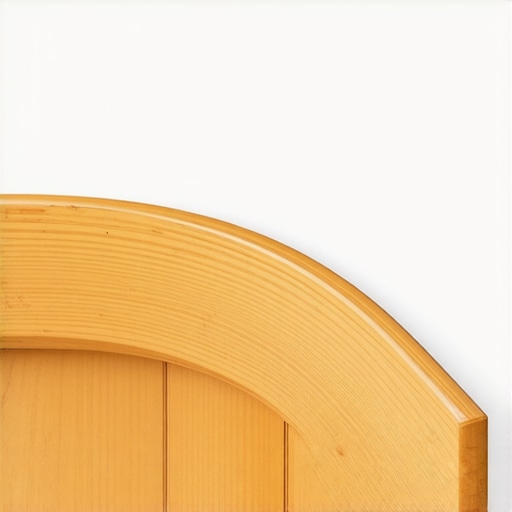
I once walked into a house where a custom-built rotunda had been fitted with standard oak baseboards. The installer, a guy who clearly thought a finish nailer could solve any physics problem, had tried to force the wood around the curve using sheer brute strength and two-inch nails. By the time I arrived, the wood had won. The tension in those oak fibers was so great that it had ripped the finish nails through the drywall, leaving a jagged gap and a piece of trim that looked like a bent bow. He didn’t understand that wood has a memory, and it always wants to go back to being a straight line. I spent three days repairing that drywall and teaching him about the neutral axis of wood before we could even start the baseboards makeover correctly. A curved wall is not a suggestion; it is a structural challenge that requires you to respect the material properties of the trim you are using.
The geometric reality of a curved wall
Installing baseboards on curved walls requires an understanding of radius geometry and material tension. You must identify if the wall radius is tight or gradual to choose between kerf cutting, steaming wood, or utilizing flexible PVC moldings that can accommodate concave or convex architectural contours without breaking.
When you look at a curved wall, you are looking at a segment of a circle. The physics of bending a solid object like wood involves stretching the outer fibers and compressing the inner fibers. In the world of structural engineering, the plane between these two forces is called the neutral axis. For most wood species used in chic baseboard designs, the compression strength is much higher than the tension strength. This means that as you bend the board, the outside face is the first thing that will fail. It will splinter, crack, or snap entirely if the radius is too tight. To successfully navigate a curve, we have to find a way to either increase the flexibility of those fibers or reduce the amount of material that needs to stretch.
Why standard wood fails the bend test
Standard solid wood trim typically fails during installation because its moisture content and grain density create a high modulus of elasticity. Without mechanical modification like kerfing, the tensile stress on the outer radius exceeds the breaking point of the cellulose bonds, leading to structural failure and drywall damage.
Most guys at the big box stores will tell you to just buy the cheapest pine and soak it in water. That is a recipe for disaster. When you soak wood, you are swelling the cells. Yes, it becomes more flexible, but as that wood dries in place, it will shrink. That shrinkage creates massive internal stress. The gaps at your miter joints will open up so wide you could park a truck in them. Furthermore, the moisture will likely ruin the bond of any adhesive you used. If you are dealing with a small bathroom with high humidity, this movement is even more pronounced. You need a method that accounts for the molecular reality of the wood grain rather than just fighting against it.
“A floor is only as good as the subfloor beneath it; deflection is the enemy of every joint.” – Master Flooring Axiom
The technical art of the kerf cut
The kerf cutting technique involves making a series of vertical saw cuts on the backside of the baseboard to remove material mass. These kerfs allow the wood to compress into the voids, reducing the radial tension and allowing the trim to conform to tight curves without splitting the face of the molding.
To do this right, you need a miter saw with a depth stop. You want to cut through about 80 percent of the thickness of the board. If you leave it too thick, it won’t bend. If you go too thin, the cut will “telegraph” through to the front, meaning you’ll see ugly vertical bumps on the finished surface. The spacing of these cuts is pure math. For a tight radius, you might need a kerf every quarter inch. For a wide, sweeping curve, every inch might suffice. You must also ensure that the kerfs are perfectly vertical. If they are slanted, the board will want to twist up or down as you bend it, which ruins your transition to the floor. This is especially vital when the board meets a tile floor where grout restoration has recently been performed; any movement in the baseboard can chip the fresh grout at the perimeter.
Flexible molding as a modern alternative
Flexible polyurethane molding offers a highly adaptable solution for curved architecture because its polymer structure can bend to extreme radii without cracking. These materials are engineered to mimic the texture of wood while providing consistent flexibility across the entire length of the baseboard profile.
While I am a wood purist at heart, I have to admit that the new polymer-based moldings are a lifesaver for tight radii. These aren’t the cheap rubber strips you see in commercial kitchens. These are high-density products that take paint exactly like wood. The trick here is the adhesive. You can’t just nail these in and walk away. You need a high-quality polyurethane construction adhesive to create a permanent bond. Because these materials have no grain, they don’t have the same “memory” as wood, but they can sag if not supported correctly during the curing process. If you are working on modern showers that transition into curved dressing areas, these waterproof options are actually superior to wood because they won’t rot when they inevitably get splashed.
Fastening schedules for high tension areas
A proper fastening schedule for curved baseboards requires mechanical fasteners every 4 to 6 inches to overcome recoil force. Using 15-gauge finish nails instead of 18-gauge brads provides the shear strength necessary to hold the trim against the studs while the adhesive bond reaches its full structural capacity.
When you are nailing into a curve, you are fighting the physics of the lever. Every nail is a fulcrum. If you only nail the ends, the middle will pop out. You have to find the studs. Using a stud finder is non-negotiable here. You aren’t just nailing into the drywall; you are anchoring into the 2×4 framing. I prefer to use a bead of Loctite Power Grab along with my nails. The nails hold it in place for the first twenty minutes, and the adhesive holds it for the next twenty years. If you are installing this over a floor where you are worried about how to refresh grout later, make sure you leave a slight gap at the bottom for expansion. Never pin the baseboard tight against a floating floor or a tile surface.
| Material Type | Min Radius (Inches) | Technique Required | Paint/Stain |
|---|---|---|---|
| Solid Oak | 96″ | Steam or Kerfing | Stainable |
| MDF | 120″ | Very limited bending | Paint only |
| Pine | 72″ | Kerfing | Either |
| Flex Poly | 6″ | Adhesive only | Paint only |
Managing the intersection of baseboards and tile
The interface between curved baseboards and tile floors requires a moisture-resistant barrier and precise caulking. Because flooring surfaces like porcelain tile or natural stone are unyielding, the baseboard must be scribed to the floor’s plane to prevent visible gaps that compromise the aesthetic finish.
This is where most installers fail. They focus so much on the curve of the wall that they forget the floor isn’t perfectly flat. If you are working in a bathroom, you need to be thinking about tile cleaning tips for the future. If you leave a huge gap under that curved baseboard, water from mopping will seep under there and start rotting your plate line. I always use a 100 percent silicone caulk at the bottom of the baseboard where it meets the tile. It stays flexible and handles the slight movement of the house. If you are using eco-friendly tile solutions, make sure your adhesive and caulk are also low-VOC to maintain the air quality of the home.
“Every curve is a test of the installer’s patience; if you rush the wood, the wood will break your heart.” – Master Flooring Axiom
Curved Wall Installation Checklist
- Measure the radius using a template or string line.
- Select material based on the tightness of the curve.
- Check moisture content of the wood using a pin-type meter.
- Locate and mark every stud along the curved section.
- Calculate kerf depth (80 percent of material thickness).
- Dry fit the piece before applying any adhesive.
- Apply a continuous bead of polyurethane construction adhesive.
- Nail into studs using 15-gauge finish nails.
- Countersink nails and fill with color-matched wood putty.
- Seal the bottom edge with flexible caulk to protect against moisture.
The final takeaway is that there are no shortcuts when it comes to curved walls. You either do the math and the prep work, or you end up with a board that snaps or pulls away. While many people want the thickest underlayment for their floors, too much cushion actually causes the locking mechanisms on LVP to snap under pressure, and the same logic applies to baseboards. If you have too much “give” behind the board because of sloppy drywall or excessive shimming, the baseboard will never be stable. Take the time to grind the high spots of the wall if you have to. Your reputation depends on the joints staying tight long after you have cashed the check. If you have questions about specific materials, feel free to contact us for expert advice on your next structural flooring project.