
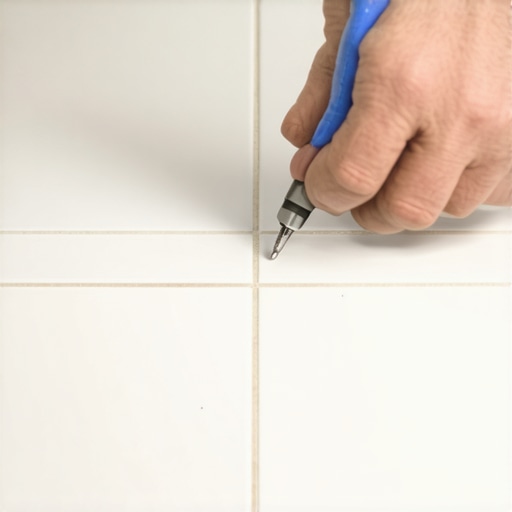
Most guys skip the leveling compound. They think the underlayment will hide the dip. It won’t. I spent three days grinding concrete on a job last month just so the floor wouldn’t click like a castanet. I have spent twenty-five years on my knees with a moisture meter and a level. I have seen the heartbreak of fifteen thousand dollar walnut floors cupping like potato chips because someone ignored the crawlspace. In a bathroom, the stakes are higher. You are dealing with water, grout, and tile lippage that makes a standard baseboard look like a zig-zagging mess. A floor is a performance surface. It is not a decoration. If you treat it like a sticker you slap on the ground, it will fail you. You need to understand the physics of the subfloor before you ever touch a piece of trim.
The subfloor secret that ruins a finish
Scribing baseboards over bumpy tile requires a mechanical transfer of the floor’s profile onto the wood using a compass or a specialized scriber tool. This process ensures that the bottom edge of the trim matches every peak and valley of the ceramic or porcelain surface. Without a proper scribe, you are left with unsightly gaps that collect hair, moisture, and grime. I have seen installers try to fill a half-inch gap with caulk. It looks like a disaster within six months. The caulk shrinks. The gap reappears. The client calls to complain. You avoid this by cutting the wood to fit the floor, not by forcing the floor to fit the wood. Most people think a bathroom floor is flat. It never is. Between the thin-set trowel marks and the natural crowning of large-format tiles, you are working on a topographical map.
“A floor is only as good as the subfloor beneath it; deflection is the enemy of every joint.” – Master Flooring Axiom
Why your tile looks like a topographical map
Tile lippage occurs when the edges of adjacent tiles are not at the same height, often caused by subfloor irregularities or improper thin-set application. In many showers with a style, installers use large tiles that are prone to bowing. When these tiles are laid, the center might be higher than the corners. This creates a rhythmic bumpiness every twelve or twenty-four inches. If you are working in a space with eco-friendly tile solutions, you might notice even more variance in the natural clay bodies. The grout lines themselves create deep valleys. If your baseboard is three-quarters of an inch thick, it will bridge those valleys and leave a hole. You cannot hide this with paint. You have to use geometry.
| Technique | Gap Coverage | Durability | Skill Level Required |
|---|---|---|---|
| Scribing | 1/16 to 3/4 inch | High (Permanent) | Advanced |
| Caulking Only | Under 1/8 inch | Low (Shrinks) | Beginner |
| Shoe Molding | 1/2 inch | Medium (Visual) | Intermediate |
| Backer Rod and Sealant | 1/4 to 1/2 inch | Medium | Intermediate |
The geometry of a perfect scribe line
A compass is the primary tool for transferring floor height variations to the vertical face of the baseboard. Set the compass point to the widest gap between the floor and the board. As you drag the point along the tile, the pencil mimics the path on the wood. This is not about being fast. It is about being precise. You must keep the compass perfectly level. If you tilt it, the line will be wrong. The physics of the arc dictates that any deviation in your hand angle will change the distance transferred. I always tell my apprentices that the compass is an extension of the subfloor. It does not lie. If you have done your tile cleaning and the surface is free of grit, the compass point will glide. If there is leftover grout or debris, the needle will jump, and your cut will be ruined.
Tools for the professional finish
You need a high-quality compass with a locking nut, a sharp pencil, and a jigsaw with a scrolling blade to execute a professional scribe. A standard carpenter pencil is too thick. Use a mechanical pencil for a finer line. When you get to the saw, do not cut exactly on the line. Cut just to the waste side of the line and then use a belt sander or a flap disc on a grinder to sneak up on the mark. This is where the sawdust gets under your nails. It is messy work. It is loud. But the result is a baseboard that looks like it grew out of the tile. This level of detail is what separates a master from a handyman. It is the difference between a chic baseboard design and a builder-grade hack job.
- Check subfloor levelness within 1/8 inch over 10 feet.
- Measure moisture content of the wall studs before installing trim.
- Ensure tile grout has cured for at least 48 hours to avoid staining.
- Clean the base of the tile thoroughly to ensure the compass point does not skip.
- Use a back-bevel on the cut to allow for a tighter fit against the floor.
The ghost in the expansion gap
Every floor needs room to move, and baseboards often hide the critical expansion gap required by flooring manufacturers. If you scribe a board too tightly and then nail it into the wall without considering the vertical movement of the floor, you risk binding. In bathrooms, humidity levels fluctuate wildly. When someone takes a hot shower, the moisture levels spike. The wood expands. If there is no room, the board will pull the nails or crack. I have seen modern designs where people forget that physics applies to aesthetics too. You must leave a microscopic gap, often just the thickness of a business card, to allow for this movement. This prevents the grout from cracking under the pressure of the wood. If you are worried about the look, a thin bead of color-matched 100 percent silicone can bridge the gap while remaining flexible. Do not use acrylic caulk in a bathroom. It is a recipe for mold. If you need help, look at grout restoration secrets for ways to seal those bottom joints properly.
“Wood moves. Tile does not. The joint between them is a war zone that requires a flexible peace treaty.” – NWFA Technical Manual Reference
The 1/8 inch that ruins everything
A deviation of just one eighth of an inch over a short span can make a baseboard look crooked to the naked eye. The human eye is incredibly good at spotting horizontal lines that are not parallel. When your baseboard follows a bumpy floor, the top edge of the board might become wavy. To fix this, you may need to scribe the bottom but also trim the top, or choose a profile that is flexible enough to follow the floor without showing the wave. If you are doing a baseboards makeover, consider using a taller profile. The taller the board, the less noticeable the floor’s waviness becomes. It is a matter of perspective and proportion. If you are struggling with old grout, check out how to refresh grout before you set your trim. A clean grout line makes for a much easier scribing process.
Why your subfloor is lying to you
Subfloors often appear flat until the weight of the tile and the installer is added, causing settling in weak spots. If you are working over a crawlspace or a wooden joist system, there is always some deflection. The Tile Council of North America (TCNA) specifies that for natural stone, deflection should not exceed L/720. For ceramic, L/360. If your floor is bouncier than that, no amount of scribing will save you. The tiles will crack. The grout will crumble. The baseboard will pull away from the wall. You must address the structural integrity before you worry about the scribe. I have walked away from jobs where the homeowner refused to sister the joists. I won’t put my name on a floor that is going to fail. If you want a floor that lasts, you start with the skeleton. Then you move to the skin. Then you finish with the trim. If you have questions about your specific layout, you can always contact us for a professional consultation. We value your privacy as much as your floors, which you can read about in our privacy policy.