
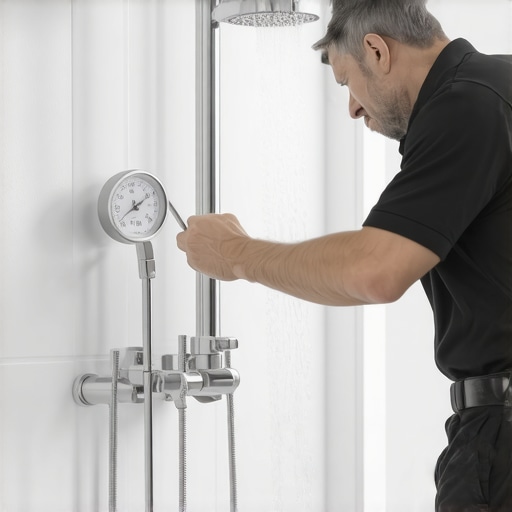
I spent three decades fixing other people’s disasters. Last year, I walked into a penthouse where a fifty thousand dollar bathroom was literally raining through the kitchen ceiling below. The culprit was not the expensive Italian marble or the designer fixtures. The failure happened because an installer wanted to save one day. He skipped the flood test. He assumed his liner was perfect. It was not. Water is a patient enemy. It finds the microscopic pinhole in a corner fold or the slightly loose bolt on a clamping ring. By the time you see the wet spot on the drywall downstairs, the subfloor is already rotting. You cannot trust a visual inspection. You have to put the system under pressure. A shower is a structural engineering project that happens to look like a decorative box. If you ignore the physics of water containment, you are just building a ticking time bomb.
The silent failure of the shower pan liner
A shower pan liner fails when water migrates through the primary drainage layer and hits a breach in the waterproofing membrane. This often occurs at the corners or where the liner meets the drain flange. Without a flood test, these leaks remain hidden until the structural framing absorbs enough moisture to swell, rot, or grow mold. We are talking about the hydrostatic pressure of several inches of standing water pushing against every square millimeter of the surface. Most installers think that because the liner looks flat and the seams are glued, it is watertight. That is a dangerous assumption. The modern designs for 2025 demand high performance, and that starts with a verified, leak-free basin.
“A floor is only as good as the subfloor beneath it; deflection is the enemy of every joint.” – Master Flooring Axiom
The physics of the three piece clamping drain
The three piece clamping drain is the heart of a traditional mortar bed shower and must be tested for mechanical integrity. Water does not just go down the drain. It permeates the grout, moves through the mortar bed, and eventually hits the liner. From there, it must travel to the weep holes in the drain assembly. If the liner is not properly compressed between the clamping ring and the drain body, water will bypass the pipe and enter the subfloor. I have seen guys use the wrong screws or forget to clear the weep holes of mortar. When that happens, the water stays trapped in the mud bed. It goes stagnant. It smells like a swamp. Eventually, it finds a way out through the wood. If you are looking at showers with a style trendy ideas for small bathrooms, remember that the smallest drain leak can ruin the biggest dream.
The molecular reality of liquid applied membranes
Liquid applied waterproofing membranes require specific mil thickness and proper curing times to create a continuous rubberized barrier. These products are popular because they are easy to roll on, but they are also easy to mess up. If you apply it too thin, it becomes porous. If you apply it over a dusty substrate, it will delaminate. The flood test is the only way to ensure the membrane has formed a monolithic bond. You are looking for a thickness that resembles a heavy duty credit card. When you fill that pan with water, the membrane is stretched and compressed. This is where you find out if your substrate prep was sloppy. If you have a dip in the plywood or a crack in the concrete that you didn’t treat, the membrane will snap under the weight of the water. You need that 24 hour soak to be certain.
| Waterproofing Method | Minimum Test Time | Common Failure Point | Success Rate |
|---|---|---|---|
| PVC Liner | 24 Hours | Folded Corners | 85% |
| Liquid Membrane | 24 Hours | Mil Thickness | 92% |
| Bonded Sheet | 12 Hours | Seam Overlaps | 98% |
| Hot Mop | 24 Hours | Thermal Cracking | 90% |
How to conduct a professional flood test
A professional flood test involves plugging the drain, filling the pan to the top of the curb, and marking the water level for 24 hours. Use a pneumatic test plug rather than a cheap rubber ball. You want to seal the pipe deep enough to test the connection between the drain and the plumbing. Fill the basin until the water is about an inch below the top of the curb. Mark the level with a piece of tape or a permanent marker on the liner itself. Now, here is the secret. You must also place a bucket of water next to the shower. This is your control for evaporation. In dry climates like Arizona or Nevada, you might lose a quarter inch of water to the air. If the shower level drops more than the bucket level, you have a leak. It is basic science. It is also the only way to sleep at night after a job.
- Seal the drain with a dedicated plumbing plug.
- Fill the basin to a minimum of two inches deep.
- Mark the exact waterline on the waterproofing surface.
- Set a control bucket to measure evaporation rates.
- Wait exactly 24 hours before draining.
- Inspect the underside of the floor or the ceiling below.
The intersection of grout and baseboards
The transition between the shower curb and the bathroom floor is a high risk area for moisture wicking into baseboards and drywall. Even if your shower pan is tight, poor management of the perimeter can lead to failure. Water that splashes out of the shower can sit against the baseboard. If that baseboard is MDF or cheap pine, it will soak up the water like a sponge. This leads to swelling and paint failure. I always recommend using a solid surface for the curb top and ensuring the baseboards makeover ideas to elevate your space include waterproof materials or a proper silicone seal at the floor line. People think grout is waterproof. It is not. Grout is a filter. It slows water down, but it does not stop it. That is why you need to know how to refresh grout without replacing it to keep the surface intact, but the real protection is the test you did before the tile went down.
“Waterproof is a promise made by the installer, but water resistance is a property of the material; never confuse the two.” – Master Flooring Axiom
The chemistry of hydrostatic pressure in wet areas
Hydrostatic pressure increases with the depth of the water and forces moisture into every microscopic void in the shower assembly. When you fill a shower for a flood test, you are exerting significant force on the bottom of the pan. This pressure is exactly what will happen every time someone takes a twenty minute shower. If the mortar bed is not packed tight, the weight of the water and the person standing on it will cause the floor to flex. This deflection is what snaps the bond between the tile and the thin-set. By testing the pan while it is still exposed, you ensure the structural support is adequate. If the floor clicks, or if the water level drops even a fraction of an inch, you stop. You do not lay tile. You find the leak. You fix the framing. You do it right because the cost of failure is total demolition.
Environmental factors and regional moisture
Regional humidity levels in places like Florida or Houston significantly impact the curing time of shower membranes before a test can begin. In a swampy environment, a liquid membrane that says it is dry in four hours might actually take twelve. If you pour water on a membrane that hasn’t fully cross-linked, you will wash it right off the wall. Conversely, in the high desert, the air might suck the moisture out of your thin-set too fast, leading to a brittle bond. You have to adjust your timeline to the room. Use a moisture meter on the subfloor before you even start. If the plywood is already at 15 percent moisture because of a leak you didn’t fix, your new floor is going to buckle. Maintain a clean workspace. Use tile cleaning tips for a sparkling bathroom in 2025 to keep the area ready for the next phase. Proper maintenance starts with a clean install. Check your grout restoration secrets for long lasting results to understand how materials age over time. Everything is connected. The baseboards, the tile, the grout, and the drain. They all rely on that one day of waiting. Don’t be the guy who skips it. Be the professional who guarantees it.