
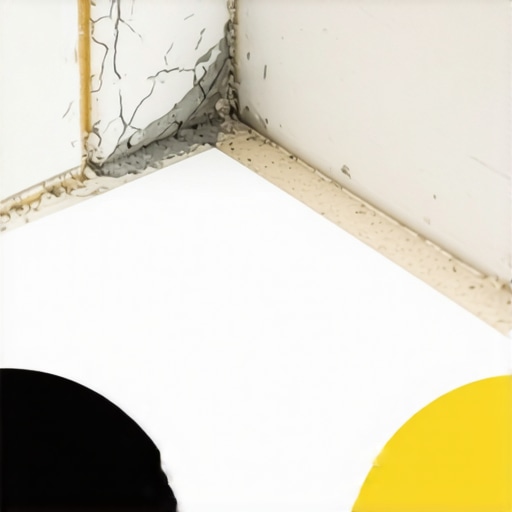
I spent three days scraping gray residue off a shower floor on a job last month just so the new bead would not peel like a sunburned back. The homeowner could not understand why I was charging for six hours of prep before I even opened a tube of sealant. They thought I could just squeeze a fresh layer over the moldy, cracked mess that was already there. It does not work that way. I have seen fifteen thousand dollar bathroom remodels ruined because an installer got lazy with a utility knife. Most guys skip the prep because it is hard work. They think the new silicone will hide the failure. It will not. In my twenty five years of handling tile and grout, I have learned that silicone is a jealous mistress. It will only bond to a perfectly clean surface, and it absolutely refuses to stick to itself once it has cured. This is not about aesthetics. This is about the physics of adhesion and the chemical reality of polymers. When you layer new silicone over old, you are creating a sandwich of failure that will trap water, breed black mold, and eventually rot out your subfloor. Every time I walk into a house where the baseboards are pulling away from the tile or the shower corner is leaking, I find the same culprit. Someone tried to save twenty minutes by skipping the removal process.
The chemistry of failed adhesion
Applying new silicone over old silicone fails because cured silicone possesses a low surface energy that prevents new polymers from forming a chemical bond. This results in a weak mechanical overlap that allows moisture to seep through via capillary action. Unlike other sealants, silicone is non-polar once it cures, meaning nothing sticks to it, including fresh silicone. When you apply a new bead over an old one, you are essentially placing a piece of plastic on top of another piece of plastic without any glue. The two layers might look like they are touching, but at a molecular level, there is a microscopic gap. This gap is the perfect highway for water. Once moisture gets in there, it stays there. It cannot evaporate because it is trapped between two waterproof layers. This is how you end up with black spots that you cannot scrub away. Those spots are not on the surface. They are growing in the graveyard of your failed caulk job. If you want a seal that actually protects your home, you have to get down to the original substrate, whether that is ceramic tile, natural stone, or the wood of your baseboards.
“A floor is only as good as the subfloor beneath it; deflection is the enemy of every joint.” – Master Flooring Axiom
The molecular structure of silicone is based on siloxane chains. These chains are incredibly stable and water-resistant, which is why we use them in wet areas like showers that wow. However, that same stability means that once the material has undergone cross-linking during the curing process, it becomes chemically inert. You cannot reactivate it with more silicone. If you try to patch a gap, you are just creating a flap. I have seen homeowners try to fix a leak by piling more and more goop into a corner. By the time I get there, there is a mountain of silicone that you can peel off with your bare hands in one long, disgusting string. Underneath that string is always a pool of stagnant water and a slime of bacteria. It smells like a swamp and it is eating your drywall from the inside out.
The hidden rot and the moisture trap
Moisture trapped behind a double layer of caulk will inevitably lead to structural damage and mold growth within the wall cavity. This happens because the outer layer of silicone prevents the inner layer from ever drying out once a leak starts. When you are dealing with tile cleaning tips, you might notice that some areas never seem to get clean. That is usually a sign that water is living behind the sealant. In a high-humidity environment like a bathroom, that trapped moisture is a ticking time bomb. I have seen floor joists completely rotted through because a shower transition was not sealed correctly. The water travels down the tile, hits the failed caulk joint, and travels behind the baseboards. From there, it finds the gap in the subfloor and starts its work on the timber. It is a slow, silent killer of houses. You will not see the damage until your foot goes through the floor or the tiles start popping off because the thin-set has turned to mush. This is why I am a stickler for grout restoration secrets that involve total removal of old materials before starting over.
Mechanical cleaning protocols for tile and grout
Total removal of old silicone requires mechanical scraping followed by a chemical solvent to eliminate the residual silicone oil that prevents new bonding. Even if you get the big chunks off, there is a thin film of silicone oil left behind that is invisible to the naked eye. If you do not strip that oil, your new bead will fail within six months. I use a combination of sharp razors and plastic scrapers to avoid scratching the finish on expensive fixtures. For natural stone, you have to be even more careful because the stone is porous. The silicone oil can actually leach into the pores of the marble or granite. This is why professional installers often use a denatured alcohol or a specialized silicone remover to prep the site. You want the surface to be so clean that it squeaks when you rub your finger over it. If it feels slick, it is not ready. You are also checking the condition of the grout during this phase. If you find crumbling material, you need to look at how to refresh grout without replacing it to ensure the entire assembly is sound before you re-caulk. Any weakness in the grout will allow movement, and movement is what tears the silicone bead away from the wall in the first place.
| Material Type | Adhesion Level to Old Silicone | Moisture Resistance | Expected Lifespan |
|---|---|---|---|
| 100% Silicone | Zero | High | 20 Years |
| Siliconized Acrylic | Low | Medium | 5-10 Years |
| Polyurethane Sealant | Zero | Very High | 25 Years |
| Old Residue | N/A | Low (Traps water) | Failure imminently |
The physics of movement and expansion gaps
Silicone is designed to act as an expansion joint that accommodates the natural shifting of a building caused by temperature and humidity changes. When you have two different materials meeting, like the tile of your floor and the wood of your baseboards makeover, they expand and contract at different rates. The silicone bead is the shock absorber. If that bead is double-layered and poorly bonded, it loses its elasticity. Instead of stretching, it simply tears. This is particularly common in regions with extreme weather. In a place like Phoenix, the dry heat shrinks everything, while in a humid coastal area, the wood swells. If your caulk is not bonded perfectly to both sides of the joint, it cannot handle that stress. You will see the bead pull away from the wall, leaving a gap that looks like a black line. That line is an open door for water. I tell people all the time that a 1/8 inch gap is enough to ruin a whole room. It is the small details that matter in flooring. You cannot hide a structural problem with a cosmetic fix. You have to respect the expansion gap and ensure the sealant is installed to handle the movement. This is why the NWFA and TCNA emphasize the importance of clean, dry joints before any application of sealant or grout.
“A floor is only as good as the subfloor beneath it; deflection is the enemy of every joint.” – Master Flooring Axiom
- Remove all old material using a sharp utility knife or specialized caulk removal tool.
- Vacuum the joints to remove any dust, hair, or debris that might interfere with the bond.
- Wipe the entire area with 91 percent isopropyl alcohol to dissolve remaining silicone oils.
- Ensure the area is completely dry, using a heat gun or hair dryer if necessary.
- Apply a high-quality 100 percent silicone bead and tool it with a finger dipped in soapy water.
When you are finished, you should have a smooth, concave bead that grips both surfaces with a chemical-grade bond. This is the only way to protect your investment. If you are looking at chic baseboard designs, remember that the most beautiful trim in the world will look terrible if there is a messy, peeling line of caulk underneath it. Take the time to do the prep work. Your subfloor will thank you, and you will not have to do the job again next year. Flooring is a science, and chemistry does not care about your shortcuts. Clean the surface, use the right materials, and respect the process. Anything else is just a waste of time and money.
“,”image”:{“imagePrompt”:”A close-up, high-detail photo of a professional hand using a razor blade to meticulously scrape old, yellowed silicone caulk from a white subway tile corner in a shower. The focus is on the residue being lifted, showing the clean surface beneath. Professional tools and a bottle of isopropyl alcohol are visible in the blurred background. Natural light, sharp focus on the textures of the tile and the peeling caulk.”,”imageTitle”:”Professional Caulk Removal Technique”,”imageAlt”:”A professional installer removing old silicone from shower tile for a proper seal.”},”categoryId”:0,”postTime”:””} Ready to post.