
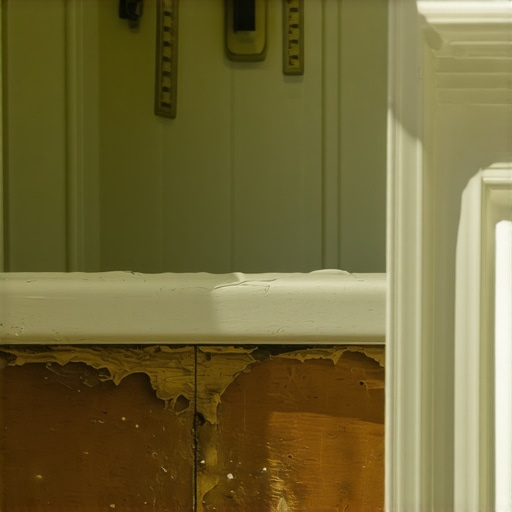
I can smell the sawdust and WD-40 as I stand in this bathroom. The homeowner is looking at a black, mushy mess where their baseboard meets the bathtub. They think it is a simple cleaning issue. I know better. This is a structural failure caused by physics and poor material choice. Most guys skip the leveling compound. They think the underlayment will hide the dip. It won’t. I spent three days grinding concrete on a job last month just so the floor wouldn’t click like a castanet. That same lack of precision is why your bathroom trim is currently disintegrating. Flooring is a performance surface. It is a structural engineering challenge that most people treat like a sticker. When you place a porous material next to a high-moisture zone like a shower, you are inviting biological decay. We are going to look at the microscopic reality of why your trim is failing and how the interaction between baseboards, showers, grout, and tile dictates the lifespan of your bathroom.
The ghost in the expansion gap
Bathroom baseboard rot occurs when moisture traps behind the trim through capillary action or grout failure. The expansion gap between the tile floor and the wall acts as a reservoir for splash water. If this gap is not properly sealed with 100 percent silicone or if the grout is porous, the wood or MDF wicks the liquid upward. Most installers treat the expansion gap as a place to hide mistakes. In reality, that 1/4 inch space is a breathing room for the house. When water hits that gap, it does not just sit there. It travels. If you have used standard grout at the plane change between the floor and the wall, it will crack. Concrete based grout is rigid. Houses move. When that grout cracks, water from your shower exit or a splashy tub gets sucked into the subfloor and the backside of the baseboard. This is the beginning of the end for your trim. You can find more about maintaining these areas in our guide on tile cleaning tips for a sparkling bathroom in 2025 which covers the basics of surface care. But surface care cannot fix a structural moisture wick.
“A floor is only as good as the subfloor beneath it; deflection is the enemy of every joint.” – Master Flooring Axiom
The molecular failure of medium density fiberboard
MDF is the most common material for modern baseboards but it is also the most susceptible to water damage in a bathroom. MDF is essentially compressed sawdust and glue. When it encounters water, the fibers swell at a rate of 25 percent or more, leading to the bubbling and crumbling you see near the tub. I have seen guys install MDF in a master bath and tell the owner it is fine as long as they do not flood the room. That is a lie. Even high humidity can trigger the swelling. If you want to know how to fix this, you should look at baseboards makeover ideas to elevate your space to see better material options like PVC or solid wood. Solid wood like pine or oak has a cellular structure that can handle some moisture, but MDF is a sponge. Once the water penetrates the factory primer on the bottom edge of an MDF board, the internal bond strength of the material vanishes. The baseboard effectively turns back into sawdust. It is a chemical failure that cannot be sanded or painted away. You have to rip it out and start over with a material that respects the laws of chemistry.
Why your subfloor is lying to you
Subfloor levelness and moisture content are the hidden factors that lead to baseboard rot near the shower. If the subfloor has a dip near the tub, water will pool under the tile and wick into the wall plate and baseboard. A subfloor that is not flat within 1/8 inch over 10 feet creates voids where moisture accumulates. Most installers are too lazy to check for level. They just slap down the tile and hope the thin-set covers the gaps. But water is patient. It finds the low spots. If your bathroom was built on a concrete slab, that slab is constantly emitting water vapor. If the moisture vapor emission rate (MVER) is too high, it pushes through the grout and into the baseboard. I always use a moisture meter before I even think about laying a tile. If that reading is above 4 percent on a concrete scale or 12 percent on wood, the job stops. We address the moisture first. If you ignore the subfloor, you are just building a rot machine. You might need to look into grout restoration secrets for long-lasting results if you find that your current grout is already failing due to subfloor movement.
The 1/8 inch that ruins everything
The precision of the caulk bead at the base of the tub determines the fate of the entire wall. A gap of even 1/8 inch in the sealant allows water to penetrate the end grain of the baseboard. This usually happens because the installer used cheap latex caulk instead of high-grade silicone. Latex caulk shrinks. As it dries, it pulls away from the tub or the baseboard, creating a microscopic fissure. Water enters through this fissure. Because the bathroom is a high-humidity environment, that water never evaporates. It stays trapped against the wood. I never use anything but 100 percent silicone at the tub to floor transition. Silicone is flexible and hydrophobic. It handles the expansion and contraction of the tub as it fills with hundreds of pounds of water and then empties. If you use a rigid grout at this junction, it will fail within six months. You can see how this fits into a broader design by checking showers that wow modern designs for 2025 to see how pros handle these transitions today.
| Material | Moisture Resistance | Durability | Best Use Case |
|---|---|---|---|
| MDF | Very Low | Low | Dry Bedrooms Only |
| Finger-Jointed Pine | Moderate | Medium | General Living Areas |
| Solid PVC | High | High | Bathrooms and Laundry |
| Solid Oak | Medium | High | High-End Architecture |
The chemistry of grout and sealant failure
Grout is naturally porous unless it is an epoxy based product. Standard cementitious grout absorbs water and moves it through the tile assembly toward the walls. When this moisture reaches the perimeter, it attacks the baseboard from the bottom and the back. Most people do not realize that grout is not waterproof. It is water resistant at best. Every time you step out of the shower, water sits on that grout and begins to soak in. This is why sealing your grout is not a suggestion; it is a requirement. If you are dealing with old, stained grout that is letting water through, you might consider how to refresh grout without replacing it to strengthen that barrier. But even the best grout needs a movement joint at the wall. The TCNA (Tile Council of North America) specifies that all change of planes must be treated with a flexible sealant. If your installer ran grout right up to the baseboard or the tub, they broke the rules. That grout will crack, and that crack will let the water in.
“Cementitious grout is a filter, not a barrier; without a proper sealant, the subfloor becomes a reservoir.” – TCNA Handbook Adaptation
The anatomy of a failing corner
Corners are the weakest point in any bathroom installation because they are where three planes of movement meet. If the baseboard is mitered poorly at the tub corner, the end grain is exposed to every splash. End grain acts like a bunch of straws sucking water deep into the wood. When I install trim in a bathroom, I back-prime every single piece. That means the side you don’t see gets a coat of sealer too. Most guys just paint the front. That is a mistake. The moisture is coming from the back and the bottom. By the time you see the paint peeling on the front, the inside of the board is already a forest of mold. You should also look at the design of the shower itself. For ideas on how to minimize splash, check out showers with a style trendy ideas for small bathrooms. A well-designed shower enclosure prevents the water from ever reaching the baseboards in the first place.
Waterproofing Checklist for Bathroom Trim
- Remove existing rotting MDF and inspect the wall plate for mold.
- Ensure the subfloor is level within 1/8 inch to prevent pooling.
- Switch to PVC or solid wood trim and back-prime all surfaces.
- Maintain a 1/8 inch gap between the bottom of the baseboard and the tile.
- Fill the gap under the baseboard with 100 percent silicone sealant.
- Verify that the shower door or curtain is properly channeled to keep water on the tile.
If you have followed these steps and are still seeing issues, it might be time to consult a professional. You can always contact us for a consultation on your specific flooring or trim needs. Do not let a small rot spot turn into a full subfloor replacement. The physics of water do not care about your renovation budget. They only care about the path of least resistance. If you provide a path through porous grout and cheap MDF, the water will take it every single time. It is about building for the long term. Use the right materials. Respect the expansion gaps. Seal the planes. That is how you build a floor that lasts. For more information on how we handle your data when you reach out, please see our privacy policy.