
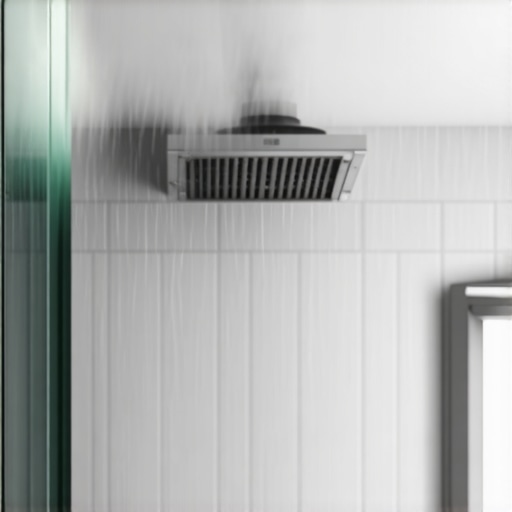
Why your bathroom feels damp even with the fan on
Most guys skip the leveling compound. They think the underlayment will hide the dip. It won’t. I spent three days grinding concrete on a job last month just so the floor wouldn’t click like a castanet. That same disregard for the invisible engineering of a room is exactly why your bathroom still feels like a tropical rainforest an hour after you step out of the shower. You have a fan. It is spinning. It might even be loud enough to wake the neighbors. Yet, the air is heavy, the walls feel tacky, and the smell of wet stone lingers. You are looking at the ceiling for answers when you should be looking at the chemistry of your tile and the physics of your subfloor. A bathroom is a specialized pressure vessel. When the installation ignores moisture vapor emission rates or the permeability of grout, the fan becomes a mere decorative accessory. I have seen fifteen thousand dollar renovations fail in eighteen months because the installer treated tile like a cosmetic skin rather than a structural shield. We need to talk about what is happening beneath the surface because your eyes are lying to you. [image_placeholder_1]
The failure of the surface level fan
A bathroom fan only removes airborne vapor but cannot address the moisture trapped within the thermal mass of the floor and walls. If your tile assembly is saturated due to poor sealing or improper substrate choice, it will continue to off-gas humidity long after the steam has been sucked out of the room. This creates a cycle where the fan handles the immediate symptoms while the source of the dampness remains embedded in your grout and thin-set. Most homeowners assume that if the mirror is clear, the job is done. This is a dangerous myth. Moisture moves through capillary action. It travels through the microscopic pores of portland cement and finds sanctuary in the voids left by cheap, notched trowel applications. If your installer did not achieve ninety-five percent coverage on the back of those tiles, you have tiny reservoirs of water sitting under your feet. This water does not just disappear. It evaporates slowly, keeping the ambient humidity at a level that feels oppressive. You are not fighting a ventilation problem. You are fighting a moisture storage problem.
“A floor is only as good as the subfloor beneath it; deflection is the enemy of every joint.” – Master Flooring Axiom
The trap inside the cement board
Cement board is water-stable but not waterproof, meaning it can hold vast amounts of liquid without degrading while slowly releasing that moisture back into the air. This distinction is where most amateur builds go wrong. They see a board that does not rot and assume it acts as a barrier. It does not. It is a sponge. When you spray water on a tiled wall with unsealed grout, the water moves through the grout lines and into the cement board. This creates a cold, damp mass behind your beautiful showers that wow. The fan on your ceiling has no way to pull moisture out from behind a layer of porcelain or ceramic. You need to understand the molecular reality of your shower. Every time you bathe, you are charging a battery of humidity. If you want to fix this, you have to stop the water from ever reaching the substrate. This requires high-performance membranes or topical waterproofing systems that create a literal tanking effect. Without this, the dampness you feel is the structural assembly breathing out the water it drank during your morning routine.
Capillary action and the science of stone
Natural stone tile is inherently porous and acts as a moisture reservoir that requires specific sealing protocols to prevent long-term humidity retention. Unlike porcelain, which has a water absorption rate of less than zero point five percent, stone like marble or slate is a collection of microscopic tubes. If you did not use a high-quality impregnating sealer, those stones are drinking every drop of overspray. This is why tile cleaning tips always emphasize the integrity of the finish. When the stone is saturated, it changes the dew point of the room. The cold stone meets the warm, moist air and causes instant condensation, regardless of the fan’s CFM rating. You are essentially living inside a cave. To combat this, you need to verify the Janka hardness and porosity of your materials before they ever touch a bucket of mortar. If you are already stuck with a damp room, the first step is often a deep dry out followed by a professional-grade sealer that actually closes the pores of the material.
The hidden rot behind the trim
Baseboards often mask the intersection of the floor and wall where moisture collects due to a lack of proper expansion gaps and silicone transitions. In my decades on the job, I have pulled back thousands of feet of trim to find black mold blooming because the installer used wood baseboards in a wet zone without back-priming them. Moisture migrates to the lowest point. If your floor is not perfectly level, water sits in the corners and wicks into the drywall behind your chic baseboard designs. This creates a perpetual dampness that a fan cannot reach. You need to ensure that the gap between the tile and the wall is filled with a hundred percent silicone caulk, not grout. Grout is rigid. It will crack. When it cracks, it invites water to explore the structural framing of your home. You should also consider baseboards makeover ideas that utilize PVC or composite materials that do not absorb water, breaking the cycle of dampness that traditional wood trim perpetuates.
| Material Type | Absorption Rate | Recommended Sealing | Humidity Impact |
|---|---|---|---|
| Porcelain Tile | < 0.5% | None required for tile | Low |
| Ceramic Tile | 3.0% to 7.0% | Grout joints only | Moderate |
| Natural Marble | 0.5% to 2.0% | Impregnating Sealer | High |
| Cementitious Grout | High | Penetrating Sealer | Very High |
| Standard Thin-set | High | N/A (Substrate) | Moderate |
The ghost in the expansion gap
Improperly installed expansion gaps allow moisture to bypass the tile surface and enter the subfloor, creating a hidden reservoir of dampness. Every room needs an expansion gap at the perimeter, usually about a quarter inch. If this gap was not treated with a waterproof sealant before the baseboards were installed, it is a highway for spilled water. I once worked a job where the homeowner complained of a musty smell for years. The fan was top of the line. The tile was pristine. But when I pulled the transition strip, the subfloor was a bog. The water from their kids splashing in the tub had been migrating under the tile for years. This is why I advocate for a total moisture barrier approach. You cannot trust the tile alone to protect the house. You have to think about the hydrostatic pressure and the way air moves through the wall cavities. If your bathroom feels damp, check your transitions. Look at where the tile meets the tub. If you see a crack in the caulk, you are looking at a leak that is fueling your humidity problems. You can find help with grout restoration secrets to seal these vulnerabilities before they destroy your floor joists.
“Water is a patient thief; it will find the one pinhole in your membrane that you thought didn’t matter.” – Master Flooring Axiom
The 1/8 inch that ruins everything
A single hairline crack in a grout line can allow several ounces of water to penetrate the subfloor during every shower, leading to perpetual high humidity. This is the contrarian truth of the flooring industry. While most people want the thickest underlayment, too much cushion actually causes the locking mechanisms on LVP to snap under pressure, and in tile, it causes the grout to flex and fail. If your subfloor has even a tiny bit of deflection, your grout will crack. Once that happens, the waterproof integrity of the floor is gone. You are now living over a wet sponge. This is why I spend so much time on my knees with a grinder and a level. If the floor is not flat within an eighth of an inch over ten feet, the installation is doomed to leak. You need to be proactive. If you see cracks, do not just ignore them. Use how to refresh grout without replacing it techniques to maintain the barrier. Dampness is a symptom of a structural breach. Treat it as such.
Moisture vapor emission rates and your slab
Concrete slabs in bathrooms often suffer from high moisture vapor emission rates that bypass the flooring and increase the room’s relative humidity. If your home is built on a slab, that concrete is constantly breathing out moisture from the earth. If the installer did not use a moisture vapor barrier like a high-grade epoxy or a specialized membrane, that vapor passes right through the concrete and into your bathroom. This is why your floor might feel cold and clammy even when the heat is on. To fix this, you need to understand the calcium chloride test results of your slab. If the emissions are over three pounds per thousand square feet, a standard thin-set will not stop the dampness. You need to invest in eco-friendly tile solutions that include moisture mitigation layers. This is the difference between a floor that lasts five years and one that lasts fifty. Stop thinking about the fan as the solution. The solution is the barrier between the wet earth and your living space.
- Check the fan CFM against the square footage of the room to ensure it actually moves enough air.
- Inspect all silicone joints at the floor-to-wall transition for gaps or mold growth.
- Use a moisture meter on the grout lines twenty-four hours after the last shower to check for retention.
- Verify that the bathroom door has at least a half-inch undercut to allow air into the room for the fan to pull.
- Seal all natural stone every six months to prevent capillary absorption.
- Monitor the humidity levels in the adjacent rooms to see if the dampness is migrating through the walls.
If you have addressed the ventilation and the dampness persists, it is time to look at the assembly itself. You might need to reach out through our contact us page for a professional assessment of your subfloor integrity. Ignoring the physics of water will only lead to expensive structural repairs down the road. A dry bathroom is a result of a tight envelope and a smart substrate, not just a spinning plastic blade in the ceiling. Protect your investment by respecting the chemistry of the build. For more information on our standards, please review our privacy policy regarding site visits and data.