The hidden anatomy of a wet wall
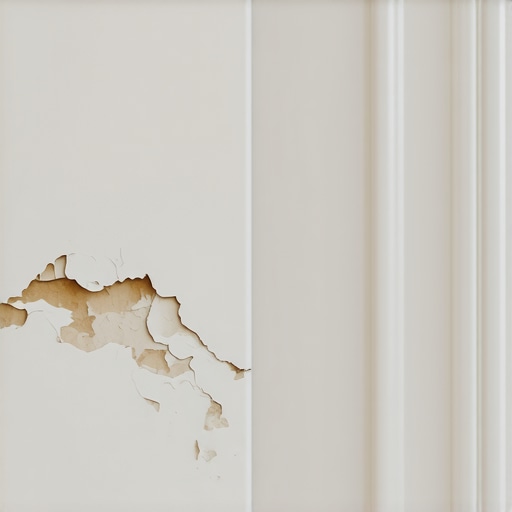
Bubbling paint near your bathroom baseboards is the physical manifestation of trapped moisture migrating through the wall assembly via capillary action or vapor pressure. This phenomenon occurs when water saturates the gypsum core of the drywall or the wood fibers of the trim, forcing the paint film to detach and form fluid-filled or air-filled blisters. It is never just a paint failure. It is a structural warning. I have seen this a thousand times in my twenty-five years on the job. I once walked into a luxury master suite where the homeowner had spent a fortune on Carrara marble but skipped the five-dollar tube of high-quality silicone. The paint was bubbling so badly near the floor that it looked like the wall was trying to breathe. When I pried that baseboard off, the smell of damp rot hit me like a freight train. The installer had used standard MDF baseboards in a wet zone and didn’t back-prime them. It was a disaster waiting to happen. If you see bubbles, your wall is telling you that the waterproofing envelope has been breached. You need to stop looking at the paint and start looking at the physics of the floor-to-wall transition. Moisture is a patient enemy. It will find a 0.1 millimeter gap in your grout and use it as a highway into your subfloor.
The physics of capillary action and baseboard wicking
Capillary action is the process where liquid flows into narrow spaces without the assistance of, or even in opposition to, external forces like gravity. In a bathroom, this means that a small puddle on the floor can actually climb several inches up into your drywall if the baseboards are not properly sealed. Most builders use Medium Density Fiberboard for trim because it is cheap and easy to paint. However, MDF is essentially a compressed sponge. Once the bottom edge touches water, it sucks that moisture up into the core. As the wood fibers swell, they push against the paint. Because the paint is a non-permeable latex or oil film, it cannot let the moisture escape, so it stretches and bubbles. If you are planning a remodel, looking into chic baseboard designs that use PVC or moisture-resistant materials is a smart move. I always tell my clients that the best looking floor is one that stays dry. You can have the most beautiful showers that wow every guest, but if the moisture management is wrong, that beauty is skin deep.
“A floor is only as good as the subfloor beneath it; deflection is the enemy of every joint.” – Master Flooring Axiom
Why your shower pan is usually lying
A leaking shower pan often manifests as bubbling paint on the opposite side of the bathroom wall or in the adjacent hallway. Many people assume a leak will show up as a pool of water on the floor, but gravity often directs the moisture through the subfloor and into the bottom plate of the wall framing. From there, it travels up. This is common in showers with a style that prioritizes low-profile curbs. If the waterproofing membrane was not properly integrated with the drain assembly or if the corners were not reinforced with band-seal, water will escape every time you step inside. The hydrostatic pressure of a standing person forces water through microscopic cracks in the tile assembly. This is why I insist on flood testing every pan for 24 hours before a single tile is laid. If your walls are bubbling, you need to check the perimeter of your shower for failed sealant. Grout is not waterproof. It is a cementitious product that is naturally porous. Without a proper membrane like Kerdi or a liquid-applied barrier, that water is going straight into your studs.
The chemistry of grout failure and moisture drive
Grout failure occurs when the chemical bond between the cement and the tile edge is broken by structural movement or improper mixing ratios. When grout is mixed with too much water, it becomes soft and brittle once cured. This creates a network of internal voids that act as reservoirs for moisture. Over time, the humidity in the bathroom causes a vapor drive. The higher pressure inside the wet wall pushes moisture toward the lower pressure of the air-conditioned room. As the vapor moves, it carries dissolved minerals and salts from the cement, which can lead to efflorescence and paint bubbling. You might need tile cleaning tips to handle the surface mess, but the real fix involves addressing the integrity of the grout lines. I always suggest that homeowners learn how to refresh grout to keep the barrier intact. If the grout is crumbling, the wall is already in danger.
| Material Type | Moisture Resistance | Common Failure Point | Recommended Use |
|---|---|---|---|
| MDF Trim | Very Low | Bottom edge wicking | Dry areas only |
| Solid Pine | Moderate | Joint expansion | Well-ventilated baths |
| PVC / Composite | High | Adhesive failure | High moisture zones |
| Greenboard Drywall | Moderate | Core saturation | Bathroom walls |
| Cement Board | High | None (Inorganic) | Shower enclosures |
The 1/8 inch that ruins everything
A gap of just one-eighth of an inch at the base of your shower door or the corner of your tub is enough to rot a bathroom floor in less than two years. When water escapes the shower, it settles at the junction where the floor meets the wall. This is exactly where the baseboard sits. Most people think their baseboards makeover is just about aesthetics, but the baseboard also serves as a protective bumper. If that bumper is not caulked at the floor line with a 100 percent silicone sealant, it invites disaster. Many installers use cheap latex caulk because it is easier to clean up, but latex shrinks and cracks. Silicone stays flexible. It handles the expansion and contraction of the house. Without that flexible seal, every drop of water that splashes out of the tub is sucked under the baseboard and into the drywall. I have seen entire subfloors turned to mush because a ten-cent bead of caulk was missing. It is a sloppy mistake that costs thousands.
“Moisture movement is governed by the laws of thermodynamics; it will always migrate toward lower vapor pressure.” – Flooring Engineering Standard
The regional humidity factor in wall bubbling
High ambient humidity in coastal or tropical regions accelerates the degradation of bathroom wall materials by preventing the drying of incidental moisture. If you live in a place like Florida or Houston, your bathroom is a tropical rainforest. The air is already saturated, so when water gets behind your paint, it has nowhere to go. It stays there and breeds mold. In these climates, you cannot use traditional organic materials. You need to consider eco-friendly tile solutions that utilize inorganic substrates. I have worked on jobs in the desert where things dry out in an hour, but in the swamp, a wet wall stays wet for a month. This is why proper ventilation is non-negotiable. If your fan isn’t pulling enough cubic feet per minute, you are basically steaming your walls every time you shower. That steam penetrates the paint, weakens the bond, and causes the bubbling you see at the baseboards.
A checklist for diagnosing your bathroom wall bubbles
- Check the shower door sweep for tears or gaps.
- Inspect the grout lines for hairline cracks or missing chunks.
- Use a moisture meter to test the drywall three inches above the baseboard.
- Verify that the bathroom fan is actually venting to the exterior and not just the attic.
- Look for dark spots or soft areas on the baseboard itself.
- Check the toilet wax ring for slow leaks that migrate across the floor.
- Ensure the sink p-trap isn’t dripping onto the back of the vanity and the wall.
Stopping the rot and fixing the damage
To fix bubbling paint, you must first identify the source of the water and then remove all contaminated materials, including the affected drywall and trim. Do not just scrape the bubbles and repaint. You are just covering up a wound that is still bleeding. You need to cut out a section of the wall to see what is happening inside. If the studs are damp, they need to be dried with high-velocity fans. If there is mold, it needs to be treated with a professional-grade antimicrobial solution. Only after the moisture content of the wood is below 12 percent should you think about putting the wall back together. Use moisture-resistant drywall and prime every side of your new trim before installation. If this sounds like a lot of work, that is because it is. If you want it done right the first time, you can contact us for expert guidance on proper installation. A floor is a system. Every piece has to work together or the whole thing fails. Do not let a small bubble turn into a full-scale renovation because you ignored the signs. Respect the water and it will respect your house.