
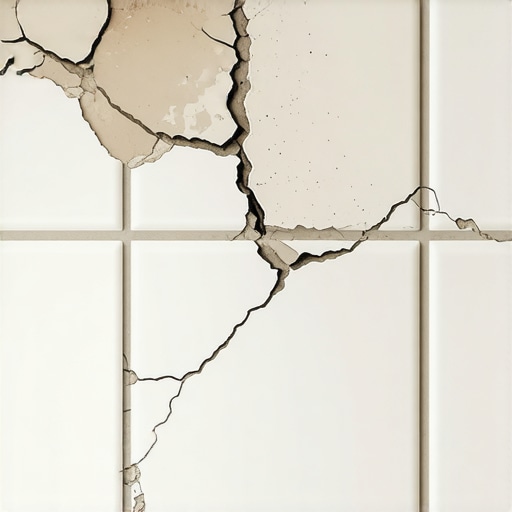
The hidden physics of grout failure and subfloor instability
I spent three days grinding concrete on a job last month just so the floor wouldn’t click like a castanet. Most guys skip the leveling compound. They think the underlayment will hide the dip. It won’t. I have seen countless homeowners waste thousands on regrouting because they ignore the structural reality beneath their feet. Grout is not a structural adhesive. It is a rigid, cementitious filler that has almost zero tensile strength. When the substrate moves, the grout snaps. This is the brutal reality of flooring that most big-box retailers will never tell you. If you are staring at a hairline fracture in your kitchen or shower, you are not looking at a cleaning problem. You are looking at a physics problem. I have spent 25 years pulling up failed tile jobs where the installer blamed the product, but the real culprit was a subfloor that had too much bounce or a joist system that was spaced for carpet, not stone. You cannot fix a moving target with a new layer of paste. You have to address the deflection, the moisture, and the chemical bond of the thin-set before you even think about the aesthetic finish of the grout line.
The myth of the superficial fix
Grout cracks because of subfloor deflection, unstable substrates, and incorrect adhesive bonds that allow individual tiles to move independently of the floor system. When you see a crack, your first instinct is to scrape it out and smear more grout into the void. This fails every time because the underlying cause remains active. You are essentially putting a band-aid on a broken bone. If the joists beneath your floor are flexing beyond the L/360 standard, no amount of high-performance epoxy grout will stay intact. The movement will simply find the next weakest point. I always tell my clients that the grout is the canary in the coal mine. It tells you exactly where your house is breathing and where your subfloor is failing. To understand why your repairs are not sticking, you have to look at the microscopic interaction between the tile, the thin-set, and the plywood or concrete below. If there is even a millimeter of vertical movement, the bond breaks. This is why grout restoration secrets for long-lasting results always start with stabilizing the floor itself. You can find more on this in my guide on grout restoration secrets for long-lasting results.
The structural skeleton beneath the ceramic
Joist spacing and subfloor thickness determine if a floor meets L/360 deflection standards, which is the industry minimum for preventing ceramic tile and grout failure. If your home has joists spaced at 24 inches on center with a single layer of 5/8 inch plywood, your floor is too bouncy for tile. It will flex under your weight. As the floor bows, the bottom of the grout joint is compressed while the top is pulled apart. This mechanical stress exceeds the internal cohesion of the cement. You need a stiff floor. This often means adding a second layer of underlayment grade plywood, glued and screwed properly, but never screwed into the joists themselves. You want the subfloor to act as a monolithic slab. I have seen guys try to save money by skipping the second layer of plywood. They think they can compensate with a thicker tile. It does not work that way. Physics does not care about your budget. If the deflection is too high, the grout will turn to powder.
“A floor is only as good as the subfloor beneath it; deflection is the enemy of every joint.” – Master Flooring Axiom
| Substrate Type | Deflection Limit | Recommended Grout | Risk Level |
|---|---|---|---|
| Concrete Slab | L/720 | Epoxy or High-Polymer | Low |
| 16-inch OC Joists | L/360 | Sanded Cementitious | Medium |
| 24-inch OC Joists | L/240 | None (Requires Reinforcement) | High |
| Old Floorboards | L/180 | None (Requires Overly) | Extreme |
Chemical warfare in the grout line
Water-to-powder ratios and over-washing during the cleanup phase destroy the polymer structure of the grout, leading to soft, chalky joints that crumble. One of the most common mistakes I see is the installer using too much water. It makes the grout easier to spread, but as that excess water evaporates, it leaves behind microscopic voids. These voids are structural weaknesses. Then, during cleanup, if the installer uses a dripping wet sponge, they wash the pigment and the binder right out of the top layer of the grout. This leaves you with a joint that looks great for a month but starts to pit and crack as soon as you walk on it. You need a stiff mix, like peanut butter, and you need to use as little water as possible during the strike-off. This is why many pros are moving toward pre-mixed urethane grouts or high-tech polymers that do not rely on the user to get the water ratio perfect. If you want to know how to refresh grout without replacing it, you must ensure the existing grout is structurally sound first. Check out how to refresh grout without replacing it for proper techniques.
Why your shower floor is a moving target
Moisture-wicking substrates and lack of movement joints cause grout to fail in wet environments where thermal expansion and humidity changes are constant. Showers are brutal environments. The constant cycle of getting wet and drying out causes the framing to expand and contract. If your tile is installed tight against the walls without a perimeter expansion gap, the entire field of tile will buckle or ‘tent.’ In many showers with a style trendy ideas for small bathrooms, the aesthetic design often overlooks the need for 100 percent silicone sealant in the change-of-plane joints. Grout should never be used in corners or where the floor meets the wall. These areas require a flexible sealant because the two surfaces move in different directions. If you use grout there, it will crack within weeks. This is a fundamental rule of the TCNA. You need to design showers that wow modern designs for 2025 with movement in mind. See more at showers with a style trendy ideas for small bathrooms and showers that wow modern designs for 2025.
The vertical pressure of baseboards
Baseboards pinned too tightly prevent the floor from expanding, leading to buckling and grout fractures along the edges of the room. This is a subtle killer. When you install new tile, you leave a gap at the wall. This is the expansion joint. But then the trim guy comes in and hammers the baseboard down hard against the tile. Now, the tile is trapped. When the house settles or the humidity rises, the tile has nowhere to go. It pushes against the grout, and the grout gives way. You should always leave a tiny gap, about the thickness of a credit card, between the bottom of the baseboard and the tile, then fill that gap with a color-matched caulk if necessary. If you are looking for baseboards makeover ideas to elevate your space, remember that the function of the baseboard is to hide the expansion gap, not to eliminate it. You can see some chic baseboard designs that transform rooms in 2025 that incorporate these technical requirements at baseboards makeover ideas to elevate your space and chic baseboard designs that transform rooms in 2025.
“Movement joints are not optional; they are the breathing lungs of a tile installation.” – TCNA Technical Bulletin
The information gain on underlayment cushion
While most people want the thickest underlayment to make the floor feel soft, too much cushion actually causes the locking mechanisms on LVP or the grout joints in tile to snap under pressure. This is a common failure in modern installations. People buy these thick, pillowy underlayments thinking they are getting luxury, but they are actually creating a trampoline effect. Every time you step, the floor deflects. In a tile assembly, this is catastrophic. Even in floating floors, it ruins the joints. You want a high-density, low-compression underlayment. It should feel firm, almost like hard rubber, not like a yoga mat. If your tile was installed over a soft membrane that wasn’t designed for the load, your grout will never stop cracking. You can’t fix it from the top. You have to understand that the thin-set is not a glue. It is a cementitious bond that requires mechanical interlocking. Using more doesn’t make it stronger. It makes it shrink more during the curing process, which can actually pull the grout away from the tile edges before you even move in.
Environmental physics and the moisture trap
Ambient humidity and thermal expansion force tiles to push against rigid grout lines, causing localized crushing or ‘spalling’ of the grout surface. In regions with high humidity, like the coastal south, the wood framing of a house can change size significantly between seasons. If the house was built in the dry winter and you install tile in the humid summer, the wood is at its maximum expansion. When winter returns and the wood shrinks, it puts the tile under immense pressure. This is why acclimation of materials is not just for hardwood. Your backer board and your tile should be in the environment for at least 48 hours before installation. If you are interested in eco-friendly tile solutions for sustainable homes in 2025, you must also consider the life cycle of the repair. Constant regrouting is not sustainable. Doing it right the first time is. Check out eco-friendly tile solutions for sustainable homes in 2025. Also, keep your surfaces clean using tile cleaning tips for a sparkling bathroom in 2025 to prevent mold from weakening the grout structure, as seen here tile cleaning tips for a sparkling bathroom in 2025.
Checklist for a permanent grout repair
- Verify subfloor stiffness by checking joist span and plywood thickness.
- Ensure all perimeter expansion gaps are at least 1/4 inch wide.
- Remove 100 percent of the old, cracked grout before reapplying.
- Use a high-performance polymer-modified grout or epoxy for superior bond.
- Replace grout in all corners and change-of-plane joints with 100 percent silicone.
- Control the room temperature and humidity during the 72-hour curing window.