
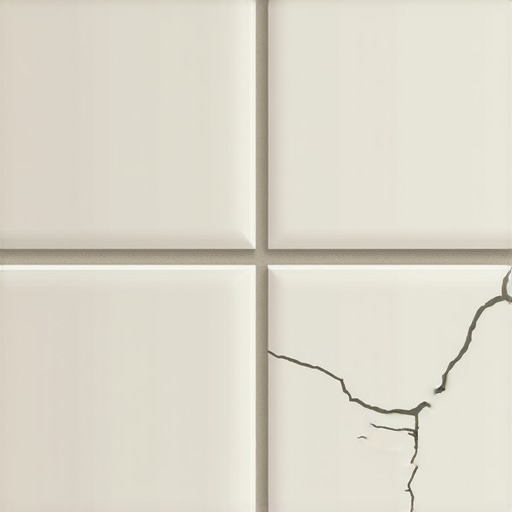
Grout is the canary in the coal mine for a bad tile job. Most guys skip the leveling compound and think the underlayment will hide the dip. It won’t. I spent three days grinding concrete on a job last month just so the floor wouldn’t click like a castanet and the grout wouldn’t turn into dust within a week. When you see a hairline fracture running through your shower floor or kitchen tile, you are looking at a structural failure, not a cosmetic one. Grout fails because the assembly beneath it is moving, shrinking, or vibrating in ways that the rigid cement cannot handle. Most homeowners think they can just smear some more paste in the gap and call it a day, but unless you understand why that bond broke, you are just wasting time and money.
The 1/8 inch that ruins everything
Cracked grout is almost always caused by subfloor deflection or improper mortar coverage that allows the tile to move independently of the substrate. If your joists are spaced too far apart or your subfloor is too thin, the floor will flex when you walk on it. Tile is rigid. Grout is rigid. Wood is flexible. When that wood bends, something has to give. Usually, it is the grout line. This 1/8 inch of movement is the difference between a floor that lasts fifty years and one that fails in five months. You have to respect the L/360 deflection standard which dictates that a floor should not bend more than 1/360th of its span under a live load. For natural stone, that requirement is even stricter at L/720. If you do not hit those numbers, your grout is doomed before the bag is even opened.
“A floor is only as good as the subfloor beneath it; deflection is the enemy of every joint.” – Master Flooring Axiom
Why your subfloor is lying to you
Subfloors often appear flat to the naked eye but contain micro-waves and dips that create air pockets under your tile. When you set a tile over a dip, you create a bridge. Every time someone steps on that bridge, the tile bows. The grout, being a brittle material, cannot handle the tension. It shears away from the edge of the tile. This is why I carry a 10 foot straightedge on every job. If I see a gap larger than 1/8 inch over a 10 foot span, I am not laying a single tile until the self-leveling underlayment is poured. This is particularly vital in modern showers that wow where large format tiles are popular. The bigger the tile, the less room for error you have in the floor flatness. A 12×24 inch tile has no flexibility, so any deviation in the floor puts massive stress on the grout joints.
The chemistry of a weak bond
Mixing grout with too much water is the most common mistake made by DIYers and rushed contractors. Portland cement requires a specific amount of water to undergo the chemical process of hydration. When you add extra water to make it easier to spread, you are essentially diluting the strength of the crystalline lattice. As the excess water evaporates, it leaves behind microscopic voids. These voids make the grout porous, weak, and prone to crumbling. It also leads to pigment washout, which is why your grout might look splotchy or lighter than the sample card. You want a consistency like peanut butter. If it is runny, it is ruined. You also need to consider the environment. If you are working in a dry climate, the tile can actually suck the moisture out of the grout too quickly, stopping the hydration process and leaving you with a soft, chalky mess.
| Grout Type | Ideal Joint Width | Best Use Case | Flexibility Rating |
|---|---|---|---|
| Sanded Grout | 1/8″ to 1/2″ | General floor tile | Low |
| Unsanded Grout | Less than 1/8″ | Polished stone/Walls | Very Low |
| High-Perf Cement | 1/16″ to 1/2″ | High traffic areas | Moderate |
| Epoxy Grout | 1/16″ to 3/8″ | Showers and kitchens | High |
The ghost in the expansion gap
Hard surfaces expand and contract with temperature and humidity changes, and without proper perimeter expansion joints, the floor will crush its own grout lines. I have seen entire floors tent up and explode because the installer ran the tile tight against the wall. You must leave a gap at the perimeter. This gap is usually hidden by baseboards, but it is the most important part of the installation. If the tile has nowhere to go when it expands, the pressure builds up until the weakest point fails. Usually, that is the grout. In large rooms, you also need movement joints every 20 to 25 feet. This is not a suggestion. It is a requirement by the Tile Council of North America. If you skip this, you are building a ticking time bomb. Use a color matched caulk in these areas instead of hard grout to allow for that inevitable movement.
The moisture trap in showers
Water penetration behind the tile can cause the substrate to swell, which physically pushes the grout out of the joints. In a shower environment, the management of moisture is the top priority. If the waterproofing membrane was not installed correctly, the backer board absorbs water. It expands. It pushes. The grout cracks. Then more water gets in. It is a vicious cycle. People often look for how to refresh grout without replacing it, but if the substrate is wet, no topical fix will work. You are just putting a band-aid on a broken leg. You need to ensure your shower pan is pre-pitched and that your weep holes in the drain are not clogged with mortar. If the water cannot get out, it stays in the assembly and wreaks havoc on your grout’s integrity.
“Tile installations are not waterproof; the membrane behind the tile is what protects the structure.” – TCNA Handbook Principle
Precision mixing and application protocols
To ensure a lasting bond, you must follow a strict protocol for mixing, slaking, and cleaning your grout. Most people skip the slaking step. After you mix the grout, you must let it sit for five to ten minutes. This allows the chemicals to fully activate. If you skip this, the grout will not achieve its full hardness. After slaking, you mix it again briefly. Do not use a high speed drill. High speeds introduce air bubbles, which again, lead to those microscopic voids that cause cracking. When cleaning the grout off the tile, use a damp sponge, not a dripping wet one. Too much water during the cleanup phase will pull the cement out of the top of the joint, leaving it low and weak. Use a dedicated grout restoration approach if the damage is already done, but for new installs, precision is the only way forward.
- Verify subfloor thickness and joist spacing before starting.
- Use a 10 foot straightedge to check for floor flatness.
- Always slake your grout for at least 5 minutes.
- Install 1/4 inch expansion gaps at all vertical transitions and walls.
- Use color matched 100 percent silicone caulk in all change of plane joints.
- Never mix more grout than you can spread in 20 minutes.
The chemistry of modified thin-set
The bond between the tile and the substrate is managed by the thin-set, and if this bond fails, the grout will follow. I always use a polymer modified thin-set. These polymers act like tiny springs within the cement, allowing for a microscopic amount of movement. If you use a cheap, unmodified mortar on a plywood subfloor, the bond will snap. Once the tile is loose, it acts like a hammer on the grout every time you step on it. You need at least 80 percent coverage for dry areas and 95 percent coverage for wet areas like showers. I see guys ‘spot bonding’ or ‘dotting’ the corners all the time. That is a recipe for disaster. It leaves huge voids under the tile. When the tile flexes into those voids, the grout cracks instantly. You have to back-butter your tiles, especially if they are large format. This ensures that the chemical bond is solid across the entire surface area. If you hear a hollow sound when you tap on your tile, you have a void, and your grout is likely the next thing to go. This level of detail is why a professional installation costs more. We aren’t just slapping mud on the floor. We are engineering a multi-layered system designed to withstand thousands of pounds of pressure and decades of temperature fluctuations.