
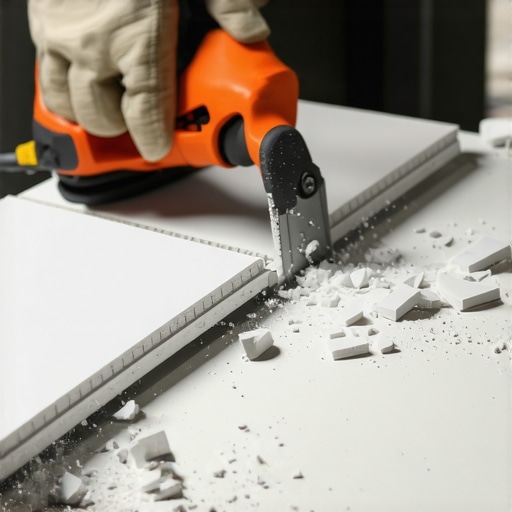
I spent three days grinding concrete on a job last month just so the floor wouldn’t click like a castanet. Most guys skip the leveling compound. They think the underlayment will hide the dip. It won’t. I have seen it a thousand times. You walk onto a job site and the installer is cursing at a stack of ruined porcelain. The edges look like they were chewed by a shark. The homeowner is hovering. The budget is bleeding. I can tell you from twenty five years in the mud that the floor does not care about your feelings. It only cares about physics. Porcelain is a dense and brittle beast. It is fired at temperatures exceeding 2,200 degrees Fahrenheit. This makes it incredibly durable but also under immense internal tension. If you do not respect the chemistry of the tile and the mechanics of your tool, you will fail. Chipping is not an accident. It is the result of heat, vibration, and poor technique. I have spent my life with the smell of wet concrete and thin-set on my clothes. I know that a clean cut is the difference between a high end finish and a hack job. We are going to look at why your tiles are failing and how to stop the carnage.
The physics of the exit chip
Porcelain tile chipping occurs because of mechanical stress, dull diamond blades, and high vibration levels during the cutting process. When the blade reaches the end of the cut, the remaining material is too thin to support the centrifugal force of the blade, causing the vitrified clay to snap off in jagged shards rather than being ground away cleanly. This is the most common failure point for DIY installers and rushed professionals alike. The structural integrity of the tile is compromised at that final half inch. If you are working on showers or large floor spans, these chips will be visible even after you apply grout. You can see modern design examples of clean installations at showers that wow modern designs for 2025. The edge must be supported. If your saw tray has a gap directly under the blade path, the tile will flex. That flex is the death of a clean edge. I always tell my apprentices that the tray must be a solid, level plane. Any deviation allows the tile to vibrate at a frequency that exceeds its internal bond strength. We are talking about microscopic movements that manifest as visible chips. It is about energy transfer. If the energy from the motor is not being converted into a clean grind, it is being converted into heat and vibration. Heat expands the diamond matrix. Vibration shatters the silica.
“A floor is only as good as the subfloor beneath it; deflection is the enemy of every joint.” – Master Flooring Axiom
The diamond blade is not actually a blade
Diamond blades for porcelain tiles are abrasive tools that grind material using industrial diamond crystals embedded in a metal bond matrix. They do not cut like a knife. They work by micro-chipping the tile at a high speed. If the diamond grit is too coarse or the metal matrix is too hard, the blade will skip and cause large chips. Choosing the right blade is the most important decision you will make on the job site. A cheap blade from a big box store is designed for soft ceramic. It will choke on the density of porcelain. You need a continuous rim blade. Any segments or gaps in the rim will hit the tile like a hammer. I have seen guys try to use a segmented blade meant for concrete on a porcelain slab. It sounds like a machine gun and the results are just as violent. You also need to consider the RPM of your saw. If the blade is spinning too fast for its diameter, it will wobble. If it spins too slow, it will catch and kick. Both lead to ruined material. When you are finishing up a room and preparing for baseboards makeover ideas to elevate your space, you want those perimeter cuts to be perfect. Even though the baseboard covers the edge, a chipped tile can lead to a crack that migrates into the center of the room later. It is a structural engineering challenge. You are managing the stress of the material.
| Blade Type | RPM Range | Application | Chip Risk |
|---|---|---|---|
| Continuous Rim | 3,000 to 4,500 | Porcelain and Glass | Very Low |
| Turbo Rim | 4,500 to 6,000 | Granite and Stone | Medium |
| Segmented | 6,000 plus | Concrete and Brick | High |
The cooling system and thermal shock
Water flow is the primary factor in preventing thermal shock and blade warping during porcelain tile cutting operations. A dry blade will heat up the porcelain body until it reaches a breaking point, leading to stress fractures and significant edge chipping. You need a constant stream of cool water. In humid regions like the Gulf Coast, your reservoir water can get warm quickly. Warm water does not dissipate heat. It just moves it around. I have a habit of adding ice to my saw tray on 100 degree days. It sounds crazy but it keeps the blade cool and the cut clean. When the tile gets hot, it expands. When the water hits it, it shrinks. This rapid cycle causes the surface tension to snap. That is where your chips come from. Also, check your pump. If the nozzles are clogged with old grout or tile dust, you are not getting the flow you need. A clean saw is a precise saw. If you are doing a deep clean after a big project, you might find tile cleaning tips for a sparkling bathroom in 2025 helpful for the finished product. But for the saw, you need to flush the lines daily. Slurry is your enemy. It turns into a grinding paste that wears down your blade and creates friction. Friction creates heat. Heat creates chips. It is a vicious cycle that ruins your margins.
The secret of the dressing stone
Dressing a diamond blade removes the glazed metal bond to expose fresh, sharp diamond crystals for more efficient porcelain cutting. Over time, the metal matrix of the blade melts over the diamonds, a process called glazing. This makes the blade smooth and prevents it from grinding through the dense tile body. If your blade is sparking or the cut is slowing down, you are glazing. You need a dressing stone. It is a simple bar of abrasive material. You run the blade through it a few times and it strips away the old metal. It is like sharpening a pencil. I do this every ten cuts when I am working with high density Italian porcelain. It keeps the blade aggressive. If you do not dress the blade, you will start pushing harder to make the cut. Pushing creates deflection. Deflection creates chips. It is all connected. Once the tile is installed, you have to think about maintenance. If the edges are clean, your grout will stay in place longer. You can learn more about this at grout restoration secrets for long lasting results. A chipped edge creates a pocket where moisture can sit. In a shower, that moisture will eventually undermine the bond. It is a failure that starts with a bad cut and ends with a moldy subfloor. Don’t let that happen.
“Precision is not an act, it is a habit; the last inch of the cut defines the craftsman.” – Tile Council of North America Standard
The 1/8 inch rule for perfect cuts
- Slow down the feed rate when you are within the last inch of the tile to reduce the impact force on the corner.
- Check the saw alignment to ensure the blade is perfectly parallel to the tray tracks.
- Use a sacrificial board under the tile to provide continuous support and prevent the bottom of the tile from blowout.
- Maintain the diamond rim by using a dressing stone regularly to expose sharp grit.
- Ensure maximum water flow hits both sides of the blade simultaneously to prevent uneven heat expansion.
Applying the 1/8 inch rule means reducing the pressure on the tile as the blade exits to prevent corner blowouts. Most installers try to force the tile through the saw. You have to let the tool do the work. If you feel resistance, the blade is either dull or you are moving too fast. If you are working on a custom project and need expert advice, you should contact us to discuss the structural requirements of your flooring. Porcelain is not like ceramic. Ceramic has a soft biscuit. Porcelain is the same density all the way through. It is a technical material that requires a technical approach. I have spent decades on my knees and I can tell you that the floor always wins. If you respect the material, it will last a lifetime. If you fight it, you will be tearing it out in five years. This is why we focus on the subfloor first. If the subfloor has even a 1/8 inch dip, the tile will eventually crack under the pressure of foot traffic. The same logic applies to the cut. If your saw tray has a dip, the tile will crack under the pressure of the blade. Precision is the only way forward. If you want a floor that looks like a masterpiece, you have to treat every cut like it is the only one that matters. Stop rushing. Stop using cheap blades. Start measuring your success by the lack of chips on your waste pile.