The ghost in the expansion gap
Shower drain gurgling is a symptom of pressure differentials within your plumbing vent system or a partial blockage in the P-trap that forces air through the water seal. This sound indicates that the atmospheric pressure is not equalized, often leading to sewer gas leaks or water damage beneath your tile installation. Most guys skip the leveling compound. They think the underlayment will hide the dip. It won’t. I spent three days grinding concrete on a job last month just so the floor wouldn’t click like a castanet, and that same attention to detail is what you need when a drain starts talking to you. A gurgle is more than an annoyance; it is a warning that the structural integrity of your bathroom floor is at risk. When air cannot move freely through the vent stack, it looks for the path of least resistance, which is usually your shower drain. This creates a vacuum effect that can pull water out of the trap, leaving your home vulnerable to methane and moisture. If you ignore it, you are not just living with a noise; you are inviting rot into your subfloor. Every time that drain gasps for air, it puts stress on the mechanical seals connecting the drain flange to the waterproofing membrane.
The physics of the trap and the vent
Plumbing vents and P-traps work in tandem to maintain a hydrostatic seal that prevents sewer gases from entering the bathroom environment. When a drain gurgles, it is typically because the vent stack is obstructed by debris or the trap weir is improperly sloped. I have seen 25 years of flooring failures, and a huge percentage start with a small plumbing issue that everyone ignored. The water in that trap is a physical barrier. If the air pressure in the pipes drops because of a clog further down the line, it sucks that water down. Once the water level drops, the seal is broken. This is not just about smell. It is about the moisture vapor that begins to saturate the underside of your tiles. If you are noticing issues with your tile surfaces, it might be time to look at grout restoration secrets to ensure your floor is still protected. A gurgle often precedes a backup, and a backup is the fastest way to ruin a custom walk-in shower. You need to understand that the air in your pipes needs to move as fast as the water. If it can’t, physics takes over, and your drain becomes the exhaust port.
“A floor is only as good as the subfloor beneath it; deflection is the enemy of every joint.” – Master Flooring Axiom
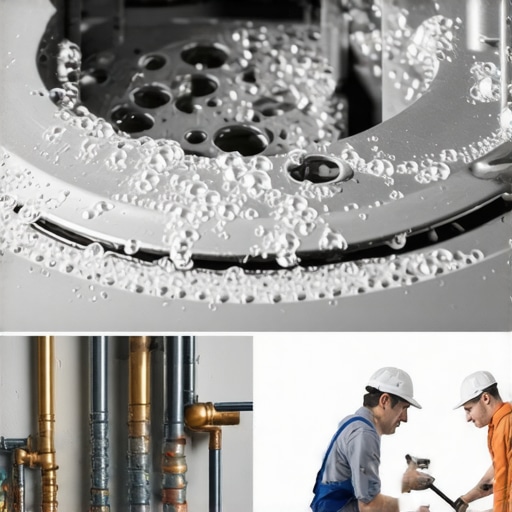
Why your shower pan is a ticking time bomb
Shower pans rely on a waterproof membrane and a tightly sealed drain flange to prevent subfloor saturation and structural rot. If the drain seal is compromised, water will infiltrate the mortar bed, leading to efflorescence in your grout lines and eventual tile failure. Most homeowners think their tile is waterproof. It isn’t. Tile and grout are just the skin. The real work is done by the liner underneath. When a drain gurgles, the vibration and pressure changes can, over years, fatigue the sealant used at the throat of the drain. I have pulled up floors where the plywood was so soft you could poke a finger through it, all because a drain seal was weeping a few drops a day. You need to be proactive. If you are designing a new space, consider showers that wow but ensure they are built on a rock-solid foundation. We are talking about the molecular bond between the PVC of the drain and the liquid-applied membrane. If that bond breaks, the water does not stay in the pipe. It travels laterally, soaking the subfloor and eventually creeping up into your wall studs.
The 1/8 inch that ruins everything
Drainage slope must maintain a minimum of one-fourth inch per foot to ensure scouring action and prevent the sediment buildup that causes gurgling sounds. If the subfloor deflection exceeds L/360 standards, the movement will crack the grout joints and break the mechanical seal at the drain assembly. I have seen guys try to eye-ball a slope. It never works. You get a birdbath in the corner of the shower, and the water sits there, stagnant, breeding bacteria and putting constant pressure on the grout. While many homeowners apply more grout to fix a leak, grout is not waterproof; it is a porous sieve that requires a chemical sealer or a membrane to actually stop water. For those looking to maintain their surfaces, following tile cleaning tips is helpful, but it won’t fix a structural slope issue. You need to verify that the floor doesn’t bounce. If the floor bounces, the drain seal will fail. It is a mechanical certainty. We use high-modulus thin-set for a reason, but even the best chemistry cannot overcome a subfloor that moves like a trampoline.
Drain Seal Integrity Comparison
| Sealant Type | Chemical Base | Lifespan | Application |
|---|---|---|---|
| Plumber’s Putty | Linseed Oil and Clay | 10 Years | Metal Flanges |
| 100% Silicone | Polydimethylsiloxane | 20 Years | Plastic to Tile |
| Hybrid Polymer | Polyurethane | 25 Years | High Movement Areas |
Signs that your grout is failing the subfloor
Failing grout manifests as hairline cracks, darkening of joints, and powdering, which allows bulk water to penetrate the tile assembly and rot the subfloor. This process is accelerated by hydrostatic pressure when a drain is clogged or gurgling, pushing water into the thin-set layer. When the drain isn’t clear, water backs up and sits on the grout longer than it should. Since grout is cementitious, it absorbs that water. If you see your grout turning dark and staying dark long after the shower is off, you have a saturation problem. You might want to learn how to refresh grout to fix the aesthetics, but you must address the moisture underneath first. I’ve spent decades on my knees with a moisture meter and a level. I can tell you that a wet subfloor will eventually swell, and when it swells, it pushes the tile up. That is when you get lippage, and that is when your expensive bathroom starts looking like a DIY disaster. You need a continuous, uninterrupted moisture barrier that ties directly into the drain throat with no gaps.
How to inspect the drain seal without a sledgehammer
Visual inspection of a shower drain seal involves checking the clamping ring, looking for weep hole blockages, and performing a flood test on the shower pan. By isolating the drain assembly, you can determine if the gurgling noise is related to a structural leak or a venting failure. Start by removing the grate. Get a flashlight down there. If you see standing water in the barrel of the drain above the trap, your weep holes are clogged. This causes the mortar bed to stay saturated, which is a leading cause of mold. You should also check around the perimeter of the room. Sometimes water travels under the tile and shows up at the walls. If you are seeing moisture near your floorboards, it might be time for baseboards makeover ideas that incorporate moisture-resistant materials. A simple test is to plug the drain and fill the pan with two inches of water. Mark the level. If it drops after an hour, your seal is gone. It is a blunt reality, but knowing now saves you a $20,000 remodel later.
Shower Health Checklist
- Listen for vacuum sounds during and after water flow.
- Check grout lines for persistent dampness or discoloration.
- Inspect the transition where the tile meets the drain grate.
- Monitor the baseboards in adjacent rooms for swelling.
- Clear the vent stack on the roof of bird nests or debris.
- Verify the subfloor stiffness to prevent joint fatigue.
“Surface waterproofing must be continuous and integrated with the drain assembly to prevent structural decay.” – TCNA Installation Handbook Standards
The connection between baseboards and bathroom moisture
Baseboards act as the first indicator of wicking moisture, often showing paint peeling or MDF swelling when a shower drain seal has failed and water is traveling across the subfloor. Because capillary action pulls water upward, the wall base will often rot before the tile surface shows visible damage. I hate builder-grade materials because they hide these problems until it is too late. Standard MDF baseboards are basically sponges. If your drain is gurgling and your baseboards are soft, you have a major leak. You should look into chic baseboard designs that use PVC or treated wood in wet areas. It is about building for the environment you have. In a bathroom, you have high humidity and the constant threat of a plumbing failure. You need materials that can handle the stress. When I install a floor, I leave an expansion gap at the wall, but I make sure the waterproofing turns up the wall behind the baseboard. This creates a bathtub effect that keeps your house safe even if the drain fails.
Tile installation secrets for a waterproof future
Modern tile installations utilize bonded membranes and epoxy grouts to create a chemically resistant and impermeable surface that protects the structural subfloor from plumbing failures. Using liquid-applied waterproofing ensures that even if a drain gurgles or backs up, the water is contained within the tiled vessel. We are moving away from the old mud-bed methods because they are too heavy and absorb too much water. Today, we use high-density foam pans and integrated drain systems. If you are environmentally conscious, you can even find eco-friendly tile solutions that don’t sacrifice performance. The key is the transition. The bond between the tile and the drain must be flexible enough to handle the expansion and contraction of the house but strong enough to remain watertight. I always tell people to invest in the stuff they won’t see. The prettiest tile in the world won’t matter if the joists underneath are rotting because of a five-dollar rubber gasket that wasn’t seated correctly. Final inspection of your drain system today prevents the heartbreak of a demolished bathroom tomorrow. Check your seals, listen to your pipes, and never trust a subfloor that hasn’t been leveled properly.