The shadow on the shower floor
Mismatched grout colors occur when the hydration process of Portland cement is interrupted by improper water ratios or moisture infiltration. To fix this, professionals use epoxy colorants, oscillating diamond blades, and digital color sensors to restore uniformity. These tools address the molecular bonding issues that cause aesthetic failures in wet environments.
I spent three days grinding concrete on a job last month just so the floor wouldn’t click like a castanet. That job taught me that if the foundation is off, every single cosmetic finish will fail eventually. Grout is the most sensitive part of that equation. Most guys skip the leveling compound and think the underlayment will hide the dip. It won’t. When I walked into a bathroom project in 2025, the homeowner was distraught because their expensive Italian marble looked like a checkerboard. The grout was dark in the corners and light in the center. They thought the tile was the problem. I knew better. It was a failure of physics and chemistry. The installer used too much water in the mix. This caused the pigments to float to the surface in some areas while sinking in others. It looked like a disaster. I had to explain that the grout was not just a filler. It is a structural component of the assembly that must be treated with the same respect as the subfloor itself.
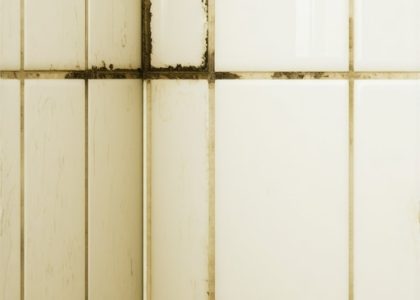
The science of why your grout looks mottled
Grout discoloration is primarily caused by efflorescence, which is the migration of salts to the surface of porous materials. This chemical reaction happens when excess water evaporates through the grout joint, leaving mineral deposits behind. It ruins the visual consistency and indicates a deeper moisture management issue.
When we look at grout at a microscopic level, we see a complex matrix of sand and cement. The pigments are held in suspension during the mixing phase. If you add a splash of extra water to make the grout easier to spread, you are effectively ruining the color. The water molecules create pathways. As those molecules leave the grout during the curing phase, they carry minerals with them. This is the chemistry of failure. It is why your tile cleaning tips wont work on a bad grout job. You cannot clean away a chemical imbalance. You have to fix the surface or replace the material entirely. Many installers ignore the humidity levels in the room. A high-humidity environment slows down the evaporation rate. This change in speed alters how the crystals form. It results in a different shade than the one on the sample card. This is why acclimation and environmental control are mandatory for any high-end shower project.
“A floor is only as good as the subfloor beneath it; deflection is the enemy of every joint.” – Master Flooring Axiom
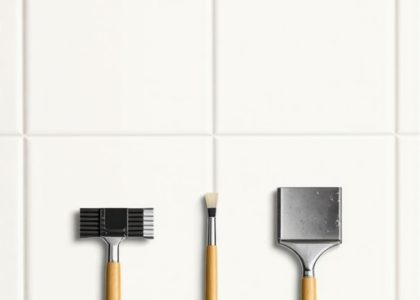
Tool 1 The molecular bond of epoxy color sealers
Epoxy color sealers are the primary tool for fixing mismatched grout because they create an impermeable barrier over existing joints. These products use advanced resins to penetrate the top layer of the grout and lock in a new, consistent pigment. They provide a permanent solution to shading issues.
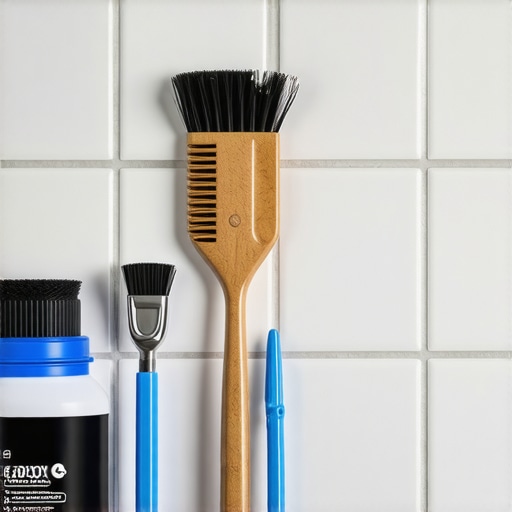
Standard grout is porous. It absorbs oils, soaps, and water. A professional color sealer is not just paint. It is an epoxy-based resin system. When applied correctly, it bonds to the cementitious matrix of the grout. This creates a surface that is stain-resistant and waterproof. It solves the problem of blotchy colors by covering the old grout with a new, uniform layer. Before applying, the grout must be acid-washed to open the pores. This ensures the epoxy can grab onto the structure. If you skip the prep, the sealer will peel like a bad sunburn. I always use a toothbrush to work the sealer into the joints. This is a slow, manual process. There are no shortcuts here. You must ensure the entire joint is saturated. Once it cures, the grout is no longer a liability. It becomes a performance surface that resists the mold and mildew typical of modern showers in 2025. The chemical bond is so strong that it often outlasts the tile itself.
Tool 2 Precision oscillating multi tools with diamond grit
Oscillating multi tools equipped with diamond-grit blades are essential for the mechanical removal of defective grout. These tools allow for the precise extraction of grout without damaging the edges of the surrounding tiles. Mechanical removal is necessary when the color mismatch is caused by deep contamination.
Sometimes you cannot hide the problem. You have to cut it out. This is where the oscillating tool earns its keep. A standard carbide blade will dull in minutes. You need diamond grit. The tool vibrates at thousands of cycles per minute. This turns the grout into dust. It is a messy job. I always wear a respirator and use a vacuum attachment. You have to be careful. One slip and you have chipped a piece of porcelain. The goal is to remove at least one-eighth of an inch of the old grout. This provides enough depth for the new grout to bite. Without that depth, the new layer will be too thin. It will flake off within months. This is common with grout restoration attempts done by amateurs. They try to smear a thin layer on top. It never works. You need the structural depth to ensure the new material stays put. This is hard work. It is why I charge what I charge. It is about the physical reality of the material.
| Grout Type | Porosity Level | Color Stability | Best Repair Tool |
|---|---|---|---|
| Sanded Cement | High | Moderate | Epoxy Color Sealer |
| Unsanded Cement | High | Low | Oscillating Tool |
| Epoxy Grout | Zero | High | Diamond Blade |
| Acrylic Premix | Low | High | Steam Cleaner |
Tool 3 Digital spectrophotometers for color matching
Digital spectrophotometers are high-tech sensors that analyze the light reflection of a surface to determine its exact color value. In flooring, these tools allow installers to match new grout to existing installations with mathematical precision. This eliminates the guesswork associated with manual color charts.
In 2026, we don’t rely on our eyes anymore. The human eye is easily fooled by lighting and shadows. A spectrophotometer gives me a Lab color value. I can take that value to the distributor and get a custom-mixed grout or sealer. This is vital when you are repairing a small section of a large floor. If the match is even slightly off, it will stand out like a sore thumb. This tool is especially helpful when dealing with sustainable tile solutions that feature unique textures and varied pigments. The sensor ignores the surface texture and focuses solely on the pigment. It is the only way to ensure a zero-threshold transition looks right. I used this on a job recently where the baseboards were being replaced. We had to match the grout to the new baseboard makeover designs. Without the digital match, the room would have felt disjointed. It is about creating a cohesive architectural space.
“Consistency in grout color is not an aesthetic preference; it is proof of a controlled and professional installation environment.” – Tile Council Standards
The checklist for a perfect grout repair
Fixing grout requires a systematic approach to ensure the new material bonds and the color remains stable. Follow this checklist to avoid the mistakes that lead to blotchy results.
- Test the moisture levels in the subfloor and wall cavity before starting any repair.
- Clean the joints with a pH-neutral cleaner to remove all soap scum and oils.
- Mechanical removal of at least 3mm of old grout for any re-grouting work.
- Use distilled water for mixing new cementitious grout to prevent mineral staining.
- Maintain a constant temperature and humidity level in the bathroom for 48 hours during the cure.
- Seal the new work with a high-quality penetrating sealer or use an epoxy-based product.
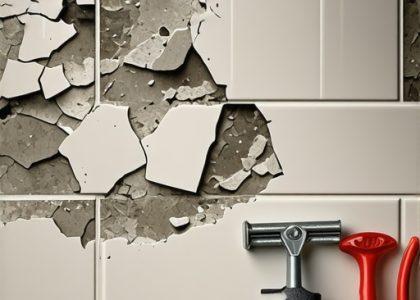
The ghost in the expansion gap
Expansion gaps are the intentional spaces left at the perimeter of a tile installation to allow for structural movement. When these gaps are filled with hard grout instead of flexible sealant, the grout will crack and change color due to stress. Proper movement joints are the secret to long-term grout health.
People think grout is supposed to be everywhere. It isn’t. At the change of plane, like where the wall meets the floor, you need caulk. Hard grout will crack there. When it cracks, water gets in. That water sits behind the tile and feeds the efflorescence cycle. This makes the grout look dark and moldy. It is a structural failure disguised as a cleaning problem. I see this all the time with chic baseboard designs. The installer grouts the tile right up to the baseboard. When the house shifts, the grout snaps. You need a 100 percent silicone sealant that matches the grout color. This allows the building to breathe without ruining the finish. If you don’t leave that gap, the pressure will eventually pop the tile off the thin-set. It will buckle. I have seen floors tent up like a mountain because there was no expansion gap. It is a basic rule of the TCNA, yet so many people ignore it. They want the look of a continuous surface. I want a surface that survives the next decade.
The final word on moisture and pigment
Successful grout repair depends on controlling the variables of moisture, chemistry, and mechanical bond. By using the right tools, you can transform a failed installation into a professional-grade surface. The focus must always be on the structural integrity of the assembly.
If you have mismatched grout, don’t just reach for a bottle of bleach. Bleach will only degrade the cement further. It eats the binder. You need to address the root cause. If it is a mixing issue, use a color sealer. If it is a moisture issue, you might need to look behind the walls. A trendy small bathroom can be ruined by one bad grout joint. Take the time to do the prep. Use the spectrophotometer to get the color right. Grind out the old material if you have to. It is about pride in the trade. It is about knowing that the floor is level and the joints are sound. That is the difference between a handyman and a master floor architect. Don’t let a 1/8 inch gap ruin your reputation. Fix it right the first time.