
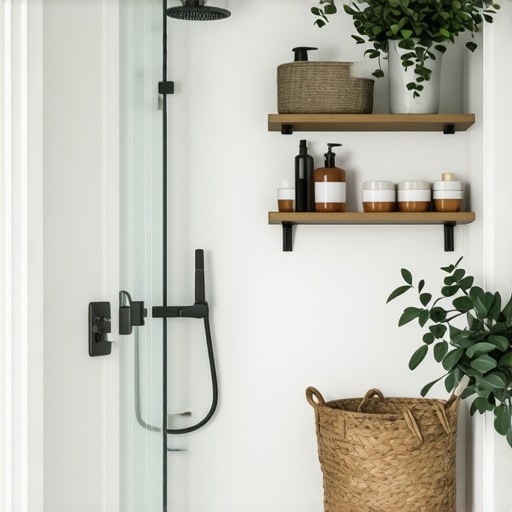
7 shower shelf ideas that maximize space in tiny bathrooms
Most guys skip the leveling compound. They think the underlayment will hide the dip. It won’t. I spent three days grinding concrete on a job last month just so the floor wouldn’t click like a castanet. That same lazy logic applies to showers. Homeowners think they can just slap a shelf onto a finished wall and call it a day. I once walked into a house where a heavy marble corner shelf had literally ripped the tile off the wall because the installer used a cheap construction adhesive instead of mechanical fasteners or integrated thin-set. The drywall behind the tile was mush. The physics of a wet environment do not care about your aesthetic goals. If you want a shelf that lasts twenty years in a tiny bathroom, you have to build it into the DNA of the wall. In small spaces, every millimeter of depth is a battle against the cramped reality of a 32 inch by 32 inch stall. These ideas are about reclaiming that space without compromising the waterproofing integrity of your home.
The structural lie of the suction cup shelf
Suction cup shelves and adhesive caddies are temporary failures that damage grout and harbor dangerous bacteria in tiny bathroom environments. These plastic distractions fail because the surface tension of a tile is rarely perfect. Microscopic pits in the glaze or the texture of the tile itself allow air to bleed in, eventually causing the shelf to plummet. When a shelf falls, it often chips the tub or cracks the floor tile. Even worse, the adhesive residues left behind can chemically react with certain grouts, leading to staining. If you are looking for real showers with a style that endures, you must look at permanent, integrated solutions that utilize the space between the studs. The goal is to move the storage inside the wall, not hanging off it. This requires a deep understanding of the wall assembly. A standard 2×4 stud wall provides three and a half inches of depth. That is three and a half inches of storage space you are currently wasting. When we talk about maximizing space, we are talking about the volume behind the tile. This is where the recessed niche becomes the king of small bathroom efficiency. It requires cutting into the substrate, installing a pre-sloped niche box, and ensuring the waterproofing membrane overlaps the flange by at least two inches. Anything less is an invitation for a leak.
“A floor is only as good as the subfloor beneath it; deflection is the enemy of every joint.” – Master Flooring Axiom
The recessed niche as a structural void
A recessed niche maximizes space by moving shampoo bottles and soaps three inches back into the wall cavity between studs. This technique is the gold standard for tiny bathrooms because it eliminates the physical protrusion that knocks into your elbows while you wash. To do this right, you cannot just cut a hole. You need to identify where your plumbing and electrical lines run. I have seen guys saw right into a vent pipe trying to install a niche. You want a pre-formed niche made of high-density expanded polystyrene or solid stainless steel. These units are 100 percent waterproof and provide a bonding surface that is compatible with modified thin-set. The chemistry of the bond is where the magic happens. You want a mortar that meets ANSI A118.15 standards. This provides the high-performance shear strength needed to hold the weight of the tiles within the niche. In regions with high humidity, the vapor drive through the tile can be intense. Using a liquid-applied waterproofing membrane over the niche seams is the only way to ensure the water stays in the drain and not in your insulation. This is how you build a permanent storage solution that actually adds value to the property.
Cantilevered marble and the shear strength rule
Cantilevered stone shelves provide a minimalist storage footprint by anchoring a thin slab of marble or granite directly into the grout line. This approach works best in renovations where you do not want to tear out the whole wall. However, you cannot just glue it. You need to use a diamond blade to create a slot in the tile and the backer board. The stone is then wedged into the slot and held with a high-modulus epoxy. The physics of leverage means that a five inch shelf with a heavy bottle on the end is putting hundreds of pounds of pressure on that small joint. If your grout is old or crumbling, this shelf will fail. You should look into grout restoration secrets for long-lasting results before attempting to anchor stone into an existing wall. The shelf should have a slight pitch of 1/8 inch toward the drain. If it is level, water will sit against the wall, eventually softening the grout and causing the stone to loosen. I prefer a 2 centimeter thickness for these shelves. Anything thinner is prone to snapping. Anything thicker looks bulky and defeats the purpose of saving space in a tiny shower. It is a delicate balance of geology and engineering.
Vertical tile channels for linear storage
Integrated metal channels installed vertically between tile rows create a modular storage system that allows for adjustable shelving without drilling. This is a modern solution that utilizes the verticality of a small bathroom. You install a specialized aluminum or stainless steel profile during the tiling process. This profile has a hidden track. You can then clip in shelves or hooks at any height. The benefit here is the lack of penetrations in the waterproofing. Every time you drill a hole into a tile wall to mount a rack, you are creating a path for water. These channels are built into the thin-set bed, making them part of the wall structure. It is a cleaner look than a messy shower caddy. To keep these metal surfaces looking good, you need to follow tile cleaning tips for a sparkling bathroom that avoid abrasive chemicals which can pit the metal finish. Hard water deposits are the enemy of these systems. If you live in an area with high mineral content, the sliding mechanism can seize up over time. It is a high-tech solution that requires low-tech maintenance. I recommend these for people who want a minimalist look but have a lot of different sized bottles to store.
| Shelf Material | Installation Type | Space Saving Rating | Waterproof Risk |
|---|---|---|---|
| Plastic Caddy | Suction/Hanging | Low | Low |
| Recessed Niche | Integrated Framing | High | High if not sealed |
| Stone Ledge | Grout Line Insert | Medium | Medium |
| Metal Channel | Thin-set Profile | High | Low |
Corner stone seats that save floor space
A small corner bench made of solid stone serves as both a shelf and a footrest while consuming less than one square foot of floor area. In a tiny bathroom, a full-sized bench is a luxury you cannot afford. But a triangular corner piece set at about 18 inches high is a game changer. It provides a massive amount of surface area for larger items like gallon-sized shampoo bottles or shaving supplies. The trick to a corner seat is the support system. I never trust just the tile to hold it. I install heavy-duty stainless steel brackets that are screwed into the studs before the tile goes up. Then I tile around the brackets. The stone seat sits on top, hiding the hardware. This is called a mechanical bond combined with a chemical bond. Most DIYers forget the mechanical part and that is why their seats collapse. You also have to consider the baseboards makeover ideas in the rest of the bathroom to ensure the transition from the shower floor to the rest of the room is fluid. A well-designed corner seat makes a small shower feel like a high-end spa because it adds functionality without cluttering the eye line. It is about using the corners which are usually dead space anyway.
Floating tempered glass with mechanical anchors
Tempered glass shelves offer the highest visual space-saving benefit because their transparency prevents the room from feeling cut off or cluttered. From a physics standpoint, glass is incredibly strong in compression but weak in tension. You must use 3/8 inch thick tempered safety glass. Anything thinner is a hazard. I use specialized glass-to-wall clamps that have rubber gaskets. These gaskets prevent the metal from touching the glass, which would cause a stress fracture. The anchors for these clamps must go into the studs or a solid backing. If you try to use plastic wall anchors in just the backer board, the weight of the glass alone will eventually pull it out. The sheer weight of glass is often underestimated. A small glass shelf can weigh five pounds before you even put a bottle on it. When water gets between the glass and the clamp, it can grow mold. This is where high-quality silicone comes into play. You need a 100 percent silicone sealant that is mold-resistant. This keeps the water out of the mechanical assembly. It is a clean, sharp look that works perfectly in ultra-modern, small bathrooms.
The plumbing stack shelf mystery
Utilizing the void space near the plumbing stack allows for a deep, narrow shelving unit that is often overlooked in standard bathroom layouts. In many tiny bathrooms, the wall where the pipes are hidden is actually deeper than the rest. This is to accommodate the 3 inch waste line. You can often find an extra 2 to 4 inches of depth in these specific areas. By framing out a vertical tall niche next to the plumbing stack, you create a massive amount of storage for towels or extra supplies. You just have to be careful not to touch the pipes. I use a thermal camera to locate the hot water lines before I start cutting. If you hit a pipe, your small shelf project just became a five thousand dollar plumbing emergency. This is a contrarian move. Most people stay away from the plumbing wall. I say that is where the space is. You just need to be a surgeon with the reciprocating saw. Once the niche is framed, you treat it like any other wet area. Waterproof it, tile it, and grout it. This is how you find space where none seems to exist. It is about understanding the anatomy of the house. Most houses are built with a lot of empty air behind the walls. Your job is to reclaim it.
- Always use a pre-sloped niche to prevent standing water.
- Check for studs using a high-quality sensor before cutting your substrate.
- Apply two coats of liquid waterproofing membrane to all shelf joints.
- Use stainless steel or aluminum to avoid rust and corrosion over time.
- Ensure stone shelves are at least 2cm thick for structural integrity.
- Match your grout type to the shelf material for the best chemical bond.