Why Your Shower Floor Grout is Pitting and How to Fix It
I have spent nearly three decades with the smell of wet cement and the fine grit of thin-set under my nails. Most people see a shower floor as a pretty surface for their feet, but I see a complex hydraulic system under constant chemical and physical attack. I spent three days grinding concrete on a job last month just so the floor would not click like a castanet, and that same level of obsessive detail is what determines if your grout stays solid or turns into a lunar landscape of pits. Most guys skip the leveling compound and they think the underlayment will hide the dip. It won’t. If the base is not flat, the tile moves, the grout cracks, and water finds its way into the substrate where it starts a slow, expensive rot. When grout begins to pit, it is not just an aesthetic annoyance. It is a sign that the structural integrity of your installation is compromised by physics or chemistry. Whether you are looking for grout restoration secrets or trying to understand why your brand new bathroom is failing, you have to look deeper than the surface.
“A floor is only as good as the subfloor beneath it; deflection is the enemy of every joint.” – Master Flooring Axiom
The chemistry of the crumbling joint
Pitting in shower grout is primarily caused by an improper water-to-powder ratio during mixing or the use of excessive water during the cleanup phase. When too much water is introduced, it creates microscopic voids as the liquid evaporates. These voids weaken the cementitious matrix, leading to small craters or pits over time. This process is often accelerated by acidic cleaners that dissolve the calcium carbonate binder in the grout. I have seen countless homeowners destroy a perfect installation in six months by using harsh vinegar solutions on cement-based grout. Cement is alkaline. Acid eats it. It is as simple as that. If you are noticing these issues, you might need to learn how to refresh grout without replacing it before the damage reaches the subfloor. The molecular bond of Portland cement relies on the formation of calcium silicate hydrate crystals. If you starve the mix of water, the crystals do not grow. If you drown the mix, the crystals are too far apart to hold hands. You need a stiff, peanut butter consistency that holds its shape. If the installer used a sponge that was too wet during the wash, they essentially washed away the glue that holds the sand together. This leaves a soft, sandy residue that eventually washes down the drain, leaving those ugly holes behind. This is why professional tile cleaning tips always emphasize pH-neutral cleaners.
Why soft water is a silent killer
Soft water can leach calcium ions from cementitious grout through a process called mineral extraction, which causes the surface to become porous and eventually pit. Homeowners in regions with water softeners often find their grout failing faster because the water is ‘hungry’ for minerals. It seeks out the calcium in your grout lines to reach an equilibrium. This is especially true in modern showers that wow where large format tiles are used with thin grout lines. The smaller the joint, the less mass it has to resist this chemical leaching. In Phoenix or Houston, where the water chemistry is extreme, I always recommend moving to epoxy grout. Epoxy is a two-part resin system. It does not rely on cement chemistry and is virtually impervious to water and acid. It is harder to install, but it will outlast the house. If you are stuck with cement grout, you must seal it. But even then, most people use the wrong sealer. A penetrative silane-siloxane sealer is the only way to go because it breathes. A topical sealer will just peel off when the vapor drive from the subfloor tries to escape.
| Grout Type | Composition | Pros | Cons |
|---|---|---|---|
| Sanded Grout | Portland Cement + Sand | Cheap, easy to work with | Porous, prone to pitting |
| Unsanded Grout | Portland Cement | Best for thin joints | Shrinks and cracks easily |
| Epoxy Grout | Resin + Hardener | Waterproof, stainproof | Difficult to apply, expensive |
| Urethane Grout | Premixed Resins | Flexible, color consistent | Long cure time |
The subfloor secret that ruins tile
Deflection is the vertical movement of a floor system under load, and it is the primary reason grout cracks and then pits. If your joists are too small or the plywood is too thin, the floor flexes. Tile is rigid. It does not bend. When the floor moves, the bond between the tile and the grout is sheared. This creates hairline fractures. Once water enters these fractures, it begins to erode the grout from the inside out. I have seen $20,000 bathrooms ruined because the contractor did not check the L/360 deflection rating of the floor. You cannot just slap tile on a subfloor and hope for the best. You need a solid foundation. If your grout is pitting near the center of the room, check for bounce in the floor. You might need to stiffen the joists from below. This is why I tell people that baseboards makeover ideas are secondary to the structural integrity of the room. A pretty baseboard won’t fix a sagging floor.
“Proper hydration is the difference between a lifetime bond and a dusty failure.” – TCNA Technical Bulletin
Restoring the integrity of the mud bed
To fix pitted grout, you must remove the damaged material to a depth of at least 1/8 inch before reapplying a matching grout or a specialized repair compound. You cannot just smear a thin layer of new grout over the old pits. It will not bond. It will flake off in a week. Use a carbide-tipped grout saw or a multi-tool with a diamond blade to carefully scrape out the top layer. Be careful not to nick the edges of your tiles. Once you have a clean, deep channel, vacuum out every speck of dust. If you leave dust in the joint, the new grout will not stick. Mix your grout with a latex additive instead of plain water to increase its bond strength and flexibility. Press it firmly into the joints with a rubber float at a 45-degree angle. Let it set for the exact amount of time specified on the bag before washing it with a damp, not dripping, sponge. This is the part where most people fail. They use too much water. Keep your sponge dry enough that you have to work a little to get the haze off. This ensures the cement stays in the joint.
- Check for loose tiles before regrouting.
- Use a pH-neutral cleaner for daily maintenance.
- Seal the grout every six to twelve months.
- Avoid using bleach or vinegar on cement grout.
- Ensure the shower is completely dry before starting repairs.
Maintenance rules for the long haul
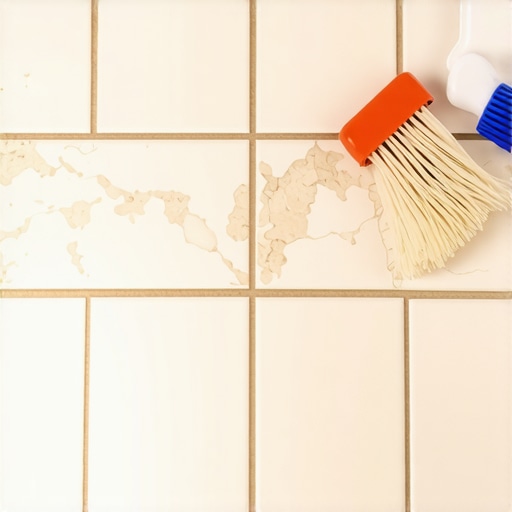
Maintaining a shower floor requires a shift from aggressive scrubbing to preventative chemical management. Stop using those stiff plastic brushes. They are basically sandpaper for your grout. Use a soft nylon brush and a specialized stone and tile cleaner. If you see mold, do not reach for the bleach. Bleach kills the surface mold but the high water content of the solution actually feeds the roots of the mold deep inside the porous grout. Use an enzyme-based cleaner that eats the organic matter. This will prevent the biological erosion that often leads to pitting. If you are planning a remodel, look into eco-friendly tile solutions that utilize denser materials or larger formats to minimize the amount of grout exposed to water. The less grout you have, the fewer problems you will face. I have seen the trend move toward 24×48 inch tiles in showers, and while they are a pain to set, they reduce grout maintenance by 80 percent. Just make sure your installer knows how to handle the weight. It is a structural challenge, not a decorative one. A floor is a machine. If you don’t oil the gears and check the bolts, it will break. Treat your grout like the structural seal it is, and it will stay smooth for decades.