The myth of the flat wall
Most guys skip the leveling compound. They think the underlayment will hide the dip. It won’t. I spent three days grinding concrete on a job last month just so the floor wouldn’t click like a castanet. This mechanical failure starts at the subfloor and ends with your baseboards looking like a jagged mountain range. When you install baseboards over tile, you are fighting against two vastly different materials. One is a rigid, mineral-based product with zero give. The other is a biological organism that expands and contracts based on the moisture in the air. If you do not understand the physics of this relationship, your wood will split, your grout will crack, and your client will call you back in six months to fix the mess.
The cellular physics of wood splitting
Wood splits because the internal tension of the grain cannot handle the displacement caused by a fastener. When a 16-gauge finishing nail enters a piece of kiln-dried oak at ninety feet per second, it must shove the wood fibers aside. In a dense hardwood, there is no place for those fibers to go. The pressure builds until the wood yields along its weakest point, which is the grain line. This is why you must understand the density of your material. If you are working with chic baseboard designs that transform rooms in 2025, you are likely dealing with high-end hardwoods or MDF. Each requires a different pneumatic pressure and a different pre-drilling strategy to avoid catastrophic failure. The baseboard is not just a trim piece, it is a structural buffer that hides the expansion gap required by the tile floor.
“A floor is only as good as the subfloor beneath it; deflection is the enemy of every joint.” – Master Flooring Axiom
Why your subfloor is lying to you
A subfloor that looks flat to the naked eye is often a series of waves and troughs that will force your baseboard to bend. When you press a straight piece of wood against a curved wall or over an uneven tile surface, you are introducing a constant load of stress. Eventually, that stress find a release point. Usually, that is at the miter joint or where the nail was driven. You need to identify these low spots before you ever cut a single piece of wood. I always use a six-foot level to check the floor and the wall. If I find a dip in the tile that exceeds one-eighth of an inch over ten feet, I know the baseboard will have a gap at the bottom. This is where grout restoration secrets for long-lasting results become relevant, as many installers try to fill that gap with grout, which is a massive mistake. Grout is not a caulk; it has no elasticity and will crumble the first time someone walks near it.
The 1/8 inch that ruins everything
The expansion gap is the most misunderstood part of any flooring installation. Tile expands. Wood expands. Walls move. If you pin the baseboard tight against the tile, you are essentially locking the floor in place. When the humidity rises in the summer, the tile will exert pressure against the baseboard. Since the baseboard is nailed into the wall studs, it cannot move. The result is either a buckled floor or a split baseboard. You must maintain a tiny gap, often the thickness of a credit card, between the bottom of the baseboard and the top of the tile. This gap is later filled with a color-matched 100 percent silicone caulk. This allows for movement without visual compromise. This is the same principle used in showers with a style trendy ideas for small bathrooms where movement joints are required at every change of plane.
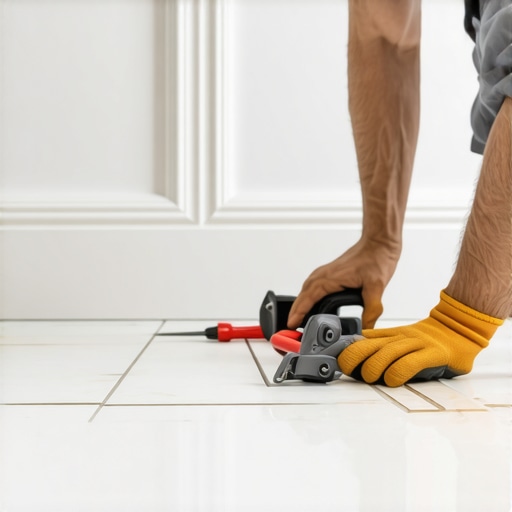
Precision tools for the master installer
Stop using a hammer and finishing nails if you want a professional result. You need a 15-gauge or 18-gauge pneumatic brad nailer with adjustable depth control. The depth of the drive is the difference between a clean hole and a shattered piece of wood. If the nail head is buried too deep, it blows out the back of the board. If it is too shallow, you have to hit it with a nail set, which often causes the wood to split if you are near an end. I also recommend a high-speed steel twist bit for pre-drilling every single hole within three inches of a cut end. This removes the wood fibers rather than pushing them aside, which eliminates the internal pressure that causes splitting. While you are at it, ensure you are keeping the rest of the room clean, perhaps by reviewing tile cleaning tips for a sparkling bathroom in 2025 to protect your newly installed surfaces from sawdust and debris.
| Material Type | Density Rating | Splitting Risk | Recommended Fastener |
|---|---|---|---|
| MDF | Medium | Low | 18-Gauge Brad |
| Pine | Low | Moderate | 16-Gauge Finish |
| Poplar | Medium | Low | 18-Gauge Brad |
| Oak | High | Extreme | 15-Gauge Pre-drill |
| Walnut | High | High | 15-Gauge Pre-drill |
Regional moisture and the wood expansion cycle
The climate in your specific region dictates how you must handle the wood before it even touches the wall. If you are in the swampy humidity of Houston, that wood is going to arrive at the job site swollen with moisture. If you nail it up immediately, it will shrink when the air conditioning turns on, leaving you with wide gaps at every miter. In the dry heat of Phoenix, the opposite happens. You must acclimate the wood in the room where it will be installed for at least seventy-two hours. This allows the cellular structure of the wood to reach equilibrium with the local environment. I have seen guys lose thousands of dollars because they took wood from a cold truck and nailed it into a heated house. The wood split within forty-eight hours. This is why eco-friendly tile solutions for sustainable homes in 2025 often focus on stability as much as sustainability.
“Wood is hygroscopic, meaning it will always move; the installer must account for this or suffer the failure.” – NWFA Technical Guide
Step by step architecture of the perfect joint
The secret to a perfect baseboard install over tile is a combination of mechanical fasteners and chemical bonds. Follow this checklist to ensure you never split a board again.
- Acclimate the wood to the room for 72 hours minimum.
- Clean the tile surface and the bottom of the wall to remove any mortar squeeze-out or drywall mud.
- Locate every stud with a high-quality sensor and mark them with painter’s tape above the baseboard line.
- Cut your miters at 45.5 degrees rather than 45 to ensure the front edge touches perfectly.
- Apply a bead of high-quality wood glue to every mitered joint.
- Pre-drill pilot holes for any nails located within three inches of the end of a board.
- Use a 23-gauge pin nailer for the actual miter returns to avoid the bulk of larger nails.
- Apply a small bead of paintable caulk at the top and a silicone bead at the bottom.
The chemistry of the bond
Adhesives are your best friend when you cannot trust the studs. Sometimes the framing in a house is so poor that you cannot get a nail to bite. In these cases, you might be tempted to nail into the tile. Do not do it. You will crack the tile or the grout. Instead, use a high-tack construction adhesive on the back of the baseboard. This creates a permanent bond to the drywall that supplements the nails. If you are working on showers that wow modern designs for 2025, you might have tile that goes up the wall. In that case, the baseboard might be replaced by a tile cove base, which requires a completely different set of rules involving thin-set and spacers. For wood baseboards, the adhesive should be applied in a serpentine pattern to maximize surface area contact without causing the board to stand off the wall too far.
How to handle the bottom gap
The gap between the wood and the tile is where most amateurs fail. They try to push the baseboard down so hard that it bows. This puts the wood under incredible tension. Instead, let the baseboard sit naturally on the high points of the tile. Use a compass to scribe the bottom of the baseboard if the floor is significantly out of level. This allows the wood to follow the contour of the tile perfectly. Once the board is nailed, you will have a small, consistent gap. Do not use wood filler here. Use a flexible caulk. If you are unsure how to handle the tile side of things, look into how to refresh grout without replacing it to ensure the existing floor looks as good as the new trim. A beautiful baseboard on a dirty or cracked tile floor is a waste of time.
Summary of mechanical principles
Installing baseboards over tile is a test of patience and understanding of material science. You are managing the expansion of wood, the rigidity of tile, and the imperfections of home construction. By pre-drilling your holes, acclimating your lumber, and respecting the expansion gap, you ensure a result that stays beautiful for decades. Remember that the wood wants to split. It is your job to give the fasteners a path that respects the grain. Never force a board into a space it does not fit. Scribe it, cut it, and glue it. This is the difference between a builder-grade hack job and the work of a master craftsman. For more inspiration on how to finish your room, check out baseboards makeover ideas to elevate your space. Precision is not an accident; it is the result of following these strict mechanical protocols every single time you pick up your saw.