I spent three days grinding concrete on a job last month just so the floor wouldn’t click like a castanet. The homeowner thought I was crazy. They wanted the tile down immediately. But I know what happens when you ignore the substrate. You end up with a shower that looks like a spiderweb of failures. I once walked into a luxury master bath where the Italian marble was literally popping off the walls. The culprit was not the stone. It was a installer who thought he could grout the vertical corners. He treated a dynamic, breathing structure like it was a solid block of granite. My hands still smell like floor wax and thin-set from scraping that mess out. You cannot fight physics with more cement. If the substrate moves and the grout stays rigid, the grout will lose every single time. It is a mathematical certainty that defines the longevity of your bathroom.
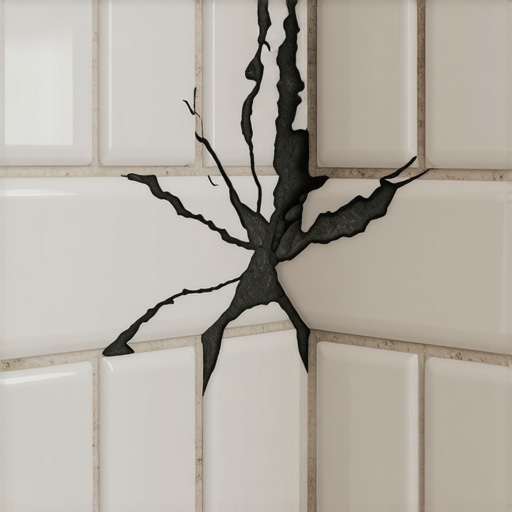
The physics of the moving corner
Cracked shower grout in corners is caused by differential movement between two perpendicular wall planes that the rigid grout cannot accommodate. When one wall expands due to humidity or structural settling and the other remains static, the bond between the grout and the tile tile flange breaks. This is known as a change of plane failure in the industry. Most residential showers are framed with wood studs. Wood is a hygroscopic material. It breathes. It swells when the steam from your morning shower hits it and it shrinks when the house dries out in the winter. A standard cementitious grout has a tensile strength of nearly zero. It is designed to resist compression, not pulling or twisting. When those walls move even a fraction of a millimeter, the grout cracks because it has no elastic memory.
Why rigid grout fails in flexible joints
Standard grout fails in corners because it lacks the chemical polymers required to handle the shear stress generated at wall intersections. Cement is a crystalline structure that forms a rigid bond between tile edges. While this works perfectly on a flat floor where every tile moves in the same direction, it is a recipe for disaster at a 90 degree angle. In the flooring world, we call this a movement joint. The Tile Council of North America is very clear about this. Any place where tile meets a different material or changes direction must be treated with a flexible sealant. If you fill that gap with hard grout, you are essentially creating a stress point. Over time, the vibration of people walking in the hallway or the simple expansion of the shower pan will force that grout to crumble into dust. You might try to patch it, but without a flexible bridge, the crack will return within months.
“A floor is only as good as the subfloor beneath it; deflection is the enemy of every joint.” – Master Flooring Axiom
The substrate secret that contractors ignore
Substrate stability determines whether your grout survives the first year because deflection in the backer board creates hidden tension. Many installers use a standard cement board but fail to tape the seams with alkali-resistant mesh or skip the thin-set behind the board. This allows the panels to move independently. If the board behind the tile is flexing every time you lean against the wall, the grout is the first thing to telegraph that movement. I see guys skip the perimeter expansion gaps all the time. They run the tile tight against the corner studs. There is nowhere for the material to go. In a climate like the humid Southeast, this is a death sentence for a shower. The moisture gets into the studs, they swell, and the pressure blows the grout right out of the corners. You need a 1/8 inch gap at every change of plane to allow for this inevitable structural dance.
| Material Type | Flexibility Rating | Best Use Case | Expected Lifespan |
|---|---|---|---|
| Sanded Grout | Very Low | Flat floors, wide joints | 10-15 Years |
| Unsanded Grout | Low | Vertical walls, thin joints | 8-12 Years |
| Acrylic Caulk | Medium | Dry baseboards, trim | 3-5 Years |
| 100 Percent Silicone | Very High | Shower corners, wet areas | 20+ Years |
Thermal expansion and moisture cycles
Thermal expansion occurs as hot water heats the tile and substrate causing them to expand at different rates than the cold framing. This creates a tug of war behind your beautiful tile. If you live in a region with extreme seasonal shifts, your house is constantly moving. The dry heat of a desert winter will shrink your framing, while a coastal summer will swell it. This is why grout restoration secrets for long lasting results often involve moving away from traditional cement in corners. You need a material that acts like a rubber band. Without that elasticity, the moisture from your shower will eventually seep into those hairline cracks. Once water gets behind the tile, it begins to rot the studs or the subfloor, leading to a much more expensive structural failure than just a few bits of falling sand.
The 1/8 inch that ruins everything
Precision in the expansion gap width is the difference between a lifetime installation and a recurring maintenance nightmare. If the gap is too small, there is not enough surface area for the sealant to bond. If it is too wide, the sealant will sag and look unprofessional. I always aim for a clean 1/8 inch gap at the corners. This is where the tile cleaning tips for a sparkling bathroom in 2025 become important because a clean joint allows for a better chemical bond. Most homeowners want their grout to look like one continuous piece of stone. I get it. It looks clean. But a professional knows that the corner must be a break in the masonry. We call it a soft joint. It should be filled with a color matched silicone that mimics the look of the grout while providing the mechanical movement needed to keep the system watertight.
Proper application of 100 percent silicone
Using 100 percent silicone instead of grout in corners ensures a waterproof seal that can withstand the structural shifting of the home. Never use “siliconized” acrylic caulk in a shower corner. It is a cheap shortcut that will fail and mold within a year. You want the heavy stuff. The stuff that smells like vinegar and sticks to your fingers. This material forms a permanent, flexible gasket. Before applying it, you must ensure the joint is completely dry. I often use a hair dryer or a heat gun to blast out any lingering moisture from the morning shower. If the joint is wet, the silicone will not stick, and you will have a leak point. A properly toolled bead of silicone should be slightly concave, pushing the material deep into the gap to create a three point bond. This is how you prevent the cracking that ruins most modern showers.
- Remove all old, cracked grout using a carbide tipped oscillating tool.
- Vacuum the joints thoroughly to remove every grain of dust.
- Wipe the area with denatured alcohol to remove soap scum and oils.
- Apply a high quality 100 percent silicone that matches your grout color.
- Tool the joint immediately with a wet finger or a profiling tool.
- Allow the sealant to cure for a full 24 hours before turning on the water.
How to refresh grout without replacing it
Learning how to refresh grout without replacing it is possible for flat areas but corners always require a full removal of rigid material. You can sometimes use a colorant or a sealer on the flat sections of the wall to bring back the original luster. However, if you see cracks in the corners, you cannot simply paint over them. You must dig it out. I have seen people try to smear a little more grout over a crack. It is a waste of time. It will not bond to the old grout and it will fall out in a week. If you want a permanent fix, you go back to the substrate. You clear the path for movement. For those looking for how to refresh grout without replacing it, focus those efforts on the center of the wall where the tile is stable. Save the corners for the high performance flexible sealants that are designed for the job. This is the only way to maintain the integrity of the waterproof envelope in a wet environment.
“Movement joints are not optional; they are the pressure relief valves of a tile installation.” – TCNA Handbook Standards