The physics of the porcelain rock
A wobbly toilet is more than an annoyance because it acts as a lever that eventually destroys your floor tiles and the subfloor beneath them. When a toilet moves, it puts direct mechanical stress on the wax ring and the surrounding grout lines, leading to leaks that rot the wood or saturate the concrete. Fixing this without cracking your ceramic or porcelain requires a deep understanding of subfloor deflection and flange height relative to the finished surface. Most guys skip the leveling compound. They think the underlayment will hide the dip. It won’t. I spent three days grinding concrete on a job last month just so the floor wouldn’t click like a castanet, and that same level of precision is what you need for a toilet. If you ignore a shimmying commode, you are essentially inviting water to migrate into your grout and then under your tiles, which will eventually pop them right off the thin-set. Most homeowners assume the bolts just need tightening, but over-tightening is the fastest way to hear the heart-breaking crack of a porcelain base. We are looking at a structural engineering problem where the floor must be perfectly flat and the fixture must be perfectly stationary.
Why your subfloor is lying to you
The underlying cause of a rocking toilet is almost always a subfloor that is not within the industry standard of 1/8 inch of level over a 10 foot span. Even if your tile looks great, the weight of the toilet combined with the user creates a dynamic load that highlights every microscopic void in the mortar bed. In regions with high humidity like the Gulf Coast or the Pacific Northwest, plywood subfloors can swell and shrink, causing the closet bolts to loosen over time. This movement is the enemy of a permanent seal. When I walk into a bathroom and see a toilet that moves more than a millimeter, I know the wax ring has already been compromised. The wax has no memory. Once it is squished or pulled apart by a rocking base, it will never reform a tight seal. This leads to the slow, silent leak that ruins your baseboards and breeds mold behind the drywall. You have to address the structural gap between the porcelain and the tile if you want the repair to last longer than a week.
“A floor is only as good as the subfloor beneath it; deflection is the enemy of every joint.” – Master Flooring Axiom
The chemistry of the wax ring and the flange
The interaction between the closet flange and the floor height determines whether your toilet stays put or becomes a fountain of sewage. Ideally, the flange should sit on top of the finished tile, not flush with the subfloor. When installers add new tile without raising the flange, they create a deep gap that the standard wax ring cannot bridge. They try to double-stack wax rings, which is a recipe for disaster because the center of the stack is prone to collapsing inward, blocking the drain. You need to measure the distance from the top of the flange to the top of the tile. If it is more than a quarter inch, you need a flange extender. This is the molecular reality of plumbing. The seal relies on compression. Without the right height, no amount of shimming will save your tile from eventual water damage. We are dealing with hydrostatic pressure and gravity, two forces that do not care about your bathroom aesthetics.
| Shim Material | Compression Resistance | Moisture Resistance | Best Use Case |
|---|---|---|---|
| Plastic Wedges | High | Total | Standard ceramic tile on concrete |
| Stainless Washers | Extreme | Total | Heavy cast iron toilets |
| Cedar Shims | Low | Poor | Temporary leveling only |
| Rubber Gaskets | Medium | High | Uneven natural stone floors |
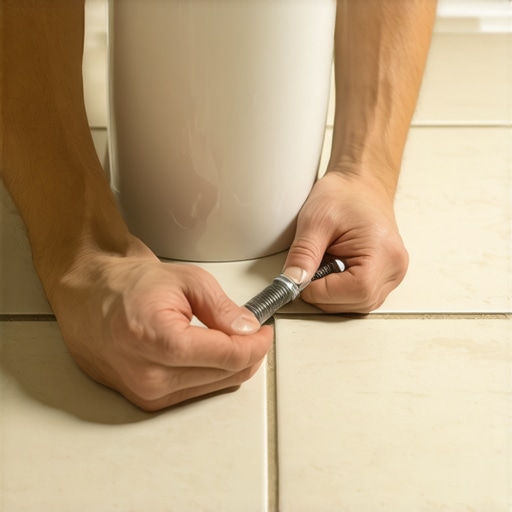
The shim that saves the ceramic
Stabilizing the toilet requires the strategic use of non-compressible plastic shims inserted at the points of greatest movement. You do not want to use wood shims because they will rot the moment any moisture from cleaning or a small leak hits them. You need to identify where the gap is by gently rocking the toilet and watching the base. Once the gap is identified, you slide the shim in until the movement stops. Do not force it. If you drive a shim in too hard, you will lift the other side of the toilet and create a new wobble. Use a sharp utility knife to score the shim flush with the porcelain. This ensures that when you apply your grout restoration or caulk, the shim is hidden. This is where the artistry of the trade meets the mechanics of the house. You are creating a solid bridge between the floor and the fixture that bypasses the thin-set entirely.
- Check the closet bolts for corrosion and replace them with solid brass.
- Verify that the flange is not cracked or loose from the subfloor.
- Dry-fit the toilet to identify the exact location of high and low spots on the tile.
- Apply a bead of 100 percent silicone around the base but leave a small gap at the back for leak detection.
- Ensure the water supply line is not under tension when the toilet is in its final position.
The 1/8 inch that ruins everything
Precision in the bathroom is measured in eighths of an inch because that is the threshold where grout begins to crack. If your toilet moves even a fraction of that, the grout around the base will crumble, and water from your showers will eventually find its way into those cracks. I have seen beautiful bathrooms ruined because someone didn’t want to spend ten minutes leveling the commode. It is the same principle as installing a large format tile. If the substrate isn’t flat, the finish will fail. In places like Phoenix or Las Vegas, the dry air can make some caulks brittle, so using a high-quality flexible sealant is mandatory. You want something that can handle the slight expansion and contraction of the building without pulling away from the porcelain. This is why I always prefer a kitchen and bath silicone over a standard acrylic latex.
“Standard plumbing fixtures require a rigid substrate to prevent mechanical failure of the seal; a moving toilet is a failing toilet.” – Master Flooring Axiom
The final seal and leak detection
Finishing the job involves more than just aesthetics; it is about creating a moisture barrier that protects your subfloor. After the shims are in and the bolts are snug, you must seal the base. Many people make the mistake of caulking the entire perimeter. You must leave a one inch gap at the very back of the toilet. If the wax ring ever fails, you want that water to leak out onto the bathroom floor where you can see it. If you seal it completely, the water will be trapped, rotting the subfloor and the floor joists before you ever know there is a problem. This is a common failure in modern renovations where people prioritize a clean look over structural safety. Whether you are working with eco-friendly tile solutions or traditional marble, the rules of physics remain the same. The water has to go somewhere. By leaving that gap, you are building in a fail-safe that could save you thousands of dollars in structural repairs down the road.