The structural failure of the miter joint
To fix a loose baseboard corner that keeps popping out, you must address structural movement or improper fastening by using 2.5-inch finish nails driven into wall studs, combined with high-grade wood adhesive or caulk to create a permanent chemical bond at the miter joint. This prevents the wood from reacting to humidity fluctuations and subfloor deflection.
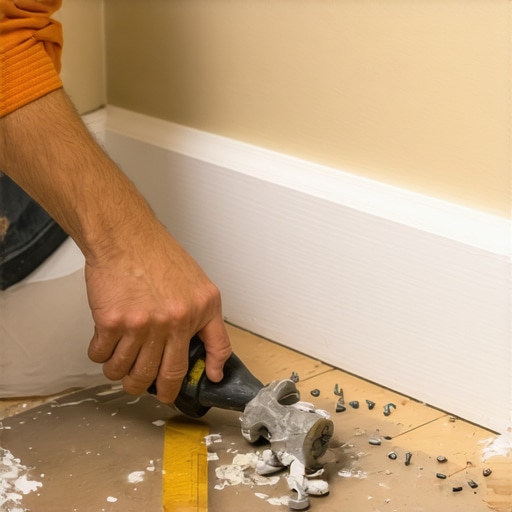
Most guys skip the leveling compound. They think the underlayment will hide the dip. It won’t. I spent three days grinding concrete on a job last month just so the floor wouldn’t click like a castanet. That job was a wake-up call for the homeowner who thought the baseboards were the problem. The reality was that the subfloor was so wavy it was pulling the trim right off the wall every time someone walked near the corner. When a floor moves, the baseboard has two choices, it can bend or it can pop. Most of the time, that miter joint is the first thing to give way. You see it as a gap, I see it as a mechanical failure of the fastening system. If you want to fix this, you have to stop thinking about it as a cosmetic trim issue and start thinking about it as an engineering challenge. You are fighting the physics of wood expansion and the geometry of a house that is constantly shifting.
The physics of wood movement and moisture
Wood is a hygroscopic material. This means it absorbs and releases moisture based on the relative humidity of the surrounding air. When your HVAC system kicks on in the winter and dries out the air, your baseboards shrink. When the summer humidity hits, they swell. If your miter joints were cut and installed at a 12 percent moisture content but your house stabilizes at 6 percent, those joints are going to open up. The popping occurs because the internal tension of the wood outweighs the holding power of the finish nails. Most builders use 18-gauge brad nails that barely penetrate the drywall. When the wood moves, those tiny pins have zero grip in the soft gypsum. You need to hit the framing members. I have seen beautiful chic baseboard designs ruined because the installer was too lazy to find a stud. They just shot nails at random, hoping the friction of the drywall would hold. It never does. Over time, the vibration of foot traffic and the seasonal cycling of the wood will pull those nails clean out.
“A floor is only as good as the subfloor beneath it; deflection is the enemy of every joint.” – Master Flooring Axiom
The chemistry of the permanent bond
Fixing a popped corner requires more than just more nails. You need a chemical bond. I always tell people to use a high-quality PVA glue or a specialized cyanoacrylate adhesive for mitered corners. When you apply glue to the end grain of the wood, it soaks in like a sponge. You have to double-coat it. Apply a thin layer, let it sit for a minute, then apply a second layer before joining the pieces. This creates a bridge between the cellular structures of the two pieces of wood. If you are working in a bathroom or near modern showers, you need to be even more careful. The moisture levels in these areas are higher, and standard wood glue might fail. In those cases, a waterproof adhesive is a requirement. When the glue dries, it is actually stronger than the wood itself. If the wall moves again, the wood will likely crack before the joint opens up. That is the level of security you want when you are doing a professional-grade repair.
| Fastener Type | Gauge | Holding Power | Best Use Case |
|---|---|---|---|
| Brad Nail | 18ga | Low | Thin decorative trim only |
| Finish Nail | 16ga | Medium | Standard MDF or Pine baseboards |
| Finish Nail | 15ga | High | Solid Oak or heavy architectural trim |
| Trim Screw | N/A | Extreme | Pulling warped boards into studs |
Why your subfloor is lying to you
If you have tile floors, a popping baseboard often points to a deeper issue with the grout or the thin-set. If the tile was installed without an expansion gap at the perimeter, the entire floor system is under pressure. As the house settles, that tile pushes against the bottom of the baseboard, forcing the top to tilt out and the miter to pop. I have seen entire rows of baseboards unseat because the tile installer ran the porcelain right up against the plate. You need a minimum of 1/4 inch gap. If you are dealing with maintenance, check out these tile cleaning tips to keep the area clear of debris that might be wedging into those gaps. A clean expansion gap is a functional expansion gap. If that gap is filled with hardened grout or dirt, the floor cannot move, and the baseboard pays the price. You might also find that grout restoration is necessary if the movement has cracked the perimeter joints. Always check the floor levelness before you re-nail the trim. If there is a dip, the baseboard will never sit flush.
- Identify the wall studs using a high-quality magnetic or electronic stud finder.
- Clean out the old adhesive and loose debris from the miter joint using a utility knife.
- Apply a bead of wood glue to both faces of the miter.
- Drive 15-gauge or 16-gauge nails at a 45-degree angle into the wall plate or studs.
- Use a trim screw if the board is severely warped and refuses to stay flat.
- Fill the nail holes and the top gap with a flexible, paintable caulk.
The ghost in the expansion gap
The gap between the bottom of the baseboard and the floor is not just an eyesore, it is a ventilation port for the wall cavity. If you have a loose corner, it is often because of the leverage exerted by the floor. When a floor sinks or the subfloor deflects under load, the baseboard is pulled down. If the nails are in the drywall and not the studs, the board will pivot. It is a simple lever action. The bottom goes down, the top pops out. This is especially common in older homes with crawlspaces where the floor joists may have some bounce. To fix this permanently, you might need to use a shim behind the baseboard to keep it plumb. I have spent years perfecting the art of the hidden shim. It is about creating a flat plane where the wall is wavy. You are essentially building a bridge over the imperfections of the house. For more ideas on how to finish these areas, look at baseboards makeover ideas that incorporate wider profiles, which offer more surface area for fastening. A taller baseboard allows you to hit the 2×4 studs higher up, where they are less likely to have shifted near the floor plate.
“Moisture content in wood must be within 2 percent of the subfloor before installation to prevent seasonal movement.” – NWFA Technical Guidelines
The regional climate factor
The geography of your home dictates the behavior of your trim. In a humid climate, wood stays swollen. The moment you turn on the heater in the winter, the wood loses that moisture and the miters scream. If you live in a dry area, the wood starts dry and stays dry, leading to fewer popping issues but more cracking. You have to account for this by acclimating your materials. If you are replacing a piece of trim that popped and broke, let the new piece sit in the room for at least 72 hours. Do not just take it from the garage and nail it up. The temperature and humidity difference will cause immediate stress on the joints. Even if you are just doing a small repair, the same logic applies. If the wood is not at equilibrium with the house, it will move. I have seen people try to hide these gaps with massive amounts of caulk, but caulk is not a structural fastener. It has a limit to its elasticity. Once the gap exceeds 1/8 of an inch, most caulks will tear or pull away. You need the mechanical and chemical fix first, the caulk is just for the finish work. For any professional help with these structural flooring challenges, you can always contact us to get a specialist’s eye on the situation.