
I once walked into a house where a 15,000 dollar wide-plank walnut floor was cupping so bad it looked like a potato chip because the installer didn’t check the crawlspace humidity. Most guys skip the leveling compound. They think the underlayment will hide the dip. It won’t. I spent three days grinding concrete on a job last month just so the floor wouldn’t click like a castanet. That experience taught me that the gap between your baseboard and your floor is not just a cosmetic flaw. It is a sign of how the entire structural assembly is moving. If you ignore the physics of that joint, you are asking for a failure that no amount of paint can hide. I have spent twenty five years on my knees with a moisture meter and a level. I view a floor as a performance surface, not a decoration. I despise builder-grade carpet and homeowners who think waterproof LVP means they can turn their living room into a swimming pool. You want a floor that lasts, you listen to the guy with sawdust under his nails and WD-40 on his breath.
The structural reality of a gap
The best way to caulk the joint between the baseboard and the floor requires a deep understanding of subfloor deflection, material expansion, and sealant chemistry. A flexible joint is necessary to accommodate seasonal movement without cracking. Proper surface preparation ensures the caulk bead adheres to both the baseboard and the flooring material effectively. When you look at that gap, you are looking at the meeting point of two different structural systems. The wall moves vertically with the settling of the house. The floor moves horizontally with changes in temperature and humidity. If you pin these two together with a rigid material, something has to break. Most installers use cheap acrylic caulk that has the elasticity of a saltine cracker. When the house breathes in the winter, that caulk snaps. You need a material with at least 25 percent movement capability to survive the reality of a living home.
“A floor is only as good as the subfloor beneath it; deflection is the enemy of every joint.” – Master Flooring Axiom
The subfloor secret that no one tells you
Subfloor levelness is the hidden factor that determines if your caulk line will hold or fail within the first six months. A subfloor that exceeds the L/360 deflection standard will cause the baseboard to rub against the flooring, grinding the sealant into dust. I have seen guys try to hide a half inch dip with a thick bead of caulk. It never works. The physics of the joint dictate that the wider the gap, the more stress is placed on the adhesive bond. If your concrete slab has a belly in it, you need to grind the high spots and fill the low spots with a high compression strength self-leveling underlayment. While most people want the thickest underlayment, too much cushion actually causes the locking mechanisms on LVP to snap under pressure. That same excessive cushion causes the floor to bounce, which pulls the caulk away from the baseboard every time you walk past it. You are not just filling a hole, you are engineering a bridge between two moving targets.
The chemical reality of flexible sealants
Sealant chemistry ranges from siliconized acrylics to pure silicone and polyurethane, each with distinct molecular bonding properties. For baseboard joints, a high-performance copolymer offers the best adhesion to wood and vinyl while remaining paintable. Let us talk about the molecular level. When you apply a silicone sealant, you are initiating a condensation cure mechanism. Atmospheric moisture reacts with the acetoxy silanes in the tube, releasing acetic acid and forming a cross-linked polydimethylsiloxane network. This network is what gives the joint its movement capability. If the subfloor has too much deflection, the strain on these molecular bonds exceeds the cohesive strength of the material, leading to a visible tear. Acrylic caulks are water-based. As the water evaporates, the bead shrinks. This is why that perfect bead you laid on Tuesday looks like a shriveled raisin by Friday. If you want a professional look, you have to account for this 20 percent volume loss during the curing phase.
Why a floating floor changes the rules
Floating floors like Laminate and Luxury Vinyl Plank require an expansion gap at the perimeter that must never be filled with rigid grout or caulk. The baseboard must sit slightly above the floor to allow lateral movement, making a flexible sealant mandatory for moisture protection. If you are working with chic baseboard designs that transform rooms in 2025, you need to be careful. You cannot lock a floating floor in place. If you run a heavy bead of high-strength adhesive caulk into that expansion gap, you have essentially nailed the floor to the wall. When the humidity hits 70 percent in August, that floor is going to buckle in the middle of the room because it has nowhere to go. I have seen whole kitchens lift two inches off the ground because some handyman thought he was being thorough by caulking the expansion gap solid. You want a thin, flexible bead that sticks to the face of the floor and the bottom of the baseboard, but does not penetrate deep into the expansion channel.
| Sealant Type | Flexibility | Paintability | Best Application |
|---|---|---|---|
| Acrylic Latex | Low | Excellent | Interior crown molding |
| Siliconized Acrylic | Medium | Good | Standard baseboards |
| Pure Silicone | High | None | Wet areas and showers |
| Polyurethane | Very High | Poor | Exterior transitions |
Navigating the transition to wet rooms
Wet area transitions near showers and tile floors require 100 percent silicone to prevent water wicking into the subfloor or baseboard core. Integrating grout with color-matched caulk ensures a waterproof barrier that maintains aesthetic continuity. In a bathroom, the stakes are higher. If you are looking at showers that wow modern designs for 2025, you will notice they often use large format tiles. These tiles have fewer grout lines, which means the perimeter joint has to handle more of the room’s expansion. If you use standard grout at the baseboard line, it will crack within weeks. Water from the shower will then seep into those cracks, travel under the baseboard, and start rotting your wall studs. I always recommend using grout restoration secrets for long lasting results by replacing that hard perimeter grout with a high-grade silicone that matches the grout color perfectly. This creates a movement joint that looks like grout but acts like a gasket.
“Expansion and contraction are not suggestions but physical certainties in every wood based installation.” – Flooring Engineering Standard
Tools of the trade for a perfect bead
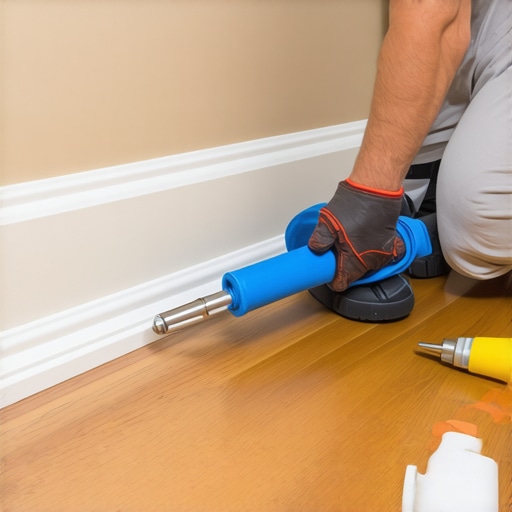
Professional caulking tools including a dripless gun, masking tape, and denatured alcohol are fundamental for achieving a clean finish. The application technique involves a steady hand and a consistent pressure to avoid bead irregularities. Do not be the guy who just cuts a giant hole in the tip of the tube and hopes for the best. You want a small, 45-degree angle cut. The hole should be no wider than the gap you are filling.
- Clean the gap thoroughly using a vacuum and a thin putty knife to remove construction dust.
- Wipe the baseboard and the floor edge with denatured alcohol to remove oils that prevent adhesion.
- Apply a thin line of painter’s tape to the floor about an eighth of an inch away from the baseboard.
- Run a continuous bead of sealant without stopping mid-wall to avoid visible overlaps.
- Tool the bead with a wet finger or a specialized profiling tool within five minutes of application.
- Remove the tape immediately while the caulk is still wet to ensure a sharp, clean edge.
If you are working on a baseboards makeover ideas to elevate your space project, the quality of this bead is what separates a DIY job from a master installation. I have seen beautiful 7-inch primed poplar baseboards ruined by a messy, smeared caulk job that collected dust and turned black within a year.
The physics of seasonal movement
Hygroscopic materials like solid hardwood will expand and contract significantly based on the relative humidity of the indoor environment. A properly caulked joint must be able to stretch during the dry winter months and compress during the humid summer. Wood is a bundle of straws. It drinks moisture and gets fat. It loses moisture and gets skinny. If you installed your floor in the summer, your gaps are at their smallest. In the winter, those gaps will open up. This is why I tell people never to caulk their baseboards in the dead of winter if they haven’t acclimated the wood. If you caulk a wide winter gap, when summer comes, that wood will expand and crush the caulk, forcing it out of the joint in a nasty, gummy ridge. You want to aim for a middle-ground humidity level, around 40 to 45 percent, before you finalize your perimeter sealing. This minimizes the extreme stress on the sealant’s molecular structure.
Common mistakes that lead to failure
Adhesion failure often occurs when caulk is applied over old sealant or dusty surfaces, preventing a structural bond. Using non-flexible fillers like wood putty in a movement joint will lead to immediate cracking. Another mistake is three-sided adhesion. This happens when the caulk sticks to the baseboard, the floor, and the subfloor underneath. When the floor moves, the caulk is pulled in three different directions and it tears. You only want the caulk to stick to the baseboard and the floor. This is why we use backer rod in larger gaps. The backer rod acts as a bond breaker, allowing the caulk to stretch like a rubber band between the two primary surfaces. It is a simple piece of foam that saves you from having to redo the job in two years. I’ve walked into too many jobs where the previous guy just pumped three tubes of caulk into a deep void. That is not craftsmanship. That is laziness. If the gap is deeper than half an inch, you need a backer rod. Period.
Finishing the edge for a professional look
Aesthetic integrity is maintained by color-matching the sealant to the baseboard rather than the flooring to create a clean visual line. For tile-to-wood transitions, using a translucent sealant can help bridge the texture gap without drawing the eye to the joint. Once the bead is laid and tooled, you need to let it cure. Do not let the cleaning crew in there with mops an hour later. Most siliconized acrylics need 24 hours before they are moisture resistant. If you are dealing with tile, you might want to look into tile cleaning tips for a sparkling bathroom in 2025 to make sure you aren’t using harsh chemicals that will eat away at your new caulk. A professional finish is about patience and chemistry. It is about knowing that the house is a moving, breathing thing. You don’t fight the movement. You design for it. That is the difference between a floor that looks good for a week and a floor that looks good for a generation. If you follow these steps, you won’t be calling me in three years to fix a cracked, moldy mess at your floor line. You’ll have a joint that holds because it was engineered to handle the truth of the house.