
The solitary crack that signals subfloor failure
I have spent twenty five years on my knees with a moisture meter and a level. I have seen every way a floor can fail. Most guys skip the leveling compound. They think the underlayment will hide the dip. It won’t. I spent three days grinding concrete on a job last month just so the floor wouldn’t click like a castanet. That job taught me that if the substrate is one eighth inch out of level over ten feet, your tile is a ticking time bomb. When you see a single cracked tile in the middle of your kitchen or bathroom, do not assume a heavy pot fell on it. That crack is often a symptom of a deeper structural disease. It is a sign of deflection, a hollow spot in the mortar, or a lack of expansion joints. Replacing it is a surgical procedure that requires precision and a deep understanding of adhesive chemistry. If you rush the process, you will end up with two cracked tiles next week. If the rest of your floor looks dull, you should look into tile cleaning tips for a sparkling bathroom in 2025 before you start the repair.
The anatomy of a hairline fracture
Replacing a cracked tile requires identifying subfloor deflection and thermal expansion issues. Most hairline fractures in porcelain or ceramic tile originate from point load stress or a hollow bond in the mortar bed. Understanding the TCNA standards ensures a permanent repair without damaging adjacent grout lines. When a tile cracks, the first thing I check is the sound. I tap it with the handle of my screwdriver. If it sounds hollow, like a drum, the mortar didn’t achieve eighty percent coverage. That air pocket creates a weak point. When someone steps on that specific spot, the porcelain flexes. Porcelain is strong but brittle. It has a high Young’s modulus, meaning it does not like to bend. When the subfloor moves, the tile snaps. This is why site preparation is the most significant part of any job. You have to understand the physics of the bond between the thin-set and the substrate. If you are working in a bathroom, you might also want to look at showers that wow modern designs for 2025 to see how professional installations handle these stresses.
“A floor is only as good as the subfloor beneath it; deflection is the enemy of every joint.” – Master Flooring Axiom
The precision surgery of grout removal
Grout removal is the most dangerous phase of tile replacement because of the risk to neighboring tiles. Using a carbide-tipped grout saw or an oscillating multi-tool with a diamond blade allows you to clear the joint perimeter. This step isolates the damaged unit and prevents vibration transfer through the grout matrix. You cannot just start swinging a hammer. If the grout is still intact, the energy from your hammer will travel through the grout line and crack the tile next to it. I have seen homeowners turn a one tile repair into a five tile disaster in ten seconds. You need to clear the grout all the way down to the substrate. This creates a moat around the castle. If you are worried about the look of your grout after the repair, check out grout restoration secrets for long-lasting results. Sometimes the grout fails because of moisture. In humid regions like the Gulf Coast, grout can stay soft for days if the HVAC isn’t pulling moisture out of the air. You have to account for the local climate when you choose your materials.
| Property | Ceramic Tile | Porcelain Tile | Natural Stone |
|---|---|---|---|
| Water Absorption | > 0.5% | < 0.5% | Varies |
| Breaking Strength | 250 lbs | 350+ lbs | High but brittle |
| Adhesive Requirement | Standard Thin-set | Modified Thin-set | Large Format Mortar |
| Expansion Rate | Moderate | Low | High |
Why your hammer is a dangerous tool
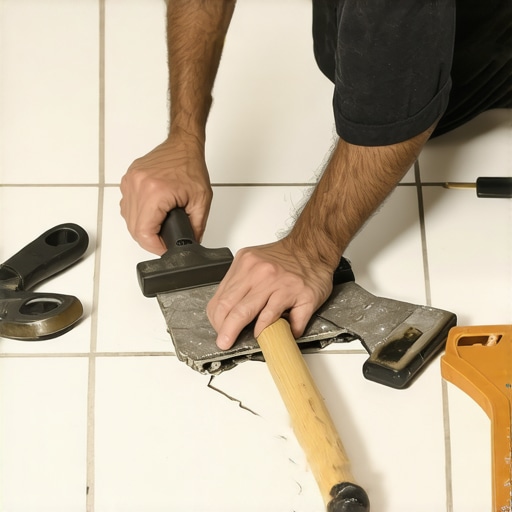
Breaking the tile requires a center-out approach to protect the edges of the installation. By drilling pilot holes with a masonry bit into the center of the cracked porcelain, you create release points for the internal stress. This prevents the fracture lines from jumping across the cleared grout joint into the main floor field. Once you have your holes, use a hammer and a narrow chisel. I prefer a three quarter inch cold chisel. Start at the center and work your way out. You are not trying to pry the whole thing up at once. You are nibbling away at it. Every strike should be directed toward the center of the hole you made, not toward the good tiles. If you hit toward the neighboring tile, you will chip its edge. I have seen guys lose an entire day of work because they got impatient with a chisel. You have to be a surgeon. Protect your walls and baseboards makeover ideas to elevate your space with cardboard or tape during this process. A flying shard of porcelain can slice through paint and drywall like a razor blade.
The physics of the mortar bed bond
Substrate preparation involves removing every trace of old mortar to ensure the replacement tile sits flush with the surface. The chemical bond of polymer-modified thin-set requires a clean, porous surface for mechanical interlocking. If the substrate is uneven, the new tile will sit proud of the floor, creating a tripping hazard and a weak point. Use your chisel to scrape the old thin-set off the subfloor. You want to get back to the original concrete or backer board. If you leave high spots, the new tile will be too high. If you gouge the subfloor, you create a low spot that will trap air. I use a vacuum with a HEPA filter to get every grain of dust out of the cavity. Dust is a bond breaker. If there is dust on the floor, the thin-set will stick to the dust, not the floor. It is like trying to tape a dusty box. It just won’t hold. If you find the grout around the area is crumbling, you might need to know how to refresh grout without replacing it before you finish the job.
Matching the ghost of a dye lot
Color matching tile and grout pigments is difficult due to manufacturing dye lots and site-specific aging. Sunlight exposure and chemical cleaners alter the chromatic profile of the original installation over time. Using a color map or a sample piece from the original batch is the only way to ensure visual continuity. This is why I always tell my clients to keep a box of tile in the attic. If you don’t have a spare, you are in trouble. Even the same model number from the same company will look different if it was made in a different year. The minerals in the clay change. The kiln temperature varies by a few degrees. These small changes result in a tile that is a shade darker or a millimeter smaller. Grout is even worse. Grout is a porous cement product. It absorbs dirt and oils. If you put brand new bright white grout next to five year old white grout, it will look like a sore thumb. You might have to stain the new grout to match the old. It is an art form, not just a trade.
“Consistency in thin-set coverage is the difference between a floor that lasts decades and one that fails in months.” – TCNA Installation Guide
The science of the cure
Setting the tile requires a back-buttering technique to achieve total coverage and leveling accuracy. Applying thin-set to both the substrate and the back of the tile ensures that the capillary action of the wet mortar creates a monolithic bond. This prevents voids that lead to future cracking under heavy loads. I use a one eighth inch or a one quarter inch notched trowel depending on the tile size. You want the ridges to run in one direction. Do not do swirls. Swirls trap air. When you press the tile down, the air cannot escape. If the air is trapped, the tile isn’t fully supported. You should also check the moisture level of your subfloor. If you are in a place like Phoenix, the dry air will suck the water out of your thin-set too fast. The thin-set needs water to hydrate and form crystalline chains. If it dries too fast, it becomes brittle and weak. You might need to dampen the subfloor with a sponge before you apply the mortar. It sounds like a small detail, but it is the difference between a professional result and a failure. When the tile is set, let it sit for twenty four hours before grouting. Do not walk on it. The weight of a person will shift the tile and break the bond before it has a chance to harden.
- Select a replacement tile that matches the original dye lot and batch.
- Remove the surrounding grout with a diamond-tipped oscillating blade.
- Drill relief holes in the center of the cracked tile to manage stress.
- Chisel out the broken pieces from the center toward the edges.
- Scrape the substrate clean of all old adhesive and debris.
- Vacuum the area thoroughly to remove all bond-breaking dust.
- Back-butter the new tile with polymer-modified thin-set.
- Level the tile using a rubber mallet and spacers.
- Apply matching grout after the mortar has cured for a full day.
- Seal the grout to prevent moisture penetration and staining.
The ghost in the expansion gap
Expansion joints are often missing in residential tile work, leading to compressive stress fractures. The ANSI standards require perimeter movement joints because subfloors and tiles expand and contract at different rates. Without these thermal buffers, the floor will tent or crack as the building settles. Most builders run the tile right up to the wall. This is a mistake. You need a gap at the edge of the room. This gap is hidden by your baseboards. If you are updating your trim, look at chic baseboard designs that transform rooms in 2025 for ideas on how to finish these edges. The floor needs to breathe. It is a living, moving structure. If you lock it in place, it will break its own chains. That single cracked tile you just replaced might have been the weakest link in a floor that is under too much pressure. If you see cracks appearing in a straight line across several tiles, you have a structural crack in the slab. That is a much bigger problem that requires an isolation membrane. But for a single tile, a careful replacement will usually do the trick. Just remember that the mortar and grout need time to reach their full compressive strength. Patience is the most important tool in your bag.