
Most guys skip the leveling compound. They think the underlayment will hide the dip. It won’t. I spent three days grinding concrete on a job last month just so the floor wouldn’t click like a castanet. I was working on a master bath with a high end honed marble floor. The homeowner was terrified. She had seen too many showers where the stone looked like it was permanently soaked in motor oil after the sealer was applied. She wanted that bone dry, natural look. I told her that if she wanted it done right, we had to look at the chemistry of the sealer and the physics of the stone itself. Flooring is a structural engineering challenge. If you treat it like a craft project, you will fail. Natural stone is a living, breathing material with a complex system of micro capillaries. If you choke those pores with the wrong resin, you destroy the aesthetic and the longevity of the installation. We are going to look at how to protect your stone without changing its soul. This is about molecular bonding, not just wiping on a liquid and hoping for the best.
The chemistry of stone and the wet look trap
Natural stone darkening occurs because traditional sealers fill pores with resins that change the refractive index of the surface. To avoid this, use a penetrating impregnator sealer with an oleophobic and hydrophobic formula that bonds below the surface without creating a surface film or wet look finish. These sealers are designed to sit inside the stone rather than on top of it. When light hits a wet stone, it is absorbed differently because the water fills the tiny gaps in the surface. Many cheap sealers use large molecule resins like acrylics that mimic this effect. They stay on the surface and act like a plastic wrap. You need a sealer with a carrier, usually a solvent or a high quality water base, that pulls the active solids deep into the stone. Once the carrier evaporates, the solids stay behind to line the pores. They do not fill them completely. This allows the stone to remain vapor permeable. It can breathe. If you trap moisture under a topical sealer, you get efflorescence or stone rot. I have seen five thousand dollar slate floors turn into a white, flaky mess because the installer used a cheap hardware store sealer that blocked the vapor drive. You have to understand that surface tension is your friend. A good impregnator creates a high contact angle for liquids. This means water beads up like mercury on a glass plate but the stone still looks raw and dry.
Why your subfloor is lying to you
You can have the best sealer in the world but if your subfloor is wrong, the stone will fail anyway. Most installers think a shower pan is just about the liner. They forget about deflection. Natural stone has zero flex. If your subfloor has more than L over 720 deflection, those grout lines will crack. Once they crack, water gets under the stone. That water stays there. It creates a dark shadow from underneath that no sealer can fix. I always tell people to check their joist spacing. If you have 16 inch centers with a single layer of plywood, you are asking for trouble. You need a rigid base. I prefer a double layer of subflooring or a high quality cement backer board set in a mortar bed. When I build showers with a style that lasts, I start with the joists. I grind the high spots. I fill the low spots. If the floor is not flat to within 1/8 inch over 10 feet, the stone will eventually Telegraph those imperfections. This leads to lippage. Lippage is not just ugly. It is a moisture trap. Water sits against the edge of the stone and eventually finds a way through the sealer. You want a floor that sheds water like a duck’s back. That starts with a perfectly sloped, perfectly flat subfloor.
“A floor is only as good as the subfloor beneath it; deflection is the enemy of every joint.” – Master Flooring Axiom
The molecular difference between topical and penetrating
Topical sealers are for people who want a shiny floor and do not care about the health of the stone. They are essentially a coat of paint. They wear off in high traffic areas. In a shower, they are a disaster. Soap scum and body oils will bond to the sealer. Then you have to use harsh chemicals to clean it. Those chemicals then eat the sealer. It is a cycle of destruction. Penetrating sealers, or impregnators, are different. They use fluorinated polymers or siloxanes. These molecules are incredibly small. They are measured in nanometers. They migrate into the stone and attach themselves to the interior walls of the pores. They create a hydrophobic barrier. This means they hate water. They also create an oleophobic barrier. This means they hate oil. In a shower, you deal with both. You have water from the tap and oils from your skin and hair products. If you use a sealer that is only hydrophobic, the oils will still soak in and darken the stone over time. You need a sealer that handles both. I always look for a solvent based impregnator for dense stones like marble or granite. For more porous stones like travertine or limestone, a water based impregnator can work if the solids content is high enough. But remember, the goal is to leave the surface texture exactly as it was. If you feel a film, you did it wrong.
| Stone Type | Porosity Level | Recommended Sealer Type | Typical Acclimation Time |
|---|---|---|---|
| Carrara Marble | Medium-Low | Solvent Impregnator | 24 Hours |
| Travertine | High | High-Solids Water Base | 48 Hours |
| Slate | Variable | Breathable Penetrator | 24 Hours |
| Granite | Low | Fluorinated Solvent | 12 Hours |
The phantom moisture in the slab
I have seen guys seal a floor the day after they set the stone. That is a massive mistake. You are locking in the moisture from the thinset. That moisture has nowhere to go but up. As it tries to escape, it carries minerals with it. These minerals hit the bottom of your sealer and turn into a white haze. It looks like the stone is fading but it is actually trapped salt. You need to wait. In a standard bathroom, I wait at least 72 hours before sealing. If it is a basement shower on a concrete slab, I might wait a week. I use a moisture meter. If the stone is reading more than 12 percent moisture, I do not touch it with a sealer. You also need to think about the baseboards makeover ideas you might have planned. If you are installing baseboards over the stone, seal the stone before the baseboards go on. This ensures the sealer gets all the way to the edge of the wall. Water loves to find the gaps between the floor and the wall. If that area is not sealed, the stone will darken from the perimeter inward. It looks like a stain, but it is actually just dampness that cannot escape. In humid climates like Florida or the Gulf Coast, this is even more critical. The ambient humidity keeps the stone from drying out. You need a sealer that allows for maximum vapor transmission while still blocking liquid water.
The 1/8 inch that ruins everything
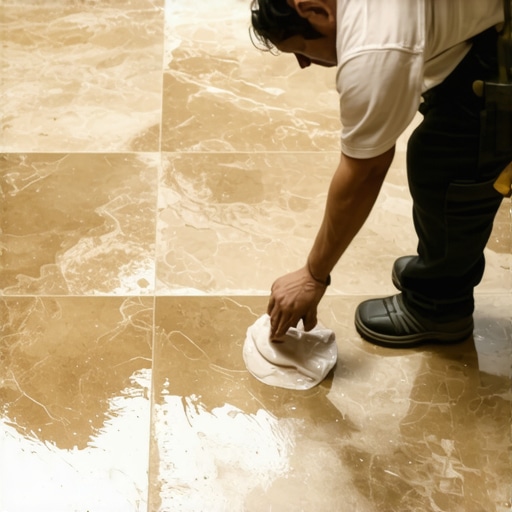
Grout is the weakest link in your shower floor. Most people think grout is waterproof. It is not. It is a porous cement product. If you do not seal the grout at the same time you seal the stone, the grout will act like a wick. It will suck up water and pull it under the edges of the stone. This is why you see dark rings around the edges of marble tiles. To prevent this, you must use a sealer that is rated for both stone and grout. I prefer a flood coat method. I pour the sealer onto the floor and use a lamb’s wool applicator to spread it evenly. I let it sit for about ten minutes. I watch the stone. If it drinks the sealer up, I add more. You want the stone to be saturated but not puddling. After ten minutes, I take a clean, dry microfiber cloth and I buff the surface until it is bone dry. This is the secret. If you leave any sealer on the surface, it will dry into a sticky, cloudy mess. You have to remove every bit of excess. If you have old grout that is already stained, you should look into how to refresh grout without replacing it before you seal. Sealing over dirt just preserves the dirt forever. For long term maintenance, check out grout restoration secrets for long lasting results. A clean grout line makes the stone look better and allows the sealer to bond more effectively.
“A penetrating sealer must reside within the stone pores, not on the surface, to maintain the original aesthetic and vapor permeability.” – Master Flooring Axiom
The checklist for a perfect no-change finish
- Deep clean the stone with a pH-neutral cleaner and let it dry for at least 48 hours.
- Perform a water drop test to check the current porosity of the stone.
- Select a high-quality solvent-based or water-based penetrating impregnator.
- Apply the sealer in a well-ventilated area using a microfiber applicator.
- Allow the sealer to penetrate for 5 to 10 minutes depending on the stone density.
- Completely buff away all surface residue before it dries to a film.
- Wait 24 hours before allowing any water contact with the shower floor.
- Avoid using acidic cleaners that can etch the stone and strip the sealer.
The ghost in the expansion gap
One thing people forget is the expansion gap at the perimeter of the shower. You cannot fill this with hard grout. You must use a 100 percent silicone caulk. If you grout the corners, the house will move, the grout will crack, and water will get behind the tile. When you seal your stone, make sure you don’t get sealer in the gaps where the silicone needs to bond. Silicone does not like to stick to sealer. I usually tape off my expansion joints before I start the sealing process. It is a pain in the neck, but it is the right way to do it. While you are thinking about the transition from the floor to the wall, consider how chic baseboard designs can hide these expansion gaps while still allowing the floor to move. A shower floor is a dynamic system. It expands when it gets hot and shrinks when it cools. If you lock it in with hard grout and topical sealers, it will fail. You need a system that has some give. This is why I always advocate for high quality materials and traditional methods. The industry is full of shortcuts, but the physics of water and stone haven’t changed in a thousand years. Water will always find the path of least resistance. Your job is to make sure that path leads to the drain, not into your subfloor. Use these tile cleaning tips for a sparkling bathroom in 2025 to keep the surface clear of debris so the sealer can do its job. If the stone is covered in soap scum, the sealer cannot bond to the pores. It is all about the preparation. I spent years learning this the hard way. Don’t be the guy who has to rip out a ten thousand dollar shower because he wanted to save twenty bucks on a bottle of sealer.
Final Analysis
Sealing natural stone without darkening it is a matter of choosing the right molecular weight. You need a penetrating impregnator that stays below the surface. You must ensure the stone is bone dry before you start. You must buff away every drop of excess sealer. If you follow these steps, your marble, travertine, or slate will stay protected while keeping that raw, natural look that you paid for. This is not just about looks. It is about protecting the structural integrity of your home. A sealed floor is a hygienic floor. It resists mold and bacteria. It makes the bathroom a healthier place to be. Take your time. Do the prep work. Respect the stone. It will reward you with a lifetime of service.