
I spent three days grinding concrete on a job last month just so the floor wouldn’t click like a castanet. Most guys skip the leveling compound because they think the underlayment will hide the dip. It won’t. I have spent twenty-five years on my knees with a moisture meter and a level. I have seen the disaster that follows when a contractor treats a floor as a decoration instead of a structural engineering project. When you are looking for the best drill bits for boring through porcelain tile, you are fighting against chemistry and physics. Porcelain is not your grandmother’s ceramic. It is a vitrified beast fired at temperatures exceeding 2,200 degrees Fahrenheit. This process creates a density that rivals granite. If you walk into a job site with a standard masonry bit, you have already lost the battle. You will burn the tip of that bit into a glowing orange nub in under thirty seconds. I have watched rookies ruin five hundred dollars worth of Italian porcelain because they did not respect the material. You need tools that can handle the Mohs hardness scale of seven to nine.
The hard truth about porcelain density
The best drill bits for porcelain tile are diamond-tipped bits specifically designed for high-density materials. Standard carbide masonry bits will fail because porcelain is vitrified. You must use diamond grit or vacuum-brazed diamond technology to grind through the surface rather than trying to cut or punch through it like wood. When we talk about porcelain, we are talking about a material that has a water absorption rate of less than 0.5 percent. This density is why tile cleaning tips for a sparkling bathroom in 2025 are so effective, as the surface is nearly impenetrable. However, that same density makes drilling a nightmare. The molecular structure of the clay is so tightly packed that heat cannot escape. Friction is your primary enemy. When the drill bit spins, it creates a thermal spike at the point of contact. Without the right bit, that heat transfers into the tile, causing it to crack or shatter. I always tell my apprentices that they are not drilling, they are grinding. You are using industrial diamonds to sand a hole through the glaze and the body of the tile simultaneously.
“A floor is only as good as the subfloor beneath it; deflection is the enemy of every joint.” – Master Flooring Axiom
The superiority of diamond tipped bits
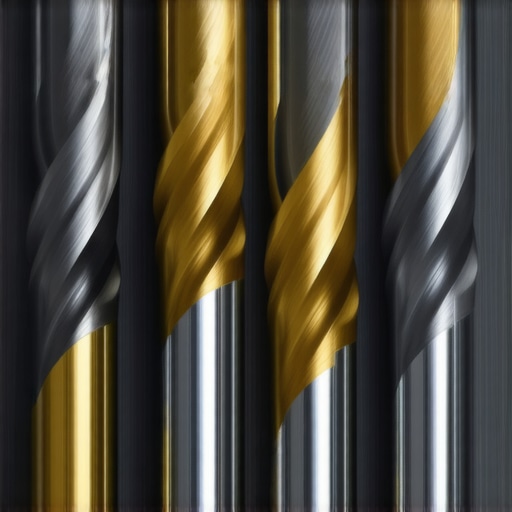
Diamond bits for porcelain tile work by utilizing a matrix of industrial diamonds bonded to a steel shank. These bits do not have sharp flutes like a wood bit. Instead, they feature a rough surface that wears away the porcelain at a microscopic level while maintaining structural integrity. There are two main types of diamond bits you will find in my toolbox. First, there are the electroplated diamond grit bits. These are affordable and work well for a few holes, but the diamond layer is thin. Once that layer wears off, the bit is junk. Then you have vacuum-brazed diamond bits. These are the gold standard. The diamonds are physically fused to the steel at a molecular level. They last longer and can handle much higher temperatures. If you are installing high-end showers that wow modern designs for 2025, you cannot afford to have a bit fail halfway through a hole. You need the consistency that vacuum brazing provides. I have used these bits to go through two-centimeter thick porcelain pavers without a single crack.
Why carbide bits will destroy your project
Carbide bits are designed for masonry and ceramic, but they lack the hardness required to penetrate professional grade porcelain. Using a carbide bit on porcelain usually results in the bit skating across the surface and scratching the finish before ultimately burning out the tip. I have seen guys try to use those spear-point carbide bits. They might get one hole done if they are lucky and the tile is soft, but more often than not, the heat builds up so fast that the carbide tips de-solder from the shank. It is a waste of time and money. When you are working on finishing touches like chic baseboard designs that transform rooms in 2025, you need precision. A carbide bit will vibrate and chatter. That chatter creates micro-fractures in the tile. You might not see them today, but in six months, when the house settles, those micro-fractures will turn into a spiderweb of cracks running across your floor. This is why the NWFA and TCNA emphasize tool selection. You cannot shortcut the physics of hardened clay.
| Bit Type | Material Rating | RPM Range | Coolant Needed |
|---|---|---|---|
| Carbide Spear | Ceramic Only | 400-600 | Optional |
| Electroplated Diamond | Porcelain/Stone | 1500-2500 | Mandatory |
| Vacuum Brazed Diamond | All Tile Grade | 2000-3000 | Highly Recommended |
The necessity of water as a lubricant
Water is the most effective lubricant for drilling porcelain because it dissipates heat and carries away the abrasive slurry created during the grinding process. Without water, even the best diamond bit will overheat and lose its abrasive coating in seconds. I keep a small spray bottle of water in my belt at all times. When I am drilling, I have a helper spray a constant stream of water directly onto the bit. If I am working alone, I use a sponge or a specialized water-fed drill rig. You can see the steam rising if you are doing it wrong. The water keeps the diamonds cool enough to stay bonded to the bit. It also prevents the tile from expanding locally and cracking. Heat management is the difference between a pro job and a homeowner disaster. If you find your grout restoration secrets for long-lasting results are not working, it might be because the original installer stressed the tile during the drilling process, causing invisible damage. Keep it wet, keep it cool, and take your time.
Drilling techniques for a perfect finish
The proper technique for drilling porcelain involves starting the bit at a forty-five degree angle to create a notch before leveling it out. This prevents the bit from walking across the slippery glazed surface and ensures the hole is positioned exactly where it needs to be. Most people try to push the bit straight down. That is a mistake. The bit will dance all over the tile. I start at an angle until I feel the bit bite into the glaze. Then, I slowly pivot the drill to a vertical position while maintaining high RPM but low pressure. You let the diamonds do the work. If you lean on the drill, you will snap the locking mechanism of the internal motor or crack the tile. I treat it like a surgical procedure. Here is my standard checklist for every hole I drill.
- Mark the center point with a permanent marker.
- Apply a piece of masking tape to prevent the bit from sliding.
- Start the drill at a high speed before touching the tile.
- Enter at a forty-five degree angle to establish a pilot notch.
- Pivot to ninety degrees and apply light, even pressure.
- Keep the site saturated with water throughout the process.
- Back the bit out every few seconds to clear debris.
“Porcelain tile requires a Mohs hardness rating of seven or higher to qualify as a commercial grade surface.” – TCNA Standards
The cost of choosing the wrong tools
I have spent thousands of dollars on high-end bits over my career and I do not regret a single cent. Using a cheap bit is like using cheap thin-set. It might look fine for the first week, but the structural failure is inevitable. When you are boring through tile for shower heads or plumbing lines, you are creating a point of weakness. If that hole is ragged or forced, you are inviting leaks and structural rot. I once worked on a renovation where the previous guy used a hammer drill on porcelain. He cracked every single tile around the valve. By the time I got there, the subfloor was mush. He saved five dollars on a bit and cost the homeowner ten thousand dollars in repairs. This is why I am a stickler for the right equipment. Whether you are dealing with baseboards or intricate grout lines, your tools define your reputation. Do not be the guy who burns out his bits and blames the tile. Buy diamond, use water, and respect the material.