
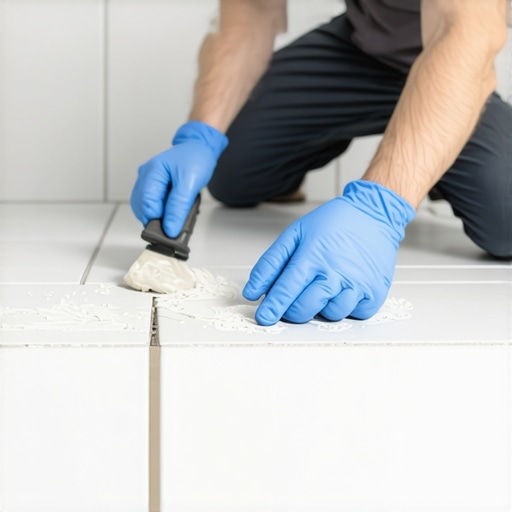
Professional Techniques for Epoxy Grout Application and Avoiding the Sticky Nightmare
I spent three days grinding concrete on a job last month just so the floor would not click like a castanet. Most guys skip the leveling compound because they think the underlayment will hide the dip. It will not. When you are dealing with high-performance materials like epoxy grout, that subfloor stability is the difference between a lifetime installation and a cracked disaster. My hands still smell like the heavy-duty degreaser I used to prep that slab. If your substrate has even a fraction of an inch of deflection, the rigid nature of epoxy will fight the movement and eventually lose. I have seen fifteen thousand dollar bathroom installs ruined because the installer did not understand the chemistry of what they were mixing. Epoxy is not just grout. It is a structural resin that demands respect, precision, and a very fast set of hands. You do not just smear this stuff around and hope for the best like you do with standard cementitious products. You treat it like a chemical engineering project. If you fail to prepare, you are preparing to spend your weekend with a hammer and a chisel chipping away at a ruined tile surface.
The chemistry behind the resin bucket
Epoxy grout consists of two or three components including a base resin, a hardener, and often a color-matched silica sand. Unlike traditional grout, it cures through a chemical reaction rather than water evaporation, resulting in a non-porous surface that resists acids, stains, and heavy moisture. This makes it the premier choice for high-traffic areas. The bond is mechanical and chemical. When you mix Part A and Part B, you are initiating a thermosetting polymer reaction. This process is exothermic, meaning it generates its own heat. The more you mix, and the longer it sits in the bucket, the hotter it gets. Once it reaches a certain temperature, the pot life drops from forty minutes to ten minutes in a heartbeat. You have to understand the specific gravity of the filler. If you use too much, the mixture becomes a dry paste that will not penetrate the joints. If you use too little, it becomes a runny mess that slumps out of vertical wall joints in showers. I always tell the apprentices that they are not just tilers today, they are chemists. You need to measure your ratios with the precision of a pharmacist because the polymer chains will not link correctly if the stoichiometry is off by even five percent.
“A floor is only as good as the subfloor beneath it; deflection is the enemy of every joint.” – Master Flooring Axiom
Why your subfloor determines grout success
Subfloor deflection and moisture vapor transmission rates must be measured before any tile or grout is applied to ensure the structural integrity of the installation. A rigid epoxy grout cannot compensate for a bouncy subfloor or an uneven slab, leading to delamination or cracking at the edges. You have to check for the L/360 standard, which is the industry benchmark for deflection. If you are working over wood joists, you better make sure those layers of plywood are screwed down every six inches on the perimeter and twelve inches in the field. I have walked onto jobs where the subfloor felt like a trampoline. In those cases, I refuse to mix the epoxy until the framing is reinforced. If the subfloor moves, the tile moves. If the tile moves, the epoxy, which is harder than the tile itself, will shear the bond right off the thin-set. It is a chain reaction of failure. You also need to consider the moisture in the slab. Even if the epoxy is waterproof from the top, moisture coming up from the ground can create hydrostatic pressure that pushes the grout right out of the joints. Use a calcium chloride test. Do not guess. If you guess, you lose.
The temperature trap in epoxy work
Ambient temperature and surface temperature drastically alter the open time and viscosity of epoxy grout during the installation process. Ideal conditions for application are between 65 and 85 degrees Fahrenheit, as colder temperatures make the resin too thick to spread, while excessive heat causes the material to flash set. I have seen guys try to grout a sun-drenched patio in July. The bucket was smoking within fifteen minutes. If you are working in a hot environment, you need to keep your grout kits in a cooler with some ice packs until the moment you are ready to mix. Do not put them on the ice, just keep them chilled. Conversely, if you are in a cold basement, that epoxy is going to feel like cold molasses. It will not flow into the joints, and you will end up with voids that look like Swiss cheese. While most people think more water helps cleaning, too much water during the initial epoxy wash actually weakens the bond and clouds the surface with a milky residue that is impossible to remove once cured. You have to balance the hydration of your sponge with the chemical state of the resin. It is a delicate dance that most people fail on their first try.
| Feature | Cementitious Grout | Epoxy Grout |
|---|---|---|
| Porosity | High (Requires Sealer) | Zero (Waterproof) |
| Chemical Resistance | Low | High |
| Stain Resistance | Poor | Excellent |
| Ease of Application | High | Low (Professional Only) |
| Cure Time | 24 to 48 Hours | 12 to 24 Hours (Chemical) |
Mastering the float technique
The grout float angle must be maintained at a strict 45-degree angle to the tile surface to force the epoxy resin deep into the joint cavities. Using a hard rubber epoxy float is mandatory, as standard soft foam floats will flex and pull the material back out of the grout lines during the spreading phase. You start in a corner and work in small sections. Do not try to do the whole floor at once. You are not a superhero. You have about twenty square feet of working space before you need to start your first wash. Push the grout in hard. You want to see it bulge out the other side of the joint if possible. Then, use the edge of the float to strike off the excess. The more you get off with the float, the less you have to scrub with the sponge. Scrubbing is the enemy. It creates mess. It spreads the resin over the face of the tile, making your life a living hell during the cleanup. If you are working around baseboards, be extra careful. You do not want this stuff on your wood trim. It will bond to the paint and you will never get it off without a sander. Check out some baseboards makeover ideas to elevate your space if you want to see how to properly integrate your floor and wall transitions.
- Use a dedicated epoxy grout float with a beveled edge.
- Mix only half-units at a time to extend your working window.
- Wear nitrile gloves and change them every thirty minutes.
- Keep white nylon scrub pads ready for the emulsification stage.
- Maintain two separate buckets of clean water at all times.
- Ensure joints are at least 1/8 inch deep and free of thin-set.
The secret of the two bucket wash
The emulsification process requires a two-bucket system where the first bucket is used for initial resin breakdown and the second bucket provides clean water for the final pass. You must use a surfactant or specialized epoxy cleaner in the first bucket to break the surface tension of the resin, preventing it from redepositing on the tile surface. I see people using one bucket of water until it looks like grey soup. That is how you get haze. You are just moving the resin around. Use a white scrub pad in a circular motion. This is called emulsifying. You are turning that sticky resin into a soapy slurry. Once it is loose, take your sponge, wring it until it is almost dry, and pull it across the tile in one single, fluid motion. Do not scrub with the sponge. Flip the sponge. One more pull. Then go to the clean bucket and rinse. If you do not change your water every fifty square feet, you are wasting your time. For those looking for long-term maintenance after the install, these grout restoration secrets for long-lasting results are invaluable for keeping that finish pristine. Epoxy does not need sealing, but it does need proper initial cleaning to look right.
“Epoxy grout is a structural component. If you treat it like paint, it will fail like paint.” – TCNA Guidelines
Removing the haze before it cures forever
Epoxy haze removal must occur within the first two to four hours of application using a buffered acid cleaner or a proprietary haze remover. If the residual resin is allowed to cure beyond twenty-four hours, it becomes a permanent plastic film that can only be removed through mechanical abrasion or harsh chemical strippers that may damage the tile glaze. I have had homeowners call me in tears because their new showers look like they were dipped in wax. They used a cheap sponge and did not change their water. At that point, you are looking at a nightmare scenario. You can try a citrus-based cleaner or a heavy-duty alkaline solution, but you have to be careful not to eat into the grout joints themselves. This is why the final wipe is the most important part of the job. You hold a light at a low angle to the floor. If you see a shimmer, the haze is still there. Wipe it again. Use a microfiber cloth for the final buff. It picks up those last microscopic bits of resin that a sponge leaves behind. For those interested in the latest styles, showers that wow modern designs for 2025 often feature large format tiles where epoxy is the only logical choice for thin, durable joints.
Long term durability and maintenance
The lifespan of epoxy grout exceeds thirty years when properly installed, as its chemical resistance prevents the structural degradation commonly seen in cement-based products. Because it is impermeable, it does not harbor mold or bacteria, making it the most hygienic choice for bathrooms and kitchens. You do not need to buy those fancy sealers every year. Just use a neutral pH cleaner. Avoid anything with bleach as it can eventually dull the finish of the resin, though it will not technically hurt the integrity of the grout. If you notice the grout getting a bit dull, it is usually just a build-up of soap scum or hard water deposits on top of the plastic. A quick scrub with a soft brush and some white vinegar usually brings the shine right back. If you want more details on keeping your surfaces perfect, read these tile cleaning tips for a sparkling bathroom in 2025. Proper care ensures that the hard work you put into the installation pays off for decades. It is a tough job, and your knees will hurt, but a well-done epoxy floor is a work of art that stands the test of time. Do not cut corners. Do not rush the mix. Respect the chemistry and the floor will respect you back. Final thoughts on this process usually involve a sigh of relief once that haze is gone. It is a high-stakes game, but the reward is a floor that is essentially bulletproof. Keep your tools clean and your water clearer. That is the secret to the trade.