
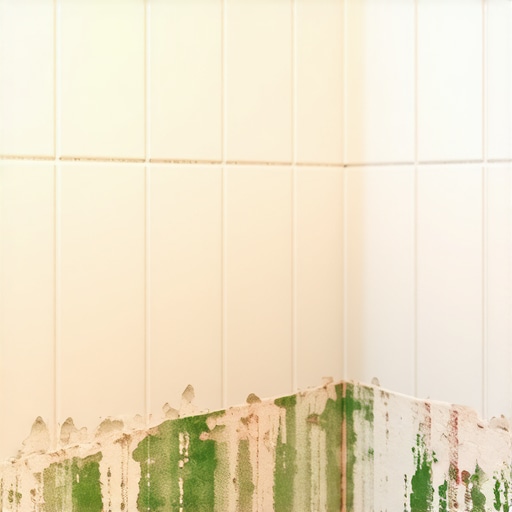
The green monster hiding in your tile joints
Green grout near the floor of a shower typically indicates a persistent moisture trap or a chemical reaction involving copper leaching from plumbing fixtures. When you see that sickly lime or deep forest hue creeping up the first few inches of your wall tile, it is a signal that the structural physics of your wet room have failed. I spent twenty-five years crawling into damp bathrooms with a moisture meter and a flashlight. Last month, I walked into a master bath where the homeowners spent thirty thousand dollars on marble, only to have the bottom three rows of grout look like a mossy swamp. The installer had skipped the preslope. He thought he could just level the floor with thin-set and call it a day. He was wrong. The water was sitting under the tile, rotting the assembly from the inside out. This happens because grout is not a solid wall. It is a porous network of portland cement and sand. On a molecular level, it looks like a sponge. When water sits behind the tile or under the floor, it moves upward through capillary action. This is the same physics that allows a tree to pull water from its roots to its leaves. If your shower pan does not drain perfectly, that water stays in the mud bed and wicks into the grout. If you want to fix this, you have to understand the chemistry and the engineering flaws causing the saturation.
The physics of capillary action in cementitious grout
Capillary action occurs when the adhesion to the walls of the grout pores is stronger than the cohesive forces between the liquid molecules. In simpler terms, the grout sucks up the dirty water like a straw. Most residential showers use standard cement grout. This material is full of microscopic voids. When the shower is running, some water inevitably gets behind the tile. A properly built shower has a waterproof membrane or a sloped liner that directs this water to the weep holes in the drain. If those weep holes are clogged or the slope is flat, the water pools. That pool of water becomes a breeding ground for algae and mold. The green color is often Serratia marcescens or a variety of fungal colonies that thrive in the soap scum and skin cells trapped in the grout. The density of the grout matters. Sanded grout has larger pores than unsanded grout, but both will wick moisture if the substrate is saturated. You can read more about grout restoration secrets for long-lasting results to understand how to treat these porous surfaces. If the grout was never sealed, the rate of absorption increases significantly. I have seen grout reach a saturation point where it stays wet for seventy-two hours after a single shower. That is plenty of time for a biological colony to establish itself. The growth starts at the floor because that is where the water pressure is highest and the drainage is slowest.
The chemical reaction of copper oxidation
If the green stain is localized around the drain or directly under a leaking faucet, it might not be mold at all, but rather copper sulfate. Most people assume green means living organisms, but chemistry plays a role too. If your home has copper pipes and your water is slightly acidic, the water can leach copper ions. These ions travel through the water and deposit onto the porous grout. When those ions are exposed to oxygen and the alkaline environment of the cement, they oxidize. This creates a green or blue-green stain that is nearly impossible to scrub away with standard cleaners. This is the same process that turns the Statue of Liberty green. It is a structural warning sign that your plumbing or your water chemistry is out of balance. You might need to check your water pH or look for slow leaks behind the wall plate. While you are looking at the walls, check your chic baseboard designs in the adjacent room. If the moisture is wicking through the wall, those baseboards will be the next thing to rot. I once saw a bathroom where the copper leaching was so bad it had actually hardened the grout into a weird metallic crust. You cannot just bleach that away. You have to stop the source of the copper and then use a chelating agent to lift the stain.
“A floor is only as good as the subfloor beneath it; deflection is the enemy of every joint.” – Master Flooring Axiom
The nightmare of the blocked weep hole
Weep holes are the small openings in the side of a multi-stage shower drain that allow moisture from the mortar bed to escape. If your installer was a hack, he probably piled thin-set or pea gravel directly over those holes without protection. When the weep holes clog, the entire mud bed under your tile becomes a stagnant lake. This is a common issue in modern shower designs that use large format tiles with minimal grout lines. The water gets in but it cannot get out. The mud bed remains at one hundred percent humidity. The green you see is just the tip of the iceberg. Underneath that tile, the mortar is likely turning into a soft, mushy mess. This structural failure leads to loose tiles and cracked grout. If you step on a tile and water squirts out of the grout line, your weep holes are dead. At that point, you aren’t just looking at a cleaning job. You are looking at a tear-out. I have spent days grinding concrete and rebuilding pans just because someone didn’t put a few pieces of broken tile or specialized plastic spacers around the drain base to keep those holes open. It is a five-cent part that saves a five-thousand-dollar floor.
| Grout Type | Porosity Level | Moisture Resistance | Best Use Case |
|---|---|---|---|
| Sanded Cement | High | Low | Large joints over 1/8 inch |
| Unsanded Cement | Medium | Moderate | Wall tile and narrow joints |
| Epoxy Grout | Zero | High | Wet areas and high traffic |
| High-Performance Cement | Low | High | General residential showers |
The 1/8 inch that ruins everything
A tiny gap or a lack of an expansion joint at the floor-to-wall transition is often the primary entry point for moisture. The TCNA (Tile Council of North America) requires a movement joint at every change of plane. That means you should not have grout in the corner where the floor meets the wall. It should be 100 percent silicone caulk. Grout is rigid. It will crack. When it cracks, water gravity-feeds into the wall cavity. This creates a dark, wet environment perfect for mold. If your shower has grout in that corner, and that grout is turning green, the water is likely trapped behind the tile and cannot evaporate. The green color is often intensified by the presence of soap residues that get trapped in the microscopic cracks. You should check out tile cleaning tips to see how to properly maintain these joints, but no amount of cleaning will fix a structural crack. You have to rake out the old grout and replace it with a color-matched silicone. This prevents the wicking action from starting in the first place. I have seen guys try to caulk over the green grout. That is like putting a band-aid on a gunshot wound. The mold is still there, and now you have just trapped it so it can eat your wall studs.
How stagnant water trapped behind tile feeds the green
Microbial growth requires three things which are moisture, a food source, and a lack of UV light. Your shower provides all three in abundance. The soap you use contains organic fats. Your skin sheds thousands of cells every time you wash. These flow into the grout pores. When the moisture stays at a high level due to poor drainage, the bacteria and fungi have a feast. In regional climates with high humidity, like the coastal areas of Florida or the swampy parts of Louisiana, this problem is accelerated. The air is already so saturated that the shower never truly dries out. In these areas, you cannot rely on evaporation. You need mechanical help. This is why I always tell people to run their vent fans for at least thirty minutes after a shower. If you don’t, you are just cultivating a garden in your grout. You can also look into how to refresh grout without replacing it if the staining is still on the surface and hasn’t penetrated the full depth of the joint. But if the green is coming from the back of the tile, you are fighting a losing battle. The chemistry of the water and the biology of the mold will eventually win.
Preventing the return of the green slime
To stop the green grout from returning, you must address the moisture management system of the shower. First, ensure the drain is clear. Second, check the integrity of the grout joints. If you find soft spots, the grout is failing. Third, consider the type of sealer you are using. A penetrating sealer is better than a topical one because it allows the grout to breathe while still repelling liquid water. However, if the moisture is coming from underneath the tile, a sealer will actually make the problem worse by trapping the water inside the grout. This is a contrarian point that most people miss. They think more sealer is always better. It isn’t. If you have a moisture trap, you want the grout to be as breathable as possible so the water can evaporate. If you seal a wet grout joint, you are basically creating a greenhouse for mold. I recommend a deep dive into trendy ideas for small bathrooms to see how modern waterproofing systems like bonded membranes can eliminate these issues by moving the waterproofing to the surface of the tile rather than under a thick mud bed. This prevents the water from ever reaching the structural layers of the floor.
- Inspect the transition between the floor and wall for cracks or missing caulk.
- Clean the drain grate and check for hair or soap clogs in the weep holes.
- Test the grout hardness with a screwdriver; if it crumbles, it must be replaced.
- Run the ventilation fan for at least 30 minutes after every use.
- Avoid using oily or fat-based soaps that provide a food source for mold.
- Consider a professional steam cleaning to kill deep-seated fungal spores.
“Water follows the path of least resistance, and in a shower, that path usually leads to the most expensive repair possible.” – Master Flooring Axiom
Fixing the issue without tearing everything out
If the green staining is caught early, you can often remediate the issue with a combination of chemical cleaning and structural sealing. Start by using an alkaline cleaner to strip away soap scum. Follow this with a hydrogen peroxide-based solution to kill the mold spores without damaging the cement. Do not use straight bleach, as it can actually weaken the grout over time and lead to more porosity. Once the grout is clean and bone dry, which may take several days of non-use and a space heater, you can apply a high-quality penetrating sealer. If the stain is from copper, you will need a phosphoric acid cleaner, but be careful as this can etch certain types of natural stone. If you are dealing with baseboards near the shower, you might want to look at baseboards makeover ideas to ensure they are made of moisture-resistant materials like PVC or primed MDF instead of solid pine, which will rot instantly when exposed to the green grout moisture. Final assessment of the situation usually reveals that the green grout is a symptom of a larger humidity or drainage issue. You have to be a detective. Look at the slope. Look at the chemistry. Look at the installation method. Only then can you stop the green monster for good.