
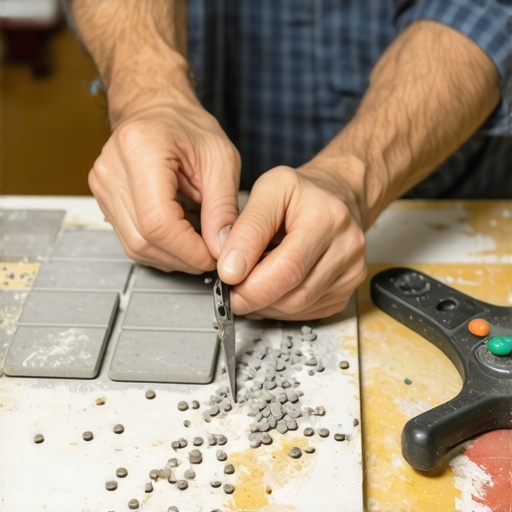
I am the mechanic with sawdust under my nails and the smell of wet ceramic dust clinging to my work shirt. I have spent twenty five years mastering the physics of surfaces. Most people see a floor as a pretty pattern. I see a structural engineering challenge involving moisture vapor transmission rates and deflection limits. Most guys skip the leveling compound. They think the underlayment will hide the dip. It won’t. I spent three days grinding concrete on a job last month just so the floor wouldn’t click like a castanet. That job taught me that if the subfloor is out by even a sixteenth of an inch, your tiny tile slivers will pop out before the grout even cures. If the foundation is a lie, the finish is a failure. Flooring is about the reality of the material under pressure.
The physics of the ceramic fracture
Cutting tiny slivers of tile requires managing vibration and stress distribution across the vitrified body of the material. By using a continuous rim diamond blade and a sacrificial backer board, you can stabilize the piece to prevent spalling or catastrophic failure at the edge. The molecular bond of the porcelain or ceramic is brittle. When you attempt to take off a quarter inch or less, the vibration from the saw blade often exceeds the internal cohesion of the material. This results in the tile shattering before the cut is complete. You must understand that the diamond blade is not actually cutting in the traditional sense. It is grinding away the material. The speed of the grind must be perfectly balanced with the rate of advancement. If you push too fast, the heat buildup causes the glaze to expand faster than the body, leading to edge chipping. This is especially true when working in wet areas like showers that wow modern designs for 2025 where precision is the difference between a leak and a masterpiece.
Why your wet saw is failing you
The wet saw often fails because of blade runout or excessive RPM which creates oscillatory waves that crack thin tile segments. To fix this, you must check the arbor for play and ensure the diamond matrix on the blade is not glazed over with silica slurry. I have seen countless installers blame the tile when the real culprit was a cheap blade with a steel core that was too thin. A thin core wobbles. A wobbling blade eats tile for breakfast. You need a blade with a reinforced hub. This keeps the cutting edge true. When you are trying to cut a sliver that is only three sixteenths of an inch wide, even a hair of vibration will snap that sliver off. You have to treat the saw like a surgical instrument. I always keep a dressing stone nearby to keep the diamonds exposed. If the blade gets dull, it starts to hammer the tile instead of grinding it. That hammering is what kills your edges. This level of detail is why my floors last while others crumble. Even when installing eco-friendly tile solutions for sustainable homes in 2025, the mechanical principles remain the same.
“A floor is only as good as the subfloor beneath it; deflection is the enemy of every joint.” – Master Flooring Axiom
The chemistry of the bond is another factor. When you have a tiny sliver, the surface area for the thin-set to grab is minimal. If your subfloor has any flex, that tiny piece will be the first to break loose. I use a high polymer modified thin-set for these cuts. The polymers provide a flexible bond that can absorb a tiny bit of movement. But ideally, there is no movement. I check the joist spacing and the plywood thickness. If it is not up to TCNA standards, I do not install. It is that simple. I have walked off jobs where the homeowner refused to fix a bouncy subfloor. I value my reputation more than a quick check. Tiny slivers at the edge of a room are often covered by chic baseboard designs that transform rooms in 2025, but that does not mean they can be sloppy. If the tile is loose under the baseboard, the grout will crack and fall out, leaving a gap for moisture to enter the wall cavity.
| Tool Type | Minimum Cut Width | Precision Level | Risk of Breakage | ||||||||||||
|---|---|---|---|---|---|---|---|---|---|---|---|---|---|---|---|
| Wet Bridge Saw | 1/8 inch | High | Low | Snap Cutter | 1/2 inch | Medium | High | Angle Grinder | 1/4 inch | Variable | Medium | Tile Nippers | 1/16 inch | Low | High |
The ghost in the expansion gap
An expansion gap of at least one quarter inch is mandatory around the perimeter of any tile installation to prevent tenting or buckling. This gap is later hidden by baseboards or shoe molding, ensuring that the tile assembly can expand and contract with thermal changes. People think tile is static. It is not. Everything moves. The house breathes. The wood framing swells in the summer and shrinks in the winter. If you jam your tile tight against the wall, it has nowhere to go. The stress will build up until the floor pops. I have seen entire living rooms lift four inches off the ground because there was no expansion gap. When you are cutting those tiny slivers for the edges, you have to account for this gap. Do not cut the tile to fit perfectly against the drywall. Leave the space. Your baseboards makeover ideas to elevate your space will cover it anyway. It is a structural necessity disguised as a finishing detail. Professionalism is knowing what stays hidden is just as important as what is visible.
- Always use a sacrificial board under the tile when cutting thin strips.
- Maintain a slow, steady feed rate to reduce thermal shock.
- Use a high-quality bridge saw to ensure the blade stays on a fixed path.
- Ensure the water flow is hitting the front of the cut to keep the diamonds cool.
- Double-check the subfloor for flatness before laying the first tile.
The 1/8 inch that ruins everything
A flatness deviation of more than one eighth inch over ten feet will cause lippage and unbalanced joints in large format tile. This structural inconsistency creates pressure points that lead to cracked grout and hollow sounds when walked upon. I use a straightedge on every single job. If I see a dip, I fill it. If I see a hump, I grind it. This is the part of the job that makes my back ache and my lungs heavy, but it is the part that matters. You cannot fix a bad subfloor with more thin-set. That is a rookie mistake. Thin-set is an adhesive, not a leveler. It shrinks as it cures. If you have a big glob of it under one side of a tile, it will pull that tile down as it dries, creating an uneven surface. This is why grout restoration secrets for long-lasting results always start with a solid foundation. If the tile is moving, the grout will fail. Every single time. I tell my apprentices that the prep work is 80 percent of the job. The actual tiling is just the victory lap.
“Consistency in the mortar bed thickness is the primary defense against differential shrinkage.” – TCNA Handbook Summary
When you are finishing the edges, you might need to how to refresh grout without replacing it if the original install was poor. But if you do it right the first time, you won’t have to. The tiny slivers at the edge of a shower or a backsplash are the signature of a pro. I use a variable speed angle grinder with a dry diamond blade for the really tricky stuff. I call it the surgeon’s touch. You hold your breath, steady your hands, and let the tool do the work. Don’t fight the material. Listen to the sound of the grind. A high-pitched whine means you are pushing too hard. A steady hum means you are in the zone. Clean up your edges with a diamond sanding pad. It takes the sharp burr off and makes the sliver look like a factory edge. Then, make sure you maintain it by following tile cleaning tips for a sparkling bathroom in 2025 to prevent acidic cleaners from eating your grout. If you need more help, you can always contact us for professional advice on your next project. We keep our standards high because your feet deserve the best surface possible. Follow the rules of physics and your floor will outlast the house itself.