
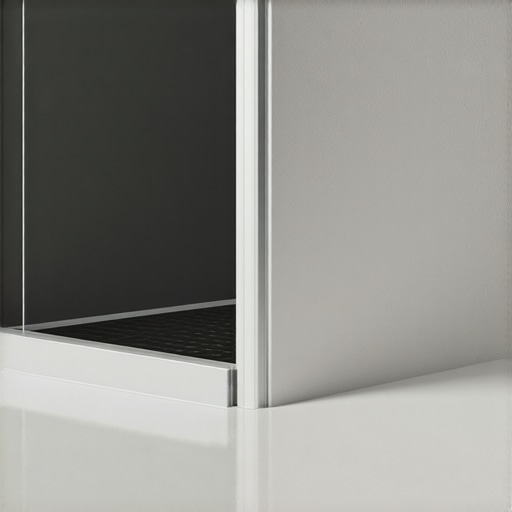
I spent three days grinding concrete on a job last month just so the floor would not click like a castanet. Most guys skip the leveling compound because they think the tile or the underlayment will hide the dip. It will not. When you are building a curbless shower, that dip becomes a reservoir for disaster. I have seen million dollar homes where the subfloor rotted out in three years because an installer thought a plastic liner was enough. In the world of high end shower design, you are not just laying tile. You are managing hydraulic pressure and moisture migration at a molecular level. If you do not get the waterproofing right at the transition, you are just waiting for a lawsuit. The smell of wet plywood and moldy drywall is the scent of a failed installation. We are going to break down why a liquid membrane is the only way to fly when you are removing the curb and inviting water to challenge your floor plan.
The myth of waterproof grout and tile
Grout and ceramic tile are not waterproof barriers. Many homeowners and amateur contractors believe that vitrified tile and polymer modified grout serve as a shield against moisture infiltration. In reality, grout is a porous structure that allows capillary action to pull water into the mortar bed or thinset. Without a liquid applied waterproofing membrane like RedGard or LATICRETE Hydro Ban, water migrates into the subfloor assembly, leading to efflorescence and structural rot. Tile is the aesthetic finish, but the membrane is the functional engine that keeps the house dry.
When you look at a curbless entry, you are looking at a zero threshold transition. This means there is no physical dam to stop water from traveling. Water moves through the grout lines via a process called wicking. If you do not have a continuous, monolithic barrier that extends from the wet area into the dry area, that water will find the edge of your waterproofing and dive straight into the wooden joists or the concrete slab. Liquid membranes are superior here because they can be rolled or brushed onto complex geometries where a sheet membrane would require bulky overlaps. Those overlaps create height, and height is the enemy of a flat, curbless floor. To see how these membranes fit into modern aesthetics, look at showers that wow modern designs for 2025 for inspiration on how the finished product should look.
Molecular bonds and the liquid rubber shield
Liquid waterproofing membranes consist of styrene butadiene rubber or ethylene vinyl acetate polymers that cure into a flexible elastomeric skin. This membrane creates a monolithic bond with the cementitious backer unit or mortar bed. By eliminating mechanical seams, these liquids provide a tenacious adhesive bond that resists hydrostatic pressure. Unlike PVC liners, liquid membranes are crack isolation membranes that can bridge lateral movement up to 1/8 inch, protecting the tile assembly from structural shifts. This chemistry ensures the integrity of the shower pan for decades.
The application process is where the science meets the sweat. You have to measure the wet film thickness with a gauge. If you go too thin, the membrane will pinhole. If you go too thick, it can skin over and trap moisture inside, leading to a gummy mess that never fully cures. I always apply two coats. The first coat fills the pores of the substrate, and the second coat provides the actual waterproofing. In a curbless entry, I extend this membrane at least two feet out into the bathroom floor. This creates a splash zone protection that is mandatory for long term durability. If you are dealing with older tile that was installed poorly, you might need grout restoration secrets for long lasting results to fix the surface, but for new builds, the liquid membrane is the only way to start.
“A floor is only as good as the subfloor beneath it; deflection is the enemy of every joint.” – Master Flooring Axiom
The subfloor secret that prevents structural rot
Subfloor preparation for a curbless shower requires recessing the floor joists or using a pre-sloped structural tray to achieve the necessary drainage pitch. The National Tile Contractors Association specifies a slope of 1/4 inch per foot toward the linear drain. A liquid membrane is vital because it allows for a low profile transition between the shower floor and the bathroom subfloor. By applying the membrane over the entire bathroom floor assembly, you prevent vapor drive from damaging the baseboards and drywall. This structural approach ensures the deflection rating of the floor meets L/360 standards for ceramic tile.
| Membrane Type | Application Method | Cure Time | Best For |
|---|---|---|---|
| Liquid Rubber | Roller/Brush | 2-4 Hours | Complex Curbless Shapes |
| Sheet Membrane | Thinset Bonded | Immediate | Large Flat Walls |
| CPE/PVC Liner | Mechanical Fastening | 24 Hours | Traditional Curbed Pans |
| Urethane Liquid | Trowel Applied | 12-24 Hours | Commercial Wet Rooms |
Most installers fail because they ignore the moisture content of the subfloor. If you trap moisture under a liquid membrane on a fresh concrete slab, the vapor pressure will eventually cause the membrane to blister and peel. You need to use a moisture meter. If the slab is over 75 percent relative humidity, you need a vapor barrier or a moisture vapor retarder before you even think about your waterproofing membrane. This is the difference between a floor that lasts five years and one that lasts fifty. If you are updating an existing space, check out showers with a style trendy ideas for small bathrooms to see how curbless designs are saving space without sacrificing structural safety.
Capillary action and the invisible flood
Capillary action is the ability of water to flow into narrow spaces without the assistance of gravity. In a curbless shower entry, water can travel uphill through the grout joints and the mortar bed via surface tension. A liquid membrane acts as a capillary break, stopping the migration of water into the dry zones of the bathroom. Without this waterproof barrier, the thinset mortar acts as a sponge, pulling moisture toward the vanity cabinets and baseboards. Preventing this wicking effect is the primary reason for a full floor membrane application in modern bathrooms.
I have seen baseboards swell and pop off the wall three feet away from the shower because of this wicking. The water travels along the subfloor, hidden under the tile, until it hits the wood of the baseboards. By the time you see the mold, the damage is done. This is why I always recommend chic baseboard designs that transform rooms in 2025 alongside a proper waterproofing plan. If you are going to invest in high end trim, do not let a $200 bucket of membrane be the reason it rots out. We have to think like engineers. The water is a predator. It will find the smallest gap in your defense and exploit it until your subfloor is mush.
Transition zones where most installers fail
Transition zones represent the most vulnerable point in any curbless shower installation. This is where the sloped shower floor meets the level bathroom floor. Using a liquid membrane allows for a feathered edge that does not add vertical height to the tile layout. This ensures a zero threshold entry that is ADA compliant and slip resistant. Proper reinforcement fabric must be embedded into the liquid at the change of plane to prevent stress cracks from telegraphing through the grout lines. This reinforcement is the backbone of the waterproofing system.
- Verify subfloor flatness within 1/8 inch over 10 feet.
- Apply alkali resistant mesh to all corners and transitions.
- Measure wet film thickness with a notched gauge.
- Extend membrane 24 inches beyond the shower entrance.
- Flood test the pan for 24 hours before tiling.
- Check moisture content of the wood or concrete substrate.
If you skip the flood test, you are a gambler. I do not care how good you think your roll job was. You plug that drain, fill the pan with water, and mark the level. If it drops after 24 hours, you have a leak. It is better to find it now than after you have laid $40 per square foot marble. For those looking for more sustainable options, eco friendly tile solutions for sustainable homes in 2025 offers great choices that work perfectly with these liquid systems. And remember, once that tile is down, you need to know tile cleaning tips for a sparkling bathroom in 2025 to maintain the surface without degrading the chemicals in your grout.
“Waterproofing is not a suggestion; it is a structural mandate for all wet-area assemblies.” – TCNA Handbook Extract
The 1/8 inch that ruins everything
Precision leveling is the difference between a functioning drain and a bathroom flood. In a curbless entry, if the subfloor is off by even 1/8 inch, the liquid membrane may pool in low spots, leading to uneven curing. Furthermore, puddling on the finished tile surface occurs if the slope to the drain is interrupted by high spots in the self leveling underlayment. Professional installers use mechanical grinders and screeds to ensure the substrate is perfectly prepped before the waterproofing phase. This level of accuracy is what separates a master installation from a builder grade failure.
When the floor is perfectly flat, the liquid membrane applies like a dream. It looks like a sheet of blue or red glass. When the floor is lumpy, you get thin spots over the hills and thick puddles in the valleys. Neither of those will protect your home. If you find your grout is already failing due to these structural issues, you might want to learn how to refresh grout without replacing it, but be warned that no surface fix can solve a subfloor that is moving. If you need a pro to look at a failing floor, you can always contact us for a consultation. We have seen it all, and usually, the fix involves a sledgehammer and a better plan.
The ghost in the expansion gap
Expansion joints are often overlooked in residential shower builds, but they are structural requirements under EJ171 standards. As temperatures fluctuate, the tile and substrate expand and contract at different rates. A liquid membrane provides shear stress relief, allowing the tile assembly to move slightly without de-bonding. If you hard grout the perimeter transitions or the curbless entry line, the compressive force will cause the tile to tent or the grout to crack. Using 100 percent silicone sealant at these movement joints is the only way to maintain a watertight seal.
Think of your house as a living thing. It breathes. It shifts with the seasons. If you lock your tile down with no room to move, it will fight back. The liquid membrane is the shock absorber. It sits between the rigid tile and the moving house, taking the brunt of the force. This is why we also pay so much attention to the perimeter. Even the way your baseboards makeover ideas to elevate your space are executed matters. If the baseboard is pinned too tightly against the tile, it can prevent that necessary movement. Everything is connected. From the drain to the baseboard, the system has to be flexible, waterproof, and precise. If you follow these steps, your curbless shower will be a masterpiece. If you cut corners, you are just building a very expensive bathtub that will eventually empty into your basement. Check our privacy policy for more information on how we handle your data when you reach out for help with your flooring projects.