
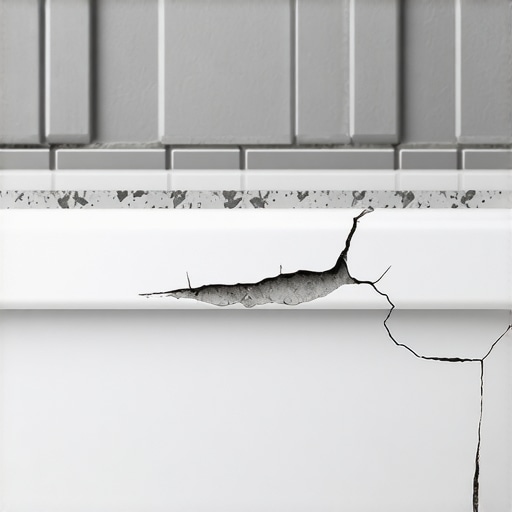
Most guys skip the leveling compound. They think the underlayment will hide the dip. It won’t. I spent three days grinding concrete on a job last month just so the floor wouldn’t click like a castanet. That experience taught me one thing that every homeowner needs to hear. A floor is a structural system, and the moment you treat it like a sticker or a coat of paint, you have already failed. When I see grout cracking around the rim of a bathtub, it tells me a story of movement, physics, and a total disregard for the laws of expansion. It is not just an eyesore. It is a blinking neon sign that says your bathroom was built with a rigid mindset in a flexible world.
The physics of the bathtub joint
Grout cracks around the bathtub rim because of differential movement between the heavy, water-filled tub and the rigid wall tile. This junction is a change of plane where a horizontal surface meets a vertical one. When a tub is filled with forty gallons of water, it exerts hundreds of pounds of pressure on the subfloor, causing a deflection that the brittle cementitious grout cannot withstand. Most installers treat this joint like any other gap between tiles, but the bathtub is a dynamic weight. It moves down when filled and rebounds when emptied. Grout is a mixture of Portland cement and sand which has almost zero tensile strength. It cannot stretch. It can only break. If you use a rigid material in a spot that requires elasticity, you are essentially asking a glass rod to bend. It will snap every single time. This failure is compounded by the fact that different materials expand and contract at different rates when exposed to the heat of a steaming shower. Your acrylic or cast iron tub grows at a different speed than your ceramic tile or your wooden wall studs. This thermal dance creates shear stress at the rim.
Why your subfloor is lying to you
The subfloor is the foundation of every tile project, yet it is the most neglected component in residential construction. When we talk about grout failure, we are really talking about deflection. Deflection is the amount a floor bends under a load. The Tile Council of North America (TCNA) sets a standard of L/360 for ceramic tile. This means the floor should not bend more than the length of the span divided by 360. If your joists are spaced too far apart, or if the plywood is too thin, the bathtub will sink a fraction of an inch every time you step into it. This microscopic dip is enough to shatter the bond of the grout at the rim. You might think your floor is solid, but wood is a biological material that breathes and bows. Under the weight of a cast iron tub, which can weigh 300 pounds empty, the subfloor is under constant stress. If the installer did not add extra blocking under the tub feet, the local deflection at the rim is massive. This is why I spend so much time on my knees with a straightedge. If the subfloor is not flat to within 1/8 inch over ten feet, the tile will eventually telegraph that movement through the grout lines.
“A floor is only as good as the subfloor beneath it; deflection is the enemy of every joint.” – Master Flooring Axiom
The chemical failure of cementitious grout
We need to look at the molecular reality of what grout actually is. Standard grout is a porous network of calcium silicate hydrates. When it cures, it forms a crystalline structure that is excellent at resisting compression but terrible at resisting tension. In a bathtub environment, this material is constantly attacked by moisture and soap scum. If the grout at the rim was not mixed with the exact ratio of water to powder, it becomes even more brittle. Most guys just eyeball the water, creating a soup that dries into a soft, chalky mess. This weak structure cannot handle the vibration of the tub. Furthermore, the chemical bond between the grout and the tub rim is purely mechanical. It is just sitting in the gap, tucked against the edge of the porcelain or acrylic. There is no actual molecular fusion happening. Without a chemical bond, even the slightest vibration from the bathroom fan or a person walking across the floor will rattle that grout loose. If you want to know more about how to handle these issues, you can read about grout restoration secrets to see how the pros fix these failures.
The 1/8 inch that ruins everything
Precision is not a suggestion in flooring. It is a requirement. The gap between the tile and the tub should be a consistent 1/8 inch to allow for the proper application of a flexible sealant. When installers jam the tile tight against the tub rim, there is no room for a sealant bead. They then smear a thin layer of grout over the top to hide the gap. This thin layer has no structural integrity. It is the first thing to flake off. You need that 1/8 inch of space to act as a reservoir for high quality silicone. Silicone is a polymer that can handle up to 25 percent movement. Grout can handle zero percent. By ignoring this small gap, you are trapping the materials in a collision course. When the tub expands from the hot water, it crushes the grout. When it cools, it pulls away, leaving a crack that sucks in moisture. This moisture then travels behind the tile, rotting the wall studs and growing mold where you can’t see it until it is too late. For those looking to upgrade their entire setup, checking out showers that wow can provide insight into how modern designs handle these transition points.
| Material | Movement Capability | Best Use Case | Durability in Wet Areas |
|---|---|---|---|
| Sanded Grout | 0% | Main floor tile joints | Low (Porous) |
| Epoxy Grout | < 1% | High traffic commercial | High (Waterproof) |
| Siliconized Caulk | 15-20% | Baseboard transitions | Medium |
| 100% Silicone | 25% + | Bathtub and shower rims | High (Mold Resistant) |
When the bathtub becomes a hydraulic piston
Think about the mechanics of a bath. You step in, adding 150 to 250 pounds of weight. You turn on the water, adding another 300 pounds. This is a dynamic load that is applied and removed daily. The bathtub acts like a hydraulic piston, pushing down on the subfloor and the thin-set mortar. If there is any air or void under the tub, it will flex. That flex translates directly to the perimeter. If you have grout at that perimeter, you are trying to stop a 500 pound piston with a thin line of dried mud. It is a physical impossibility. This is why many manufacturers recommend setting the tub in a mortar bed to eliminate voids and provide a solid base. If your installer skipped the mortar bed because they were in a rush, your grout crack is just the beginning of your problems. The tub will eventually creak and groan, and the movement will eventually pop the tiles off the wall. This is a common issue when people try to refresh grout without replacing it without addressing the underlying movement.
The solution that contractors hate
The fix is simple, but it requires more effort than just smearing more grout into the crack. You must remove the failed grout entirely. You cannot just caulk over it. If you leave the old grout in the joint, the new caulk will not have enough surface area to bond, and the old grout will continue to crumble underneath, eventually puncturing the new seal. You need a clean, dry channel. I recommend using 100 percent silicone that is color-matched to your grout. Many people hate the look of silicone because it can be shiny, but modern manufacturers produce matte finish silicones that blend perfectly. Silicone stays flexible for decades. It creates a waterproof bridge that moves with the tub. Contractors often hate this because it takes longer to apply correctly. You have to mask off the edges with blue tape, tool the joint with a specific profile, and wait for it to cure. But if you want a seal that lasts, silicone is the only answer. While you are at it, you should also look at tile cleaning tips to keep that new silicone looking fresh and free of mildew.
- Remove all old, cracked grout using a manual grout saw or a multi-tool with a diamond blade.
- Vacuum the joint thoroughly to remove all dust and debris that could interfere with the bond.
- Clean the rim and the tile edge with denatured alcohol to remove soap scum and oils.
- Apply a high quality 100 percent silicone sealant, ensuring it fills the entire depth of the 1/8 inch gap.
- Tool the joint immediately using a soapy finger or a caulking tool for a smooth, concave finish.
“Movement joints are not an option in tile work; they are a structural necessity required by every major building code.” – TCNA Handbook for Ceramic, Glass, and Stone Tile Installation
The thermal expansion trap
In regions with high temperature swings, the problem is even worse. In the summer, the humidity makes the wooden framing swell. In the winter, the dry air makes it shrink. This seasonal cycle means your bathroom is literally changing shape throughout the year. If you have grout at the bathtub rim, you are fighting nature. The expansion coefficient of a plastic tub is significantly higher than that of a ceramic tile. This means the tub gets bigger and smaller with every hot shower. Without a flexible joint, the grout is under constant internal pressure. This is the same reason why bridge decks have those metal teeth or rubber gaps. They allow the structure to breathe. Your bathroom is a small-scale version of a bridge. It needs those expansion joints to prevent self-destruction. I have seen beautiful bathrooms ruined because the installer thought they knew better than the TCNA. Don’t let that be your house. Focus on the structural integrity first, and the aesthetics will follow. Proper maintenance and the right materials will save you thousands in water damage repairs down the line. Keep your eye on the subfloor and your hand on the silicone gun.